When we think of classical music, we tend to think of composers such as Ludwig Van Beethovan, Wolfgang Amadeus Mozart, or even Johann Christian Bach. Their musical works have had a huge impact on revolutionizing music and shaping what it has become today. It was in the 19th century where the popularity of the piano grew, and there were a lot of classical pieces of music written for it. However, what of the guitar? As you keep reading we will dive deeper into that and perhaps even teach you a thing or two about how to play Classical guitar!
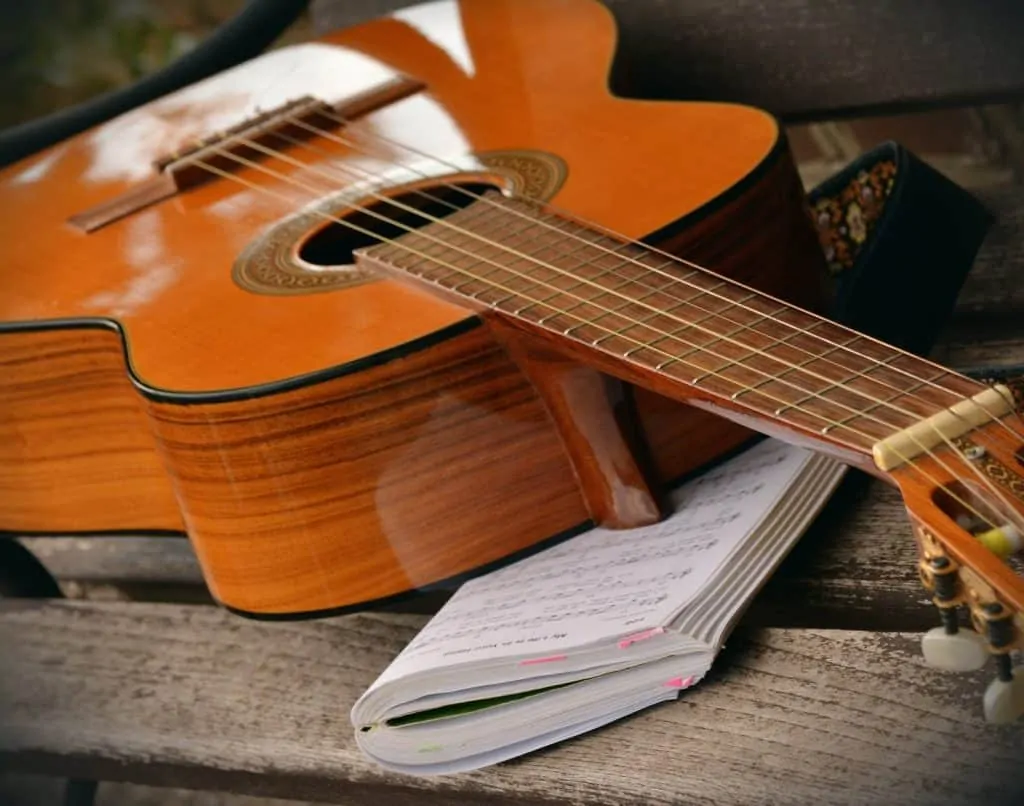
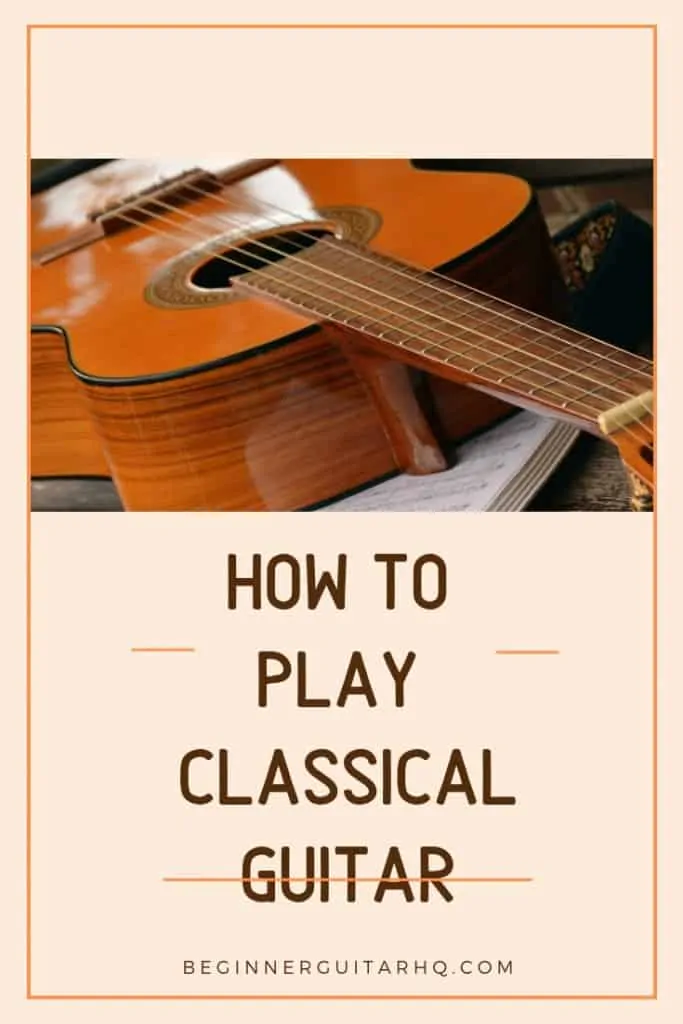
Nylon stringed guitar with book of sheet music, both common in classical music.
What is Classical Music?
In this context, when we say Classical, what we’re actually referring to is the era in which the music was written and when these composers were alive. Different from the Baroque era, or the Renaissance era, Classical music is more homophonic — which means that the instruments accompanying the melody are in the same rhythm as the melody. You’ll find that the music is more focused on beauty, elegance, and balance — and furthermore the elements are more varied and contrasting. (Elements such as the instruments, dynamics, pitch, key, color and timbre.)
As mentioned before, the harpsichord used to be the main instrument, but was ultimately replaced by the piano in this era. The main factor that makes the piano a better instrument than the harpsichord for musicians and composers alike is all in the hammers that strike the strings when a key on the piano is pressed. This allows for the musician to play the notes of the piano louder and softer at will; creating more expression. The harpsichord, however, would pluck the strings with quills and this would result in a bright and tinny sound from the instrument. As dynamics, emotion and color became a larger part of the picture, the harpsichord became obsolete.
Now, that’s enough about piano, you came to learn about guitar.
Guitar in Classical Music
A nylon stringed guitar, which some may also call a spanish guitar, is typically used in Classical music as a member of the guitar family. The strings are made from either nylon or catgut; which are developed from the inner walls found in animal intestines. A little gross. Despite the name, however, they do not use cat’s intestines to create these sort of strings.
Brief Origins:
Believe it or not, the name gui-tar comes from the Persian language, “tar” meaning “stringed instrument”. A tar also happens to in fact be an Iranian instrument, to which the guitar might have originated from. The tar evolved into a series of spanish guitars known as vihuela and the gittern in the fifteenth and sixteenth centuries. In the seventeenth and eighteenth centuries, it evolved into the Baroque guitar, which then eventually became the Classical guitar.
Classical guitar which adopts a lot of the same techniques found in Fingerstyle guitar, is a very disciplined practice. Classical music puts a lot of emphasis on beauty, elegance, and balance. When playing classical guitar, it’s important that you remember the ideology of composers and how the music was written for its time. Your body is an extension of the instrument you are playing, and like a finely tuned guitar, you have a role to make it sing.
The challenge of playing Classical guitar or Classical music in general is playing with absolute grace and accuracy.
Short Story:
When I was in college, I was a vocal, guitar and piano major. Out of the three, my strength was definitely in guitar, so I focused more on piano as a challenge to myself! I took paid lessons, and learned a baroque piece of music, a romantic era piece of music, and lastly, a classical piece of music. Out of the three pieces of music I was going to perform for my musical jury — where you get judged in front of a panel of professionals and graded, like a final exam, the classical piece for me was by far the hardest.
I had to be very precise with my playing, but make sure my shoulders were nice and loose and light on the hands — just graceful. It was hard to fight myself, to let loose and not be intimidated by the sheet music. With enough repetition, I got it down! I was able to play without even thinking, and with accurate timing. Needless to say, it wasn’t perfect, but I did well. I got about an A-.
Takeaways: Repetition is important. Sight reading, and attention to key signatures is a challenge for beginners. Lastly, timing is hard if you’re not patient, and harder when you’re just learning.
Don’t get discouraged reading this, however. It will be hard if you aren’t experienced with sheet music, or classical music in general — but it’s not impossible, I did it with minimal experience, and so can you! The main thing you need to succeed in your endeavors of playing Classical guitar, is patience and a love for music.
Why Learn Classical Guitar?
There are a lot of musicians who study Classical music and the great minds who wrote these famous pieces, for good reason! Studying music can make you smarter. It helps develop your cognitive skills, and in both children and adults, it can raise your IQ by 7 points. Another reason to learn Classical guitar, is it can help you develop discipline. When playing a Classical piece of music, you need to play it as it was written. There are a variety of musical terms and symbols to remember when reading sheet music, all of which can aid in developing you as a musician as well!
Furthermore, there are a lot of musicians who start out learning Classical music to develop their technique, and good habits when playing. The skills you might learn from Classical guitar are in fact universal. Whether it’s reading sheet music, chord inversions, fingerpicking, dynamics and other musical jargon… etc.
While learning Classical music can most certainly improve your playing and knowledge of music, it is not at all necessary that you learn it in order to become a successful musician. Take The Beatles for instance. None of them had any prior musical knowledge, however, they were able to hammer out some really catchy iconic tunes that would ultimately impact the music industry, forever.
Popular Classical Pieces For Guitar
There are many well known Classical works written by amazing composers throughout this era. Who can forget Moonlight Sonata, written by Beethovan, or Mozart’s Eine Kleine Nachtmusik, or even Vivaldi’s piece The Four Seasons. These are pieces of music that made such a mark, that we hear them still — to this day!
However, there are many pieces of music written for the guitar in this era as well!
- Johann Christian Bach’s piece Bourée in E minor
- Rodrigo’s piece Concierto de Aranjuez
- Vivaldi’s piece Guitar Concerto in D
- Piazzola’s piece Libertango
And more…
Attempting these pieces would most certainly be recommended once you have a handle on the style of playing. Which we will cover. For now, perhaps look up each individual piece to hear how it sounds! Get an idea and feel for the style of music and the way it was written.
Tools Needed For Classical Guitar
There are a few tools you’ll likely need in order to get started with playing Classical Guitar. Don’t get discouraged, however, if you don’t own any! You may still play, in whatever way you can, and then adapt later to the tools once you’re able to obtain them! Getting started is important. As a smart man once said about songwriting, “If you are afraid of writing a song, you will never write a single note.” Same goes with playing guitar and developing your technique, so no excuses!
Tool number 1: Footstool
Why use a footstool? Good question! It actually serves a few different purposes when you’re playing Classical Guitar. The main purpose being: it allows the guitarist to position themselves properly when playing. What does that mean? Firstly, it allows your hand and wrist to get into a good position when playing along the neck. The guitar is angled differently as the footstool isn’t necessarily on your lap, but on one raised thigh (of the foot that’s resting on the footstool).
Secondly, it straightens out your posture. Which is a pretty good habit to get into regardless of whether you’re playing guitar or not. Musically speaking, however, it will leave you with minimal tension in your body and give you more freedom and flexibility playing your guitar.
Tool number 2: Nylon Strings
Nylon strings are important to the sound and overall tonal qualities of Classical Guitar music. They aren’t completely necessary if you’re just starting out and only happen to have a steel string acoustic guitar. However, nylon strings are softer on the fingers, which works out for beginners just getting used to playing guitar — and on top of that give the guitar a rich, warm, mellow sound. Contrary to steel string guitar, which has harder strings, and a brighter, and more powerful tone.
Tool number 3: Thumb Pick (Optional)
Thumb Picks are completely optional when playing guitar, whether that is Classical Guitar, or Fingerstyle Guitar. They do offer some benefits, which one obvious benefit is volume. Whether you’re plucking guitar strings, or strumming them, you’ll get more volume out of your guitar if you’re generally using a pick. Learning to use a Thumb Pick instead of your thumb can be tricky. It’s almost like playing guitar with longer nails.
While using a Thumb Pick can be a tricky tool to get used to, some prefer it! Aside from volume, like a Flamenco Guitarist who doesn’t trim their nails on their guitar picking hand, a Thumb Pick does alter the tonal characteristics of the strings when plucked. It’s an acquired taste for musicians alike.
Tool number 4: Capo (Optional)
Capos can be universally used among all styles of playing guitar. What a Capo does is transpose the open strings to a desired fret, like forming a barre chord without the use of your own fingers — it does just that for you! People often use a Capo when they want to play certain notes in harmony that would otherwise be impossible without the aid of this device. It’s a godsend for a lot of musicians.
There also happen to be Capos developed specifically for Classical Guitar. You need that specifically if you’re interested in using the functions of this tool for Classical Guitar. You might ask, “Why?” The answer is, because Classical Guitars, or Spanish Guitars if you will — have wider necks than steel string guitars, whether they are electric or acoustic. You need a capo that fits this neck.
Tool number 5: Sheet Music
Obviously, this isn’t necessarily part of the guitar. However! It’s a necessary component to learning to play. Which we will also cover.
Proper Holding of Classical Guitar
When holding the Classical Guitar, it’s important to remember that it’s different than holding the guitar in the traditional way. (The traditional way meaning, that it’s sitting on your lap with the curvature of the body wrapping around your thigh). We’ll go over the necessary steps in order to hold the guitar appropriately, so you can play Classical Guitar to your full potential.
Image of man playing classically without footstool.
Step 1: Place your footstool on the floor where you would like your left foot to go. (Assuming you’re a right-handed guitarist. If not, then do the opposite.) Make sure that it is in a comfortable place, like where you would normally plant your left foot when playing traditionally.
Step 2: Firmly plant your left foot on top of the footstool, and your right foot on the floor comfortably. Make sure that they are roughly shoulder width apart.
Step 3: Take your guitar in hand. Place the guitar on your lap where you normally would in traditional style, then shift it to the other leg. Now the curvature of the body is wrapped around your left leg.
Step 4: Tilt the neck of the guitar about 45 degrees. This will allow you to play up and down the neck at will and give you more flexibility.
Step 5: Drape your right arm over the body of the guitar and have your hand hovering over the soundhole of the guitar.
Step 6: Now that you’re all in position, straighten your posture and loosen your arms so that you have more flow and flexibility. Stiffness is the enemy!
That’s that! Now you have yourself in proper position to play Classical Guitar. Now that you have that down, you’re ready to take on the next step; developing the proper fingering method to play melodies on the guitar.
Fingering On The Guitar
Across all styles of playing guitar with your fingers, whether that is Classical Guitar, Flamenco Guitar, Slap Guitar, and Fingerstyle Guitar; the method of fingering remains the same. If you learn it once, the skills are transferable to any of these styles, if you wish to pursue them in the future! On top of that, learning to play in this way will help you synchronize both hands and develop muscle memory and finger dexterity. It’s a very important asset to your improvement of playing to learn!
When playing Classical Guitar, we recognize each of the fingers on the hand we pick with as different letters. These letters are P, I, M and A.
P = Pulgar Thumb
I = Indice Index
M = Medio Middle Finger
A = Annular Ring Finger
These different fingers are homed to different strings. For instance, the Thumb or P finger, belongs to each of the bass-most strings. The low E, A and D strings. The Ring Finger or A finger, goes on the G string. The Middle Finger also known as the M finger, goes on the B string. Finally, the Index Finger, also called the I finger, is homed to the high E string. Easy peasy!
Looking at the diagram below, you may follow these exercises to get a feel for how the fingers are to play the strings.
Once you have the first exercise down and truly have a feel for the plucking method of Classical Guitar, try the next exercise out. This should be a tad more difficult.
Now, that you have completed the prior exercise, give the next one a shot! This one won’t be easy, but do your best to play it. You’ll know you’ve mastered it when you can play it without thinking.
Tip: A thing that has worked in the past for myself, is when a pattern is too complicated for me to comprehend, I split the pattern up into halves, or groups of 4. Then play individual pieces of the pattern in repetition until you get it down. Then move to the next piece of the pattern, and do the same and so on.
Once you have it down move back to the first piece of the pattern. Play it again, then try to work in the second part. Play the two parts together in repetition. Then once you get those, try to work in the third part. Before you know it, you’ll be playing the whole thing like a pro!
If you want to make the most out of this practice, try playing it seamlessly until you can play it 50 times in a row without messing up. Really pay attention to your fingers, if you mess up — and by mess up I mean playing the wrong note, or notes, mess up timing… etc. start over from 1. Playing with a metronome at a slow tempo can make this practice a lot easier and more accurate for yourself. We talk more about this in detail later.
If you find yourself getting bored of these exercises, then try to make it more interesting for yourself by doing the following:
Start incorporating chords while you’re plucking away at the patterns. The importance of doing this is that a lot of Classical Guitar and Fingerstyle Guitar playing, is about forming chords ahead of time, to play the notes with a clean flow. Example chords could include: C, A, D, G — you may even make this into a chord progression for yourself to practice.
Ultimately, this will help synchronize both hands to play on time, your right hand playing the notes, pressing the gas, and the left hand forming the chords steering the wheel. Make sure you keep the flow nice and not broken up. If you mess up, start over again.
Increasing the tempo, is something you should only do if you’re playing the notes accurately without messing up. If you can’t fix your sloppy guitar playing, then picking up the pace will only form more bad habits. Playing fast doesn’t make you sound cool — playing the notes on time does! Even if that timing for now is very very slow. We all start somewhere!
Playing backwards is an excellent way to get yourself thinking. The tablature for these exercises being played backwards won’t be provided so that you can use your head, and figure it out! It’s also a way to get you to think outside the box in further exercises, when it comes to playing rests or triplets or any other timely notes. Furthermore, playing backwards gets you used to playing patterns you’ve never played before, leaving you to adapt. This is also why spider exercises are so effective for guitarists.
Rundown of Reading Sheet Music
These days, guitarists mostly refer to learning tablature — a very spoon-fed way of learning how to play songs or perform exercises. Not that there’s anything wrong with learning tablature at all! For the sake of Classical Guitar though, it is completely necessary to learn sheet music as most, if not all of it comes only in this form. We’ll go over some of the basics of reading sheet music for you, so that you’ll at least have a kick start, and get you off on the right foot. In the next few sections we’ll cover, note values, notes on the treble clef, and time signatures to get you started.
Book of sheet music, as given example for what we’re covering.
Note Values
There is a reason why people say, “if you’re good at math, you’ll definitely be good at reading music!” They’re right for the most part, but I was never good at math. The point of this is, note values each resemble a number of beats. It doesn’t matter what key, or time signature you’re in, they remain the same, unless you’re using dotted, or double dotted notes — we’ll get to that soon!
We’ll start with the value of a whole note, an empty circle that resembles this…
The value of this note is 4 beats. Let’s say, however, we want it to be shorter! Perhaps, half the length of a whole note. 2 Beats. Below, we call that, a half note.
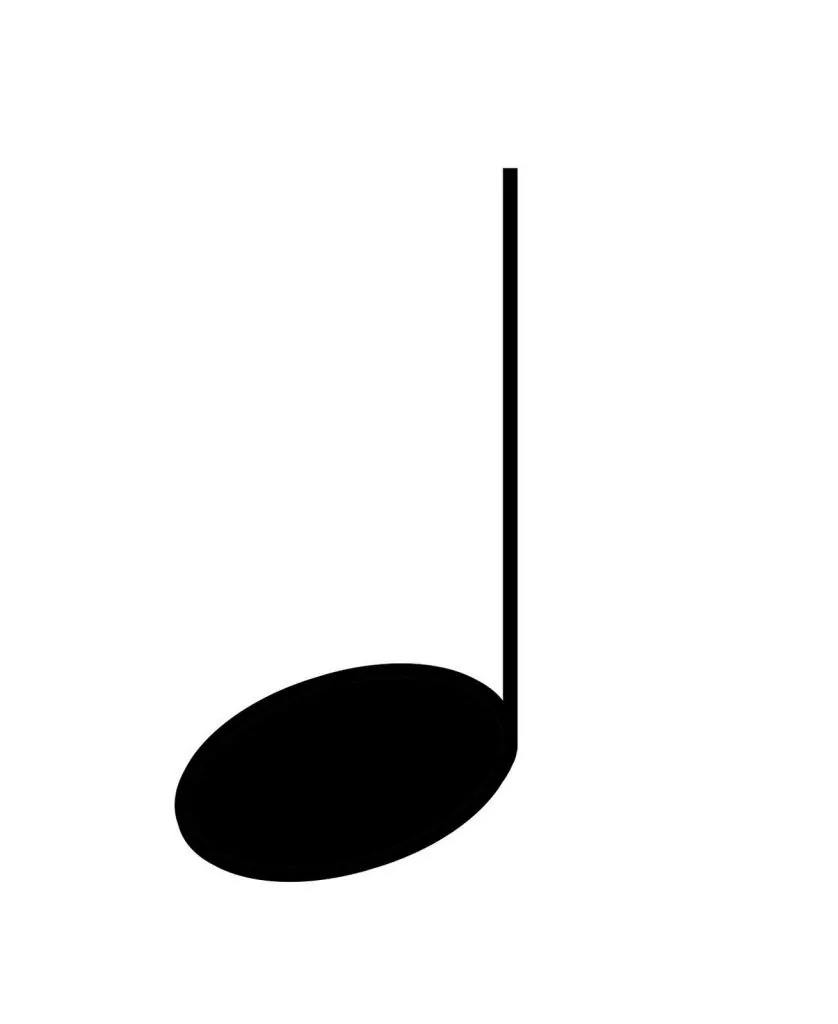
Half of a half note would be a quarter note, containing but a single beat.
Diving deeper, we have crazier fractions of the whole note — the eighth note, sixteenth note, and the thirty second note. The difference lies in the flags hanging off the stems.


When there is a dot next to the note, which we call dotted notes, that means the beat is its normal value and a half of its value. So for instance, a whole note containing 4 beats, if dotted, would become 6 beats. A half note containing 2 beats, dotted would contain 3 beats. A quarter note containing 1 beat, would contain a beat and half a beat (half a beat being equivalent to adding an eighth note to it).
If the note contains two dots following the note, then that means the note is of its regular value, added with half of its value and a quarter of it’s value. Confusing right? Thankfully these don’t commonly show up in sheet music.
For instance, take a whole note, a note of 4 beats. Add a dot to it and now you have 6 beats. Add the second dot, and you now have an additional beat for a total of 7 beats.
If you take a half note, a note of 2 beats, add a dot for it to contain 3 beats. When you finally add the second dot, it becomes 3 beats and a half. (3 ½). Some composers love dabbling in dotted notes and making very technical pieces of work, but as said before — it’s not common to find, so you shouldn’t worry too much.
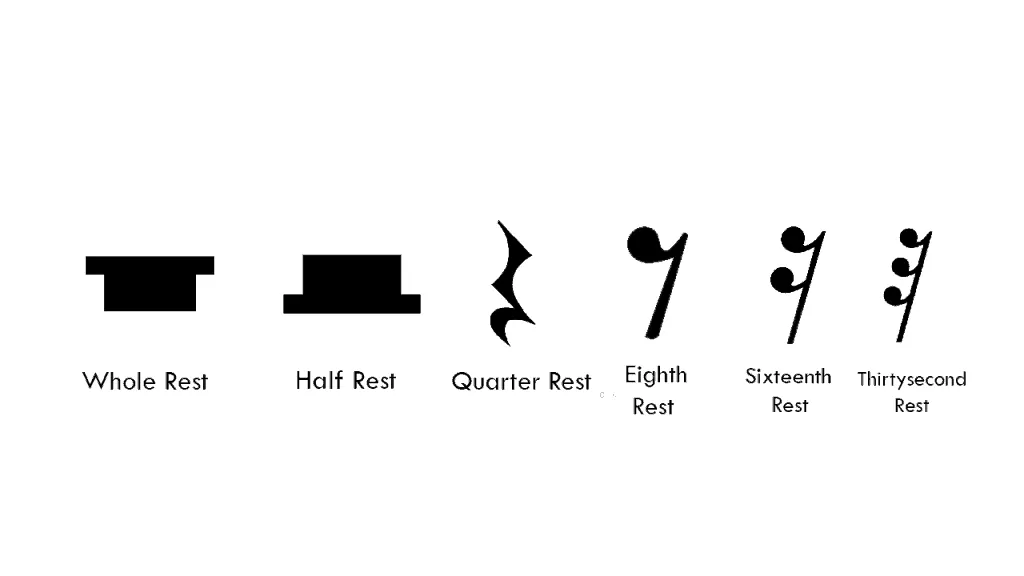
There may come a moment where the piece of music you’re playing contains a rest. Don’t take it quite literally, and pause your playing at your leisure. Only pause for the set amount of beats the rest requires. It’s to be treated as any other note that contains a value. Rests are important because they create the contrast in the piece of music and add space. It provides more depth and feeling to a piece of music.
We won’t dive much further into rests, other than the fact that their note values resemble those of a whole note, half note, quarter note… and so on. We call these whole rests, half rests, quarter rests… etc.
Notes On the Treble Clef
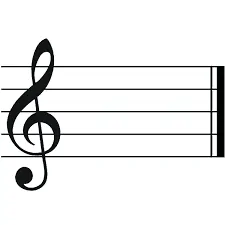
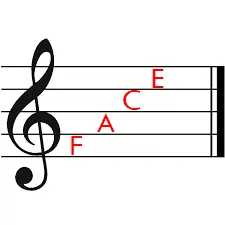
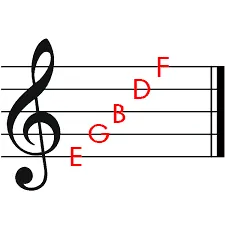
Sheet music using the treble clef consists of 5 lines and 4 spaces.
The notes within these lines spell the word FACE. The notes of course being, from bottom to top, F, A, C and E.
On the lines, however, from bottom to top reads, E, G, B, D, F. An easy way to remember it is by repeating, “Every, Good, Boy, Deserves, Fudge”.
If you understand the placement of the notes in coordination to where they belong on the guitar neck this would most certainly make things easier for you. For the sake of keeping things brief, we’ll discuss time signatures next.
Time Signatures
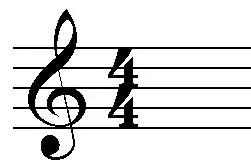
Rhythm is important when it comes to learning a piece of music. Without a handy tool written beside the clef, we wouldn’t be able to decipher what note gets the beat, and how many are in each bar. We call these “Time Signatures”. (See below – Example of 4/4 time)
The time signature 4/4 is the most commonly used amongst music you’d hear today. We also call this common time. The two 4’s represent something different from one another. The number on the top, tells you how many beats are in each bar. The number on the bottom tells you which note gets the beat!
In common time (4/4), the quarter note would get the beat. So if you were to play a whole note in one bar, you’d then hold the note for 4 beats. Half notes would be held for 2 beats. If you’d like to practice reading time signatures, there are plenty of exercises you can find online to clap notes to. Use your foot, or a metronome, and get clapping those rhythms!
Another example: If we were in ¾ time, then the rhythm would be very waltz-like. One-Two-Three, One-Two-Three, One-Two-Three… etc. There would be three beats in each bar, and the quarter note would get the beat.
Another example: Let’s say this time, we’re in 6/8 time! Bigger numbers, but don’t be intimidated! There would be 6 beats in each bar, and the eighth note would get the beat. One-Two-Three-Four-Five-Six, One-Two-Three-Four-Five-Six, One-Two-Three-Four-Five-Six…etc.
Now let’s go back to 4/4 time…
If we are in 4/4 time yet there happen to be all eighth notes, we’d count it like.. One, and, Two, and, Three, and, Four, and… One, and, Two, and, Three, and, Four, and…
One, and, Two, and, Three, and, Four, and…
Even crazier now! If we were to have nothing but sixteenth notes, we’d have to count it like… One, e, and, a, Two, e, and, a, Three, e, and, a, Four, e, and, a… One, e, and, a, Two, e, and, a, Three, e, and, a, Four, e, and, a… One, e, and, a, Two, e, and, a, Three, e, and, a, Four, e, and, a…
So when you’re practicing nailing these rhythms, or reading sheet music in advance before trying to play the melodies, keep these tips in mind!
This is only the very tip of the iceberg, other things you should understand are key signatures, sharps and flats, clefs, modes, scales, intervals, and much more! For the sake of keeping this article short, and on topic, however, we’ll leave it at that.
Classical Techniques Used
While the benefits of playing Classical Guitar center around being able to play harmoniously, using the index, middle and ring fingers to produce melody and the thumb to produce bass — it is a difficult endeavor of its own to master.
Much like the piano, the Classical Guitar is indeed able to produce a range of dynamics, (meaning softer and louder notes for instance) as well as being one of the few instruments that is polyphonic. (Producing more than one voice, simultaneous notes)
Arpeggios are a common technique used throughout Classical Guitar and a lot of spanish guitar music. Composer Mauro Giuliani is very well-known for including this sort of technique in his pieces.
Tirando is a method of finger stroking where after striking the string, the finger stays in the air. After doing so, the finger does not lay on the adjacent string. However, contrary to that is Apoyando — also called the rest stroke is the method of plucking the string, and having the finger rest on the adjacent string.
For clarification, when we say the adjacent string, what we mean is the string next to the previous string played.
While the rest stroke, (Apoyando) was preferred in the 20th century, nowadays you’ll find that musicians prefer the free stroke (Tirando).
Tremolo, is still used a lot, among various genres of music — in Classical Guitar, however, the method of playing this involves using your three index fingers and thumb. As we mentioned P, I, M, A, earlier.
Slower three-note tremolos usually involve the pattern, P, M, I. Faster three-note tremolos involve the use of P, A, I. As we begin to add more notes, it gets more complicated.
Nails are another really great tool to get the most quality sound out of your strings. There are a lot of guitar players that don’t trim their finger plucking hand’s nails. They usually vary in length, however, it does provide a unique timbre and color to each note played. Notably, flamenco guitar players usually do this, however, it is common to see it in Classical, and even Slap Guitar as well!
The way that guitarists would usually make the most use out of their nails is to have the string come in contact with the flesh of the fingertip, followed by the nail, and then gliding up the curvature of the nail to produce the sound. For those wondering, yes, guitarists sometimes did break their nails among a performance and that would be an inconvenience. It is said, guitarists sometimes applied extensions to their playing hand should this be an issue.
Strumming using a Spanish Guitar technique Rasgueado includes using the backs of your fingernails, more so to give the impression of a faster strum.
Other techniques Classical Guitarists use may include using the side of the thumb — nearest to the palm to produce a softer and lower sound.
The numb nail may also be used to produce a brighter tonal quality in the string when plucked.
This is only the tip of the iceberg as they say, when it comes to forming a variety of Classical Guitar techniques. Other honorable mentions include: vibrato, harmonics and slurs.
Improving Timing and Discipline
Many of us would like to play with the utmost accuracy and precision to sound like some of our musical inspirations. When it comes to Classical Guitar, this is crucial to sounding good. Classical music is about elegance and grace, to play gracefully, you must be able to play the piece as it has been written and intended for the performer.
A clock that symbolizes time and how important that is to a piece of music.
Something as easy as a metronome can help you keep yourself on time. For those who aren’t quite sure what a metronome is; it’s a device that musicians use that ticks like a clock to a set tempo. You use the ticks to play for instance, scales, or spider exercises. If you can play it on tempo, you’re already off to a great start.
Sometimes sheet music will have the tempo written at the top of the page and perhaps the Italian term for the tempo.
Allegro – Lively and fast
Grave – Slow and solemn
Accelerando – Accelerating in tempo
These are but a few examples!
Sometimes these terms will occur in the middle of a piece of music, and that means to change up the playing style or tempo. There are a vast number of Italian musical terms to learn, so researching them will definitely improve your knowledge of sight-reading a piece of sheet music.
Another thing that comes quite obvious, is repetition. You have to, have to, give it at least a few hours every day, if you can, to practicing a couple scales, or sight reading a new piece of music, or even practicing arpeggiating different chords. Anything that will advance your skills.
Note: You may look at your practice, and wonder, “How the heck am I supposed to improve by doing some mediocre scales over and over??” The answer to that, is you decide. You choose how you get the most out of your practice. You can be crushing the same scales over and over and feel no progress, or you can turn up the tempo, play them backwards, or play them elsewhere on the neck. It’s up to you how much you will improve. The key words are, challenge yourself.
Posture plays another crucial role in making sure you don’t play sloppy. If you’re sitting slouched, with your feet not firmly planted on the ground, and your hand awkwardly sitting at the top of the neck, then you’re likely not going to sound as accurately as you wish to.
Following the method of maintaining a proper posture, as we talked about before, will ensure that you can get the most out of your instrument. Your guitar is your instrument, and you are but an extension of that. Similar to how a vocalist needs to think of their body as the instrument and maintaining posture and form can determine the overall quality of their sound. It’s really all about maintaining good habits.
What’s Next?
Now that you’re at the end of the article, it’s common to think somewhat, “Okay, so I know what to do now, but where do I go from there? What is the blueprint, where is the trail that will help me advance further that I can trust in.” That’s what we’re here to talk about, so you don’t get lost on your journey to becoming better in your craft.
Firstly, inspiration is a must. You won’t get anywhere without feeling inspired to do something. If you feel that this is what you want, but you’re in a rut, or you’re having trouble summoning the enthusiasm to play given a certain day — we all have those, that should be your focus.
Watch some YouTube videos, of guitarists playing Classical pieces that you wish you could play, or that just move you to your very core. To take this a step further, if they are in fact a smaller channel, reach out! Chat with like-minded individuals that have the same passion that you do. Develop a network.
Make a vision board of the musicians you love and musical lifestyle you want to maintain! Put it somewhere you’ll always see it, and make sure these images resonate with you. When you feel down, this will help remind you why you started in the first place.
Lastly, read about, or watch some documentaries on the subject. This will not only enhance your knowledge, but your love for Classical Guitar.
Another thing to take you further is to remember to practice 4 -6 hours a day, if you can. I know that we don’t all have the sort of lifestyle that can allow for us to have that much spare time. If not, dedicate an hour or two a day. Anything helps. Sorry to say, but if you can’t dedicate at least an hour or so to play — you might need to change some things in your life around so you can.
Make sure that this practice is meaningful and will advance you further as a musician. For instance, be honest with yourself and look at your weakest areas of your playing, that’s always a good place to start.
If you’re sloppy, fix your posture and work with a metronome. If you’re not very guitar literate, practice scales, chords, or even inversions and understand how they come to be. If you’re finding that your fingers are weak, develop that finger strength and dexterity, with spider exercises, and holding chords for extended periods of time before changing them up. (I like to call that finger-yoga)
Reading sheet music is a challenge, but a necessity to most Classical Guitarists. Practicing your sight reading is important. There are websites that will drill you on naming each note, which you should probably do first. When you’re confident in your ability to do that, then take it a step further by naming the note and playing it on the guitar. When you start getting comfortable with that, add in sharps and flats and key signatures.
The last thing I can recommend in taking yourself further is if you’re wanting to do this as a living, you must put yourself out there. Networking is a must, use social media to your advantage. Apps like Twitter, YouTube, Instagram, etc.. will be your best friends in this endeavor. Find like-minded people that you can help, and will help you in return to build a bond or a community of people that love what you’re about.
Perform at local places, invite your friends, family, and followers to attend! These are people that will be your biggest supporters and generate that snowball effect for you. As you gain more exposure, they’ll tell their friends and family and so on. It’s not an easy path, but for a die-hard music lover, it is the right path.
Classical Guitar yields huge benefits to the musician who learns it. These benefits are transferable amongst all forms of music. There is a lot to take in, however, with the right mindset, discipline and attitude, you can one day learn to master it.
Now you know what you need to get started on playing Classical Guitar. So what are you waiting for? Practice hard and practice safe!

