As a guitarist, oftentimes you’ll be playing on your own rather than with a band. One of the great things about the guitar is that it’s an instrument that can provide rhythm, lead, bass and percussion sounds all in one, so it really is a musical Swiss army knife. In this tutorial, we’re going to look at one of the simplest ways you can add a percussive element to your playing – especially useful for all those times you don’t have a drummer on hand!
Contents
What is Palm Muting / Muted Strumming?
Muted strumming is a right-hand playing technique that involves using your palm to stop the strings from resonating as you bring the pick (or your fingers) across them. This allows you to make a sound not unlike a snare drum, most likely on the off-beats of your strumming pattern. The overall effect sounds like this:
Now, let’s take a look at how to play that strumming pattern, muted strums and all!
Step 1 – Getting Into the Rhythm
The key to any kind of rhythmic guitar playing is to make sure that you can really feel the rhythm of the song you’re playing. Any decent drummer will tell you that keeping good time is the first step before you can go any further with percussion. For this strumming pattern, as is typical of any kind of strumming pattern that involves muted strumming, the muted strums come on beats 2 and 4 of the bar (the off-beats or backbeats). So to start, make an Em chord shape, count the beats out loud, and strum on beats 2 and 4, like this:
Step 2 – Muting the Strings
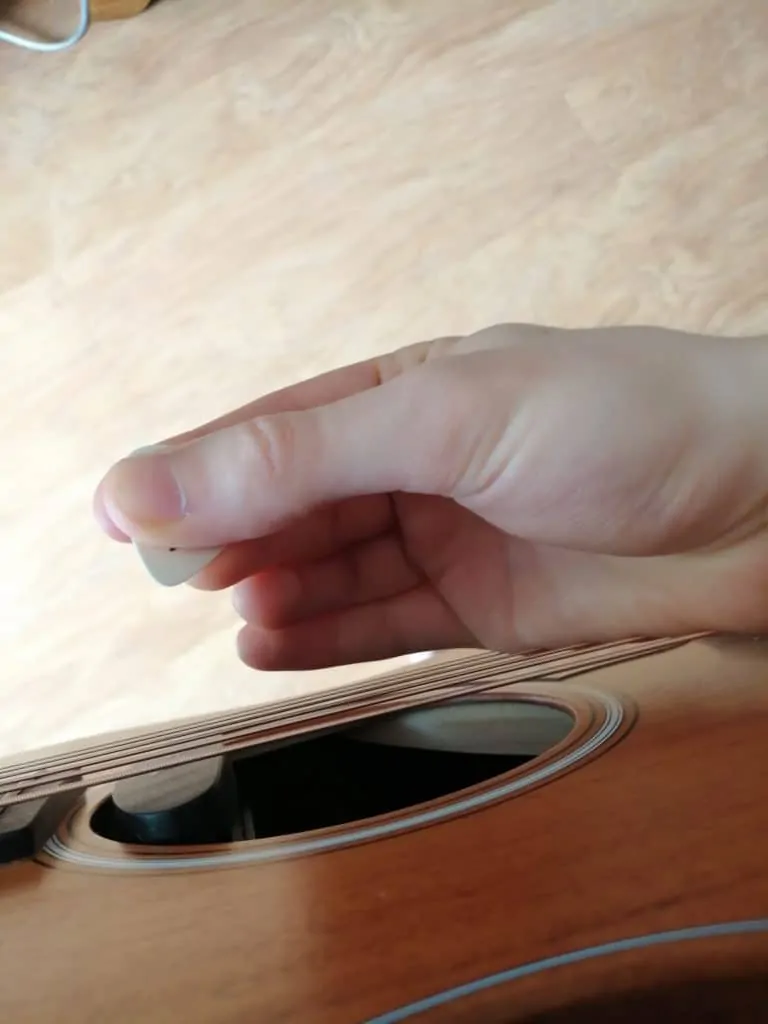
Once you’ve done that a few times and really got that steady pulse in your head, you’re ready to add in the muted strum technique. To do this, you need to allow the side of your palm to hit the strings as your pick (or fingers hits them). It should be this part of your hand that hits the strings:
Try this slowly at first, it may take a little practice to get it right, but it is quite simple once you get the hang of it! Once you’ve got the technique, start to play muted strums on beats 2 and 4, like you were doing in the previous step with the Em chord. Keep your left hand in that Em chord shape – it will make things easier in the next step!
Step 3 – Fleshing Out the Strumming Pattern
Now that you’ve got the percussive element down, it’s time to add the main bulk of the strumming pattern around it. Keep that steady beat 2 and 4 pulse in your head and then start to strum this pattern:
Down Up (mute) Down Up (mute)
Again, take it slowly at first, but try to keep that muted strum pulse as constant as possible. Rather than thinking about it, try to just feel the rhythm. At this stage, and once you’ve got up to speed, it should sound like this:
Step 4 – The Finishing Touches
At this stage, you’re just one small step away from playing the strumming pattern from the start of this tutorial. All that you need to add now is the upbeat at the end of each bar that links the whole pattern together. All this means is adding another up stroke at the end of the bar, so the complete pattern is:
Down Up (mute) Down Up (mute) Up
Practice this phrase over and over again, so each bar links into the next seamlessly. Once you’ve got this at a slow tempo you can gradually bring it up to speed and soon enough you’ll find that it feels pretty natural!
Summing Up
So, by now you should be able to play the strumming pattern from the first video. But the good thing is, you can apply the muted strum technique to virtually any strumming pattern! Experiment with adding that muted strum on beats 2 and 4 to some strumming patterns you use regularly (using some helpful strumming tips if you need them). You’ll find that once you’ve mastered the technique of bringing the side of your palm down at the same time as you strum, you can effortlessly add a percussive element to whatever song you’re playing! Perfect for accompanying yourself or others singing, it’s the first step to becoming a true one-person band!

