If you’ve watched a lot of people play guitar, you’re pretty likely to have come across at least some of them using a capo. This is an accessory that is not only affordable, but something I strongly recommend you add to your arsenal.
Perhaps you already have one, but you’re not quite sure how to use it. Unfortunately, most of them don’t come with instructions.
I’ll be explaining how to use a capo and, if you don’t have one, why you should seriously consider getting one.
Contents
What is a Capo?
A capo is kind of like a plastic or metal clamp, which in the modern age includes rubber or softer plastic to protect the guitar. Don’t worry, when I say clamp, I mean it only clamps the guitar hard enough to let the strings ring clearly, like you would with your finger. The pressure along with the protective rubber or soft plastic coating or cushioning also prevents it from slipping around.
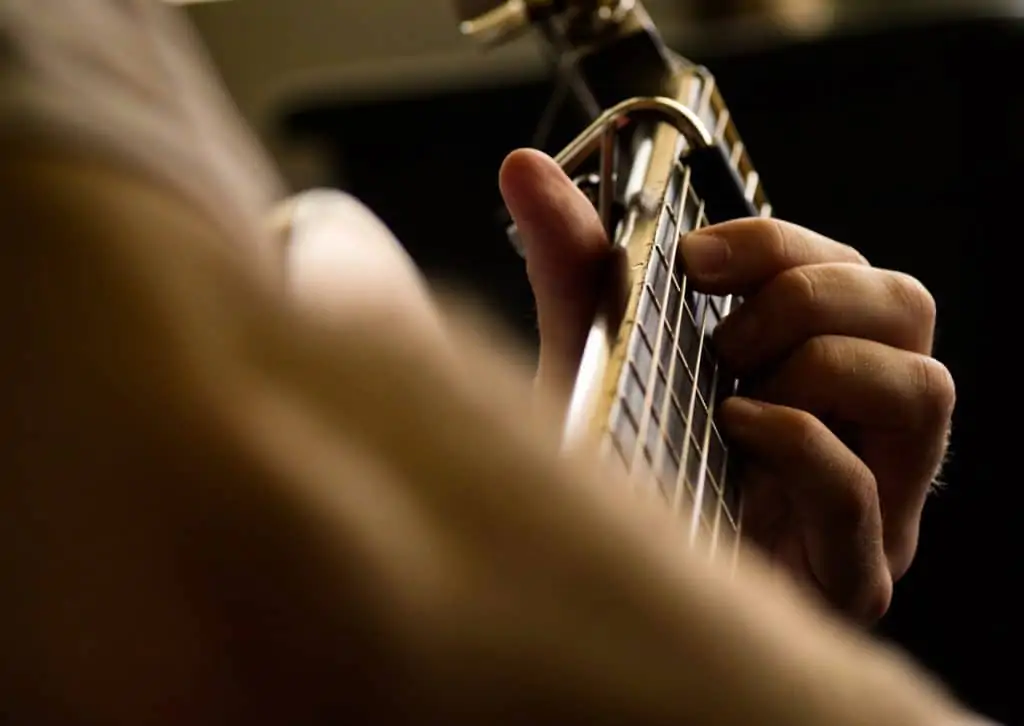
The capo, when put in place correctly (it’s not that hard to do depending on the type of capo you have), raises the pitch of the strings.
The History of the Capo
For all the history buffs out there, here’s a bit about the humble beginnings of the capo and how it came to be what we know today.
The first capo was developed in the 1700s. Back then and for many years after, it was known as a capotasto. It was a c-shaped piece of brass that probably was harder to use than those on offer today and very likely scratched the neck of the guitar. I’m wincing in sympathy of all those scratched guitars.
Since then, many more capos were developed. The c-shaped brass capos graduated into little contraptions you had to tighten with a screw. Some of them used similar mechanisms to what’s used today, except that these capos used wire to secure them to the guitar. The Spanish capos were made out of bone and metal, for example.
In 1850, a man called James Ashborn applied for his patent of the capo. He improved upon the yoke and screw design by adding a lever.
Nowadays there are a few types of capos around that work well and inflict no damage on the guitar. Believe it or not, there are still patents being applied for this year. Not just for the guitar, but other stringed instruments too. So perhaps we’ll see some more interesting designs.
Why Use A Capo?
Why Use a Capo
Easily Change the Key
So you’ve already learned that a capo raises the pitch of the guitar. It’s easy to deduce from there that it helps you raise the key that you’re playing in. But instead of playing the chords from the key you’ve chosen, you play the same chords as for the key you were previously in.
For example, if you have the music written in G in front of you, but you prefer the key to be in A, you place the capo in the second fret and just carry on playing the chords for G. The capo is the new “nut”, (that strip that the strings are guided through at the top of the neck).
Capos can be a lifesaver (or indeed, a voice saver) when the key is too low for the singers and all that without making your brain tired or risking wrong chords if you aren’t good at playing in a different key on the fly. There isn’t always time to pencil in the new chords. But it only takes a few seconds to attach a capo.
Higher Voicings and Different Tones
If you’re looking for a particular tone, the capo is also helpful. I like playing with the capo around frets 5, 6, and 7. It produces are a sound that’s reminiscent of a ukulele. When I want some relaxed island vibes, that’s what I do.
Some chords sound beautiful in a higher voicing. While I’m not always a fan of higher voicings on an acoustic guitar, particularly when strummed, I like the sound of the chords sounding higher due to the capo.
So often, while I’m capable of playing a transposed song with the chords particular to that key, I sometimes just use the capo, not only to save my hands from a crazy amount of barre chords, but because it sounds good too.
Play in Difficult Keys More Easily
Which brings me to another point. While you can play open chords in the key of B (which has five sharps/#), I find some of those chords more difficult than playing barre chords. Especially if I have to mute strings in between or stretch my fingers quite a bit. It also just depends on what sound you’re going for. Some genres sound better with barre chords as opposed to their open chord counterparts.
The result is that if someone really likes the key of B and most of the songs in the set are in that key, my hand gets tired, especially if there’s a practice right before it’s time to play on stage. At the end of the session, my hand hurt a little and the muscles in my forearm are done.
But pop a capo on there and play the chords of a key that’s much easier on the fretting hand, and ta da! You get a more pleasant playing experience and fewer risks of mistakes caused by difficult chords or your hand giving up.
How to Use a Capo
There are different types of capos on the market today and the design determines how you use it. You can look at a list of the best capos here if you’re in need of one.
Strap-On Capos
My first capo was not the easiest to use, especially if you have perfectionist tendencies and lack luster coordination. It’s what’s called a strap-on capo.
- Place the solid part with the rubber across in fret you want it to be in. Closer to the bottom fret (the metal strip) is better, but you’ll still achieve the effect if you’re closer to the middle of the fret
- Take the strap and make sure it goes around the back of the neck and bring the piece of plastic or metal on the end up to the top of the bit across the fret
- Then slot it into place and push it down or hook it to make sure it stays in place (strap-ons usually have notches or teeth for this purpose)
- You want to make sure that it’s tight enough for the strings to be pushed down and ringing clearly
Spring Clamp Capos
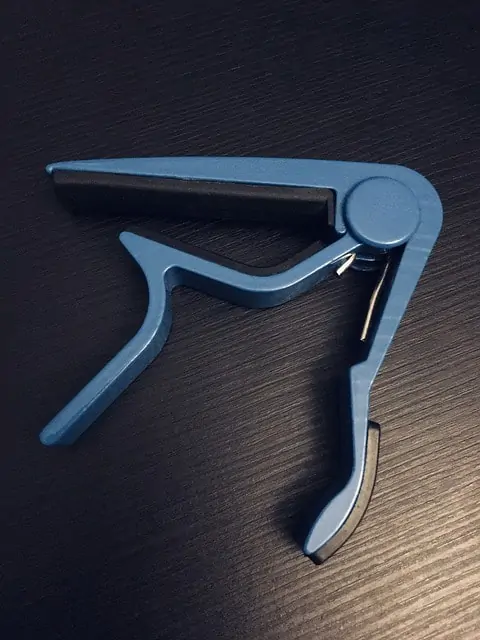
Spring Clamp Capo
I now have one of these on account of losing my first capo in a move. I’m now very happy that I have this one.
- Squeeze the handles to open the clamp
- Gently put it in place in the fret that you want
- Let go of the handles
I’m sure you see now why I’m so happy with this capo. This one is great for getting it into place in just a second or two. They also conveniently sit at the top of the headstock of the guitar, within easy reach. Make sure that you get one that has protective rubber or plastic to prevent damage.
Screw-On or C-Clamp Capo
I’ve never used one of these because they are definitely more complicated to use. These are more like the original ones used a few centuries back, but with protection incorporated for the guitar.
- Loosen the screw to open the capo up enough to get it over your strings in the required fret
- Hold it in place and tighten the screw until the capo is secure and the pressure is enough to have the strings ring out clearly
In the music shops here, there aren’t as many of these as the spring clamp capos. They tend to be more expensive than the other types of capos. But they are very secure. There’s no need to worry that the capo is going to fall off if you get passionate and jump around or move wildly.
If you use them regularly and on a guitar that you’re familiar with, you’ll no doubt learn how to get it in place quickly and even move it around as needed from song to song in record time.
Where to Place Your Capo- A Handy Capo Chart
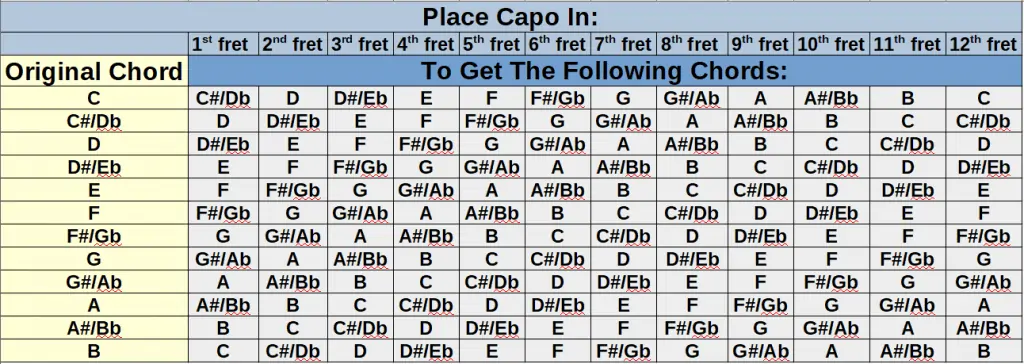
It’s easy to think of moving the capo up and down a specified number of frets by how many keys you want to go up. But it can be tricky if it’s multiple keys that you need to go up, especially in the heat of the moment. Here’s a chart to help you out:
How To Use This Capo Chart
Let’s take C. If you want to go up three whole steps, or more specifically, that chord needs to be an F, you move the capo to fret 5 to get an F.
So if you play all the original chords, say:
C, G, Em, D
And your capo is in fret 5, you will actually be playing:
F, C, Am, G.
Unless you have a cutaway guitar, you very likely won’t want to go higher than about the 9th or 10th fret with your capo, but this chart goes all the way for those of you who have electric guitars and acoustics shaped with the cut away shape. Playing with the capo in the 12th fret will simply give you a higher voicing of the original chords.
Conclusion
My capo is something that I use regularly. It’s made my life a lot easier and provided some additional versatility. Whether you have a capo or have yet to go get one, I’m sure that you will find the same thing.
Now that you know how to use your capo, go for it. Find out what you like to do with it and enjoy how much easier it makes things sometimes.
It’s good to learn how to change keys and to play a variety of chords without the help of a capo, but there’s no shame in using a capo, especially if it makes the music better. Go forth, let your creativity flow, and have fun!

Cheanné Lombard lives in the home of one of the new Seven World Wonders, Cape Town, South Africa. She can’t go a day without listening to or making music.
Her love of music started when her grandparents gave her a guitar. It was a smaller version of the full-sized guitars fit for her little hands. Later came a keyboard and a few years after that, a beautiful dreadnought guitar and a violin too. While she is self-taught when it comes to the guitar, she had piano lessons as a child and is now taking violin lessons as an adult.
She has been playing guitar for over 15 years and enjoys a good jam session with her husband, also an avid guitarist. In fact, the way he played those jazzy, bluesy numbers that kindled the fire in her punk rock heart. Now she explores a variety of genres and plays in the church worship group too and with whoever else is up for a jam session.


