Once upon a time, in the days of analog, gain had a single meaning. Now In the digital era, musicians have experimented with many different ways of not only creating it, but also defining what it is. As a result, it’s become one of those catch-all audio terms that can be difficult to understand as a beginner guitarist.
What is gain? Is it a type of volume control? A special effect? Or some sort of combination of the two?
Don’t worry. Once we break down the enigma of what it is and how it works, you’ll find it easier to start experimenting with. Whether you’re jamming with your buddies or recording a brand new song on Garageband, mastering gain will help you channel your ideal tone into your guitar playing.
First Things First
Let’s start off by exploring the original, analog definition of gain. Then, we’ll dive into some of the newer definitions that connect it to other audio terms, such as volume, overdrive and distortion.
What is it?
What do you think when you hear the word “gain”? A gym bro lifting weights? A Wall Street tycoon raking in their latest stocks?
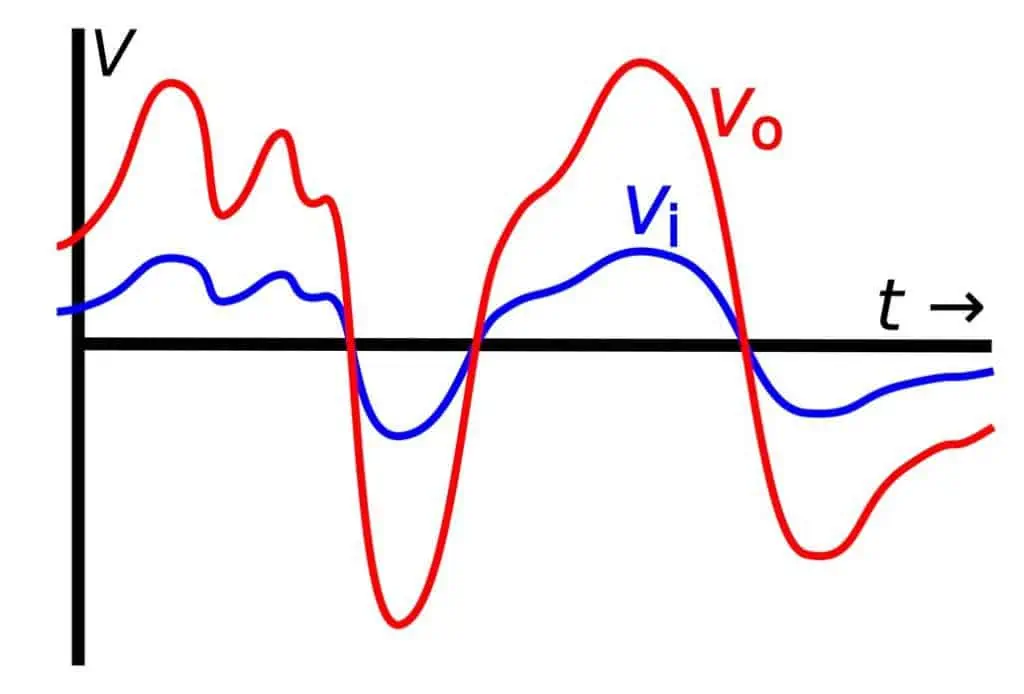
These are certainly the images we have In pop culture. But in the music world, we define it a bit differently. It’s what we call the ratio of output to input voltage in a circuit.
Clear as mud, right? Let’s break this down a bit further…
Voltage is the electrical potential (amount of force or tension) between points in a circuit. In guitar amplifiers, this circuit starts at the input jack (where you plug in your guitar cable) and ends at the audio output (the speaker). Changing the voltage between points along the circuit creates different levels of gain. We measure these levels in decibels (dB).
Notice how applying gain on a guitar amplifier raises the output voltage (the red wave) compared to the input voltage (the blue wave) of the audio signal.
This input/output circuit becomes more complicated if you add other circuits to the mix, such as effects pedals or audio interfaces (devices that connect your instrument to a Digital Audio Workspace, like Garageband or Ableton). Yet the basic principles remain the same. You just have more points along the circuit where you can set controls for the output voltage.
In some types of circuits, gain doesn’t refer to voltage. Instead, it can mean the ratio of output to input current (the rate of flow of electric energy). Other circuits, including those in radio frequency amplifiers, use it to refer to the ratio of electric power (the speed of electric energy).
But don’t worry about these other types for now. Most of the audio equipment you’ll come across only deals with voltage.
How does it work?
Guitar amplifiers have two basic stages:
- Preamp stage: the audio signal passes from the guitar into the amp for initial processing. This is where the basic features of an audio signal (pitch, phase, motion, etc.) are created. Whatever features are applied at this stage will create the tone of your guitar.
- Power amp stage: the signal is boosted, then blasts through the speakers as audible sound. In tube amps, some new audio features can be applied at this stage. But in solid state amps, the tone won’t change from the preamp stage.
Both of these stages modulate (change) the amplitude (height of crests and troughs) of your guitar’s audio signal. This in turn creates a change in volume.
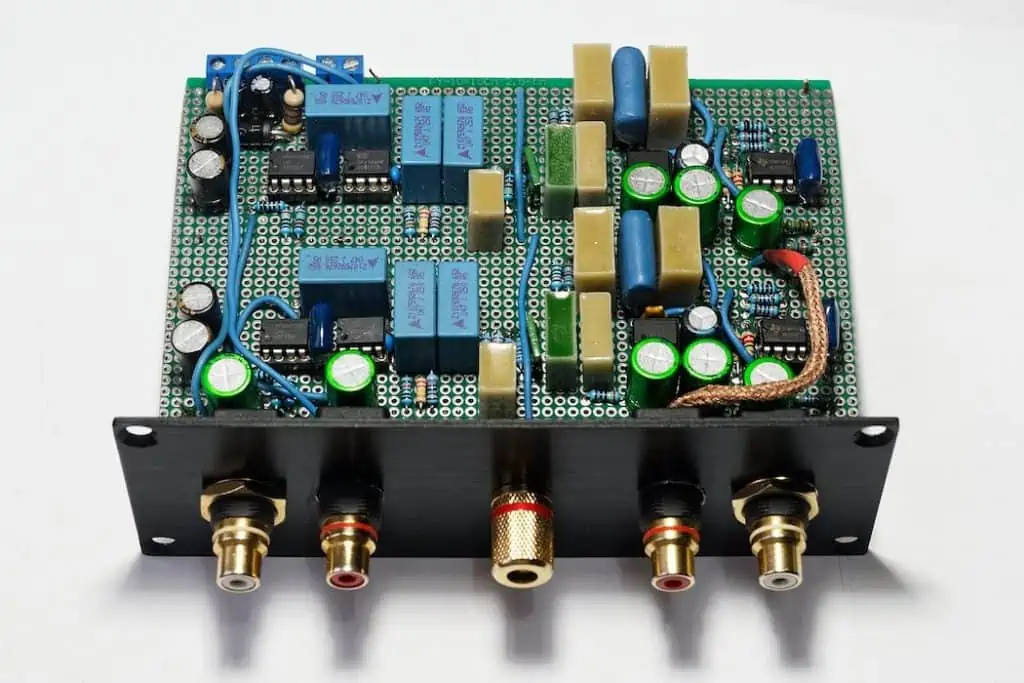
Preamps also play a role in other types of audio equipment, such as record players (pictured), audio interfaces, mixing consoles and more.
Gain is applied to the preamp stage. It increases the output voltage of the audio signal before it enters the power amp stage, so that the output to input voltage ratio is greater than 0.
In order to produce sound on an amp, the gain level needs to be higher than 0 dB. Otherwise, the guitar signal will be too weak to pass into the power amp stage. This is why on many amps, you won’t hear anything if you have the knob set to 0.
Amp simulators on Digital Audio Workspaces (DAWs) work at a lower level (-18 dB instead of 0 dB). But the analog rules still apply here. If your output voltage is too low, you’ll be too close to what engineers call the noise floor (the base level of background noise that is picked up when recording audio). In other words, you won’t be able to hear your guitar, because it will be too quiet to cut through the noise.
In short, regardless of whether you’re using a physical amp or an amp simulator, you need at least a little gain to hear your instrument properly.
What is the difference between gain and volume?
Sometimes, you’ll hear these two words used interchangeably. This is one of those digital-age confusions, since many VST plugins for DAWs (including many compressors) have a “gain” control instead of a “volume” control.
To make matters even more confusing, some amps only have a “volume” knob. In this case, the knob will control both volume and gain. But don’t worry — the standard is to separate the two controls
To be fair, the two are similar concepts. They both boost the amplitude of audio signals. They’re both measured in decibels. But the key difference is that gain works in the preamp stage, while volume (usually) only works in the power amp stage.
Remember that in the power amp stage, the amplitude of the audio signal is the only feature that modulates. This means that volume only has an effect on loudness, not tone. On the other hand, gain has an effect on both loudness and tone.
What is the difference between gain, overdrive and distortion?
Many guitarists (even experienced ones) use gain, overdrive and distortion interchangeably. To be fair, many amps, pedals and plugins label gain controls as “overdrive”. But more accurately, overdrive and distortion are products of gain.
In the preamp stage, an audio signal has a maximum amplitude before it becomes damaged and starts to clip. We call this “safety zone” between the noise floor and maximum amplitude the headroom. Distortion is what happens when an audio signal goes beyond the headroom.
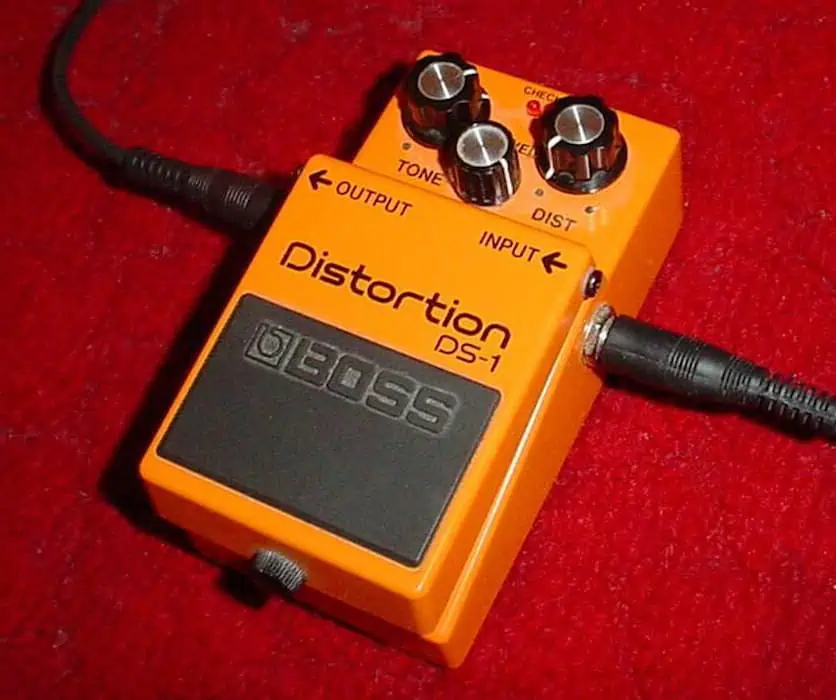
In a distortion pedal, the output voltage of the guitar signal is already pushed past the headroom before it even enters the amp (“Boss DS 1 Distortion pedal” by Surachit / CC BY-SA 2.5).
In other words, high levels of gain will result in distortion. By contrast, low levels will result in a clean tone.
Around the 3:36 mark of this video, you can clearly hear how turning the knob on the amp determines the level of overdrive.
Overdrive refers specifically to subtle distortion. Overdrive pedals and plugins mimic the sound you get when you turn up the gain (or overdrive) knob just past the headroom. By contrast, plain old distortion is what we call the higher level of audio signal clipping. It is gritty, aggressive and goes even more beyond the headroom than overdrive does.
This video goes into more detail about what the key differences are between gain and distortion.
How Much Is Too Much?
Setting the right voltage ratio is kind of like adjusting the volume buttons on your phone during a conversation. If the decibels are too low, there will be too much background noise to hear anything clearly. If the decibels are too high, there will be too much clipping to hear anything clearly.
So, how are you supposed to know where the happy middle ground is?
Setting your voltage ratio is a delicate balancing act that becomes easier with practice
Because different amps, pedals and plugins have their own unique ways of adjusting the output voltage, there is no universal rule. However, the human ear tends to perceive louder sounds as better. So, the closer you set your controls to the maximum amplitude, the better your guitar will sound.
Another thing to keep in mind is the conventions of whatever genre you’re playing in. For example, many country and R&B guitarists prefer a clean, low-gain level. However, rock and overdrive go together like peanut butter and jelly. So, don’t be afraid to crank up the knob to get that classic, crunchy sound.
For metal, punk and other distortion-loving rock subgenres, you’ll want to push your sound far beyond the headroom
How Do You Adjust It?
Now that we’ve explored these various definitions and uses, here comes the fun part — actually experimenting with the controls on your audio equipment.
Whether you’re prepping for a gig or mixing your latest recording, setting the correct gain level is essential to capturing the best sound on your guitar (and other instruments)
On guitar?
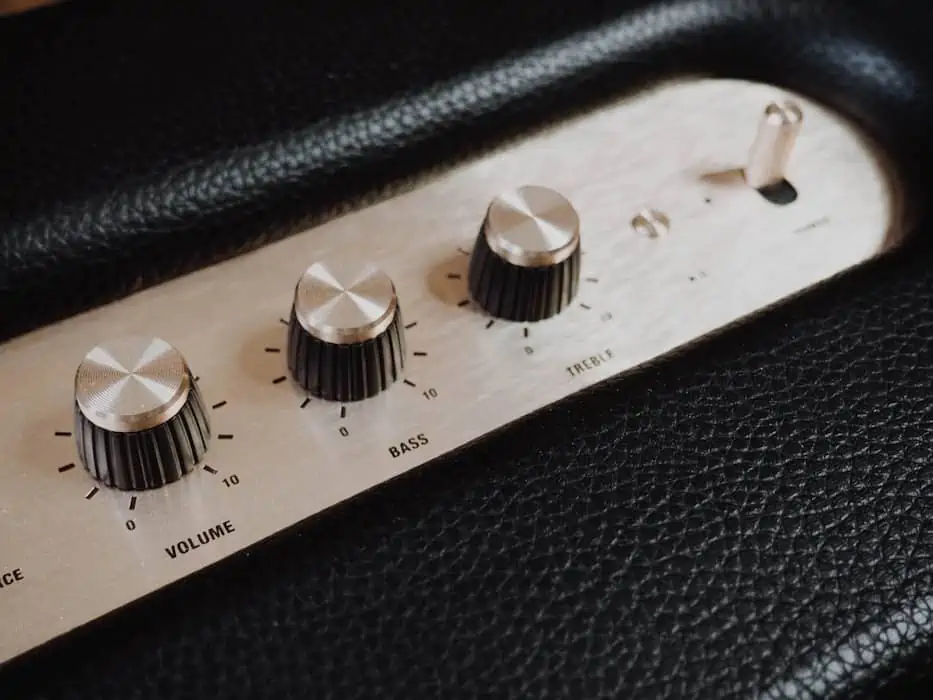
There are a few different ways to adjust the voltage ratio on your guitar setup. Of course, the most obvious way is to use the built-in controls on your amp.
When I first started playing electric guitar, I had nothing but a hand-me-down Yorkville IG-20 amp from the early 90s. As a result, it didn’t have any fancy presets or even a separate channel to give me that grunge-worthy distortion I loved. Instead, I had to set everything manually with my gain knob.
I later got out of the dinosaur era by buying a new Marshall MG15CF. Having a separate “crunch” channel gave me instant overdrive. But even still, I found that playing around with the knob was the tried and true way to customize my tone.
You may find that the presets and channels on your amp give you the exact voltage levels you’re looking for. If so, great! It means less work for you. But I would still recommend experimenting with the manual controls, so you get comfortable with finding the headroom.
One thing many beginners want to know is what happens when you turn the knob on your amp up all the way? Will you damage your speakers? Or your headphones?
Luckily, guitar amp speakers and studio headphones are generally sturdy enough to handle high voltage levels. But if you’re working with a more delicate amp (especially a tube amp) and/or using standard headphones, it’s safer to set the gain knob lower and grab a boost, overdrive or distortion pedal to make up the difference. This way, you can still reach your optimal level of crunch without destroying your equipment. Or your ears!
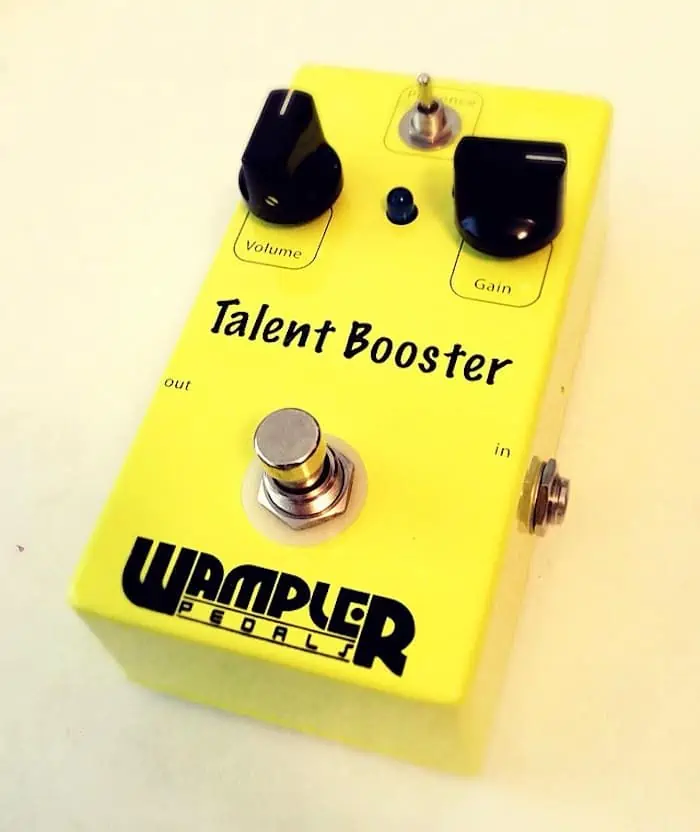
Boost pedals are like extensions of your amp. They can push both your volume and gain levels beyond what a traditional amp can give you “WAMPLER Talent Booster (9519534357)” by Mekkjp / CC BY-SA 2.0).
Another option is to plug your guitar into a preamp on a mixing console. This is what John Lennon famously used to capture a fuzzy, distorted sound on the classic Beatles song “Revolution”. At the time, it was analog technology at its finest. But now in the digital age, most guitarists prefer to connect their instrument to a laptop/tablet and adjust their levels from their audio interface, DAW or both.
Unlike amps and pedals, DAWs are notoriously finicky when it comes to high output voltage. If you go past the headroom, you’ll get an annoying clipping sound instead of Rage Against the Machine-worthy distortion.
That’s why it’s important to go through a process called gain staging. This means keeping a constant decibel level throughout your sound system.
On a DAW, you can achieve this by adding a gain plugin to the plugin chain and a VU meter to the mix bus. The VU meter will single out any areas where the recording goes above 0 dB. Then, you can turn down the volume to eliminate any unwanted distortion. That is, the distortion that you’re not purposely creating with your plugins.
This video takes you through the basic process of gain staging a guitar track on a DAW.
You can also prevent unwanted clipping by adding a limiter to your plugin chain. This is a type of compressor that will automatically attenuate (or lower) the amplitude of an audio signal that goes beyond whatever decibel range you set it to (ex: 0 dB). Using a limiter is a lot easier than manually adjusting each point of distortion. But again, I would recommend going the manual route at first to get comfortable with and fully understand the process.
On other instruments?
Gain staging isn’t just a concern for guitarists. It’s also what other musicians need to be aware of when they’re setting up their equipment at a gig or recording studio. Especially if they’re using microphones for amplification.
Mics naturally have a signal level of -60 to -40 dB. This is much lower than line level — what we call the base amplification level at which audio signals are transmitted (0 dB). In other words, mics need extra output voltage to cut through the noise and actually produce sound.
What can we do to bring a mic up to line level? The most common fix is using a mic preamp. Most pieces of audio equipment that you plug your mic into (mixing consoles, audio interfaces) will already have a built-in preamp that will do the job for you. However, if you’re not 100% happy with your tone, you can always use an external preamp to customize your voltage ratio.
To stay in the headroom, you’ll want to set the levels on your microphone somewhere in the 0 to 60 dB range.
Especially in the recording studio, a properly staged mic will help you record the best vocal, drum or even acoustic guitar tracks!
Final Thoughts
Because of its many definitions and uses, gain can be a difficult concept to wrap your head around at first. But once you break down what it is, you’ll realize that it’s not really as confusing as it seems.
Voltage. Volume. Distortion. These are all features that make it one of the most invaluable tools to play (and record!) your instrument at the highest sound quality
Obviously, your optimal voltage ratio (and the way you create it) will change depending not only on your audio setup, but also the conventions of whatever genre you’re playing in. So don’t be afraid to experiment a bit and find what works best for you.
Good luck!

