Waiting a couple of weeks for the guitar parts you ordered to arrive may sometimes be nerve-racking.
The significance of knowing the best guitar parts to always have in the bag is usually not obvious to most guitar players until it’s sometimes too late. Playing the guitar is fun, but the fun shouldn’t stop just because a string snapped, your tuning machine broke, or your cable split internally and will not connect properly.
Most guitar parts – especially the moving parts, are constantly subjected to pressure from your fingers as you execute techniques like hammer-on and pull-offs during play. Consequently, it is important that you have these best guitar parts as spares. Who knows, you might be in the middle of a solo when one of your strings decides to give way.
Here I have itemized the guitar parts that have the most probability to breakdown during the playing life of your guitar, and which from experience are best to have.
But that’s not all.
I have also included some tips for installing and fixing these parts seeing that they are all easy to install.
So, if you’re ready, let’s dive in!
Contents
Guitar Nuts
These are probably the last thing you’d expect to break in a long time during your guitar’s playing years.
Most guitars – especially the medium-priced and low-priced guitars, come with Nuts made from plastics, and plastic can’t withstand high level of playing stress for long.
This is, therefore, a good reason to add Guitar Nuts to the list of best guitar parts to have in the pockets as spare.
There are also other types of Nuts along with the plastic types and they include Bone Nuts and Tusq Nuts.
Plastic Nuts
These are made from plastic materials, and when subjected to playing and tuning stresses of the string, may splinter the slots over time – causing string hitching. In case of accidental guitar mishandling, plastic Nuts can also crack at the edges close to the E-strings, leaving the strings less tensioned as well as falling off the fretboard.
Temperature can also affect its durability as constant change of temperatures during different seasons tend to weaken its elasticity. This increases its tendencies to suddenly break under pressure accumulated over time.
Also, plastic Nuts don’t give the best guitar tone as they sound relatively hollow on the guitar. The plinky sound of Plastic Nut blanks when dropped on hard surfaces like concrete confirms their limited tonality.
Plastic Nuts are, however, relatively inexpensive and account for their popularity in the manufacturing of cheap guitars.
Bone Nuts
Bone Nuts are made from organic bone materials and are more durable than their plastic counterparts. The hard, very dense, but light material make them a preferred choice for most high-end vintage guitars.
However, due to a variety of bone materials used for Bone Nuts, their level of porosity and density will vary. This makes Bone Nuts relatively unstable in tone and resonance as well as in durability. This may sometimes lead to early damage as well as poor tone quality for guitar sounds.
Tusq Nuts
Made from high heat-pressured advanced polymers, Tusq Nuts offer more tone-consistent sounds and are more durable than the previous Nuts mentioned.
The efficiency with which it conveys sounds between the low bass and the high E string is very good. Acoustic guitars give a very lively and clear distinct sound with Tusq Nuts.
The sustain you get from Tusq Nuts are richer and longer, giving your guitar sounds more power especially when playing harmonies.
Tips for Installing Guitar Nuts
Maybe you want to install another Guitar Nut after the damage of the existing one or you just simply want to upgrade to a Nut with better tone quality, these practical tips can be very useful for you.
- Measure the string action (the height of string from the fretboard) and string spread with a metal rule before removing the strings
- Measure the Nut widths before removing the Nut
- Make sure to remove Nut without damaging the Nut slot on the guitar. You might need to gently chip it off from the edge with a small flat chisel and small hammer if it proves too tight to remove.
- Always clean off remnants of glue left behind in the slot after removing the Nuts. Simply use a fine grade sandpaper slice to gently clean the slot
- Determine if you have a curved-bottom or a flat-bottomed Nut slot before you sand your nuts to fit the slot.
- For curved-bottom slot – which is typical of some American made guitars, paste a strip of fine sandpaper along the width of the fretboard and sand the bottom of the nut by moving it on the sandpaper along the fretboard width
- Make sure not to add too much glue in the slot during installation. A drop each at the ends and at the center of the slot will be fine
We love this detail of how to upgrade your guitar tone by simply upgrading your guitar nut from Plastic to Tusq.
Guitar Straps
You’ve probably watched one of those rock bands where the showmanship of the guitarist included swinging his guitar around in a continuous circular motion before catching it to continue playing.
This stunt, AKA the Hoola hoop effect, was a signature of guitar greats like Yngwie Malmsteen, Bruce Springsteen, and Warner E. Hodges.
It is needless to say that without a good guitar strap such stunts couldn’t have been successful. Hence, including guitar straps as one of the best guitar parts in the bag is not an exaggeration.
Guitar straps hold the guitar firmly to your body while you play – mostly while standing. They come in different colors and designs, and are made with different materials including leather, polyester, nylon, cotton and suede.
All of these materials have their advantages and disadvantages and you should give careful consideration before choosing the best guitar strap for you.
Tips for Choosing Guitar Straps
The kind of playing you do determines to a large extent what strap will be best suited for you. In the case where you’re not sure if you’re going to be playing with high energy – which means a lot of sweat, or low energy, then you should consider keeping a couple of spare straps of different materials just in case.
These tips should help you make the needed decision to choose straps suited for your performance.
- A strap that is comfortable on you while giving good support to your guitar will be the topmost criteria for choosing a guitar strap. Cotton strap is great in terms of comfort as it is also lightweight yet giving plenty of support to the guitar.
- Your type of guitar is another consideration for choosing a guitar strap. Some guitars have double strap buttons, while others have single strap buttons with the remaining have no strap button. The category of your guitar based on its strap button configuration will determine the kind of strap that you buy
- High energy playing which involves a lot of sweat will warrant a different type of strap than low energy playing. You might want to consider getting a suede strap for its ability to deal with sweaty situations and for its durability
- If you’re looking for longevity for your guitar strap, then you might want to go for leather strap. This is the most popular strap when it comes to lasting power, and it comes in different designs, shapes, and sizes. Though not so comfortable when you’re sweating, leather straps last longer than most other materials and gets better the longer you use them
- If you’re looking to customize your strap with DIY designs like painting and dyeing it, then go for nylon or polyester. Though not so enjoyable when you’re sweating, these materials are strong, durable, as well as affordable. They easily accept artistic painting or dyeing that you put on them
- Consider getting strap locks if you find it challenging securing your guitar with just strap. Strap buttonholes might become widened over the years of use and might not properly secure your guitar as much as you need it to. A strap lock will help you secure the guitar better
Most guitar strap might cause guitar slipping after many years of use. Use Strap Locks to hold down your guitar while you confidently wear your favorite guitar strap
Guitar Strings
This might be the most frequently replaced of all guitar parts considering that it takes 90% of all the stresses during a guitar’s lifetime. Hence, a list of the best guitar parts to have handy is not complete without including guitar strings.
There are several things to consider when choosing strings for your guitar including your type of guitar, gauge or thickness of strings, and the material of strings. These and tips necessary for the installation of guitar strings are spotlighted below.
Guitar-based Strings
Either it’s an acoustic or electric guitar, your guitar type is an important consideration for choosing the string type that you buy or install.
String manufacturers target particular types of guitars when rolling out their strings. Some manufacturers specifically make strings for electric guitars, and installing such strings on an acoustic guitar might not give the best tone possible as compared to using strings manufactured for an acoustic guitar.
Another important thing is the mounting at the guitar bridge. Some classical acoustic guitars use nylon strings, and will not be able to accommodate steel strings since you won’t be able to mount the strings on account incompatible bridge design.
Carrying an extra set of guitar parts including guitar strings will be the best if they are made specifically for your type of guitar
String Gauge
Guitar strings can be based on their thickness or gauge. They are generally categorized as either light strings or heavy strings, with some variations like medium and super light gauges in and around these gauges.
There are no cast-in-stone specifications for what gauge of strings is best for your guitar, every guitarist will pick a gauge of string based on personal experience and preference. So it doesn’t matter if you’re a master of your craft or just learning to play those major chord inversions, picking a string gauge will be based on what works best for you.
But as a general guide, light gauge strings fall between gauge 9 and 10 for electric guitars and gauge 11 and 12 for acoustic guitars, while heavy strings can fall anywhere from gauges 13 upwards.
If you do a lot of articulations like bending and vibratos, or if you’re a beginner with little or no calluses to handle heavier string gauges, then light gauge strings might be for you.
But if you require more action during playing – like if you use Guitar Slides, or if you want more volume from an acoustic guitar, then heavier strings might be best for you.
String Materials
The material used in the manufacture of the string is another point to consider when choosing strings for your guitar. You wouldn’t want to use a nylon-string for your electric guitar, that may not go so well if you try it.
Bronze strings which include Phosphor Bronze and the 80/20 Bronze are commonly found on acoustic guitar. Steel strings including Nickel plated steel, stainless steel, and pure steel are used on electric guitars. Nylon strings are standard for some types of acoustic guitars and should not be used on electric guitars.
Tips for Installing Guitar Strings
Changing guitar strings is perhaps the most frequently done activity besides playing the guitar for almost all guitarists. Here are some tips that can come in handy when fixing or installing new guitar strings.
- Loosen the strings to reduce the tension before cutting it with a cutter. This is so that it does not snap back and poke you in the eye if you cut while it’s still tensioned
- Note how the strings are arranged on the guitar before removing them
- Once you remove the strings, use a clean cloth to clean the fretboard and the body of the guitar which would have been harder to do when the strings were in place
- Insert the new strings and measure the slack by pulling it through the tuning peg post, holding it exactly one peg post above, then pull it back towards the body to the main peg post before winding it around the peg post in an inside out motion over the inserted string
- Bend the excess shoot of the inserted string vertically to get it out of the way while winding the tuning pegs
- Make sure to pass the strings under the string-trees on the headstock
- Wind the tuning pegs making sure that the new strings are wound below the already inserted strings
- When the strings are wound with enough tension to make a note, try stretching out the strings by bending them outwards from the fretboard with your fingers. This should stop the strings from going out of tune like new strings do
- Keep your strings’ pack to help identify it next time you’re in a guitar shop for same type of string
Your ability to recognize the best guitar string that suits your play and knowing how to install them perfectly will go a long way to help you produce better sounds with your guitar
Tuning Pegs
One of the best guitar parts that you may also need to have handy is a couple of tuning pegs.
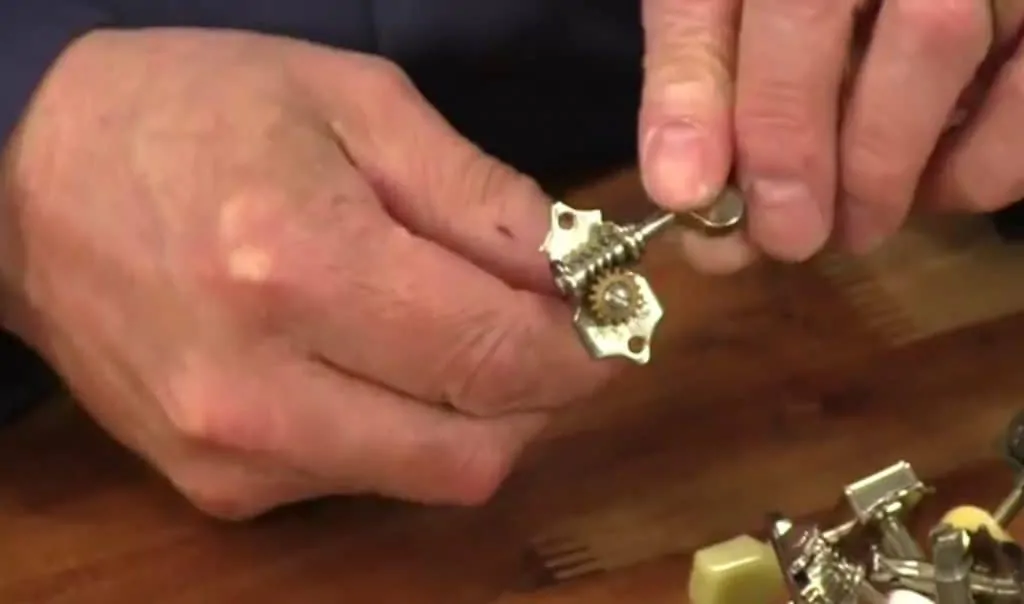
Also referred to as peg-heads, tuning machines, or just tuners, these guitar parts are what holds down the strings on your guitar. They also help you tune your strings and maintain the normal string tension necessary for playing.
Tuners are expected to last for a very long time based on design but, there have been cases of tuners going bad barely months after purchasing the guitars. Sometimes, mishandling your guitar can result in rod wobble, button breakage, plate bend, or worm gear damage.
It is best to have a spare in the box as this may significantly reduce the time you need to start playing your guitar again after a breakdown.
All tuning pegs will generally fall into one of two categories which are vintage tuning pegs or sealed housing tuning pegs. Most modern guitars – especially electric guitars, come with sealed housing tuning pegs, while you will typically find vintage tuners on older guitars – especially acoustic guitars.
Vintage Tuning Pegs
Vintage does not necessarily mean old for tuning pegs but refers more to some particular styles that are associated with certain brands.
These tuners are typified by their pressed-in-tight bushings which fits the holes in the headstock before the tuning pegs are installed.
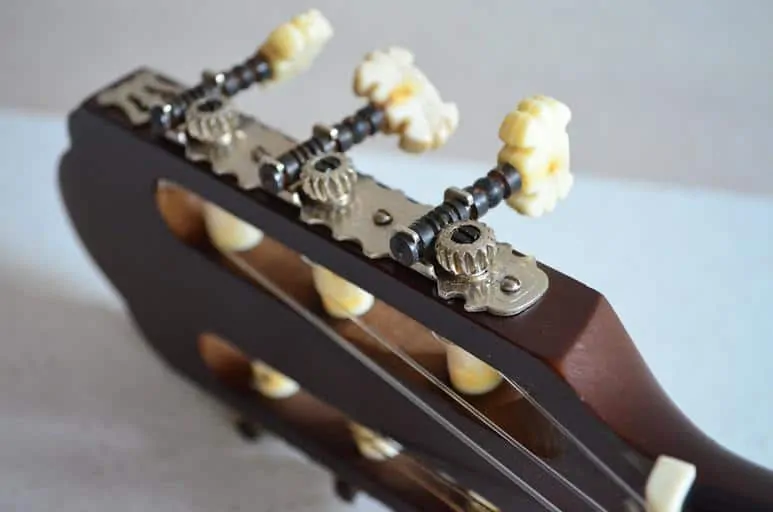
Vintage tuning machines also fall into three types including Open-back, Kluson, and 3-on-plate tuners
Open-back tuning pegs
A pair of Kluson Tuning Pegs
A Guitar with 3-on-plate Tuning Pegs
Sealed Housing Tuning Pegs
Your guitar likely has this type of tuner as this is very common with most modern and recent brands of guitars.
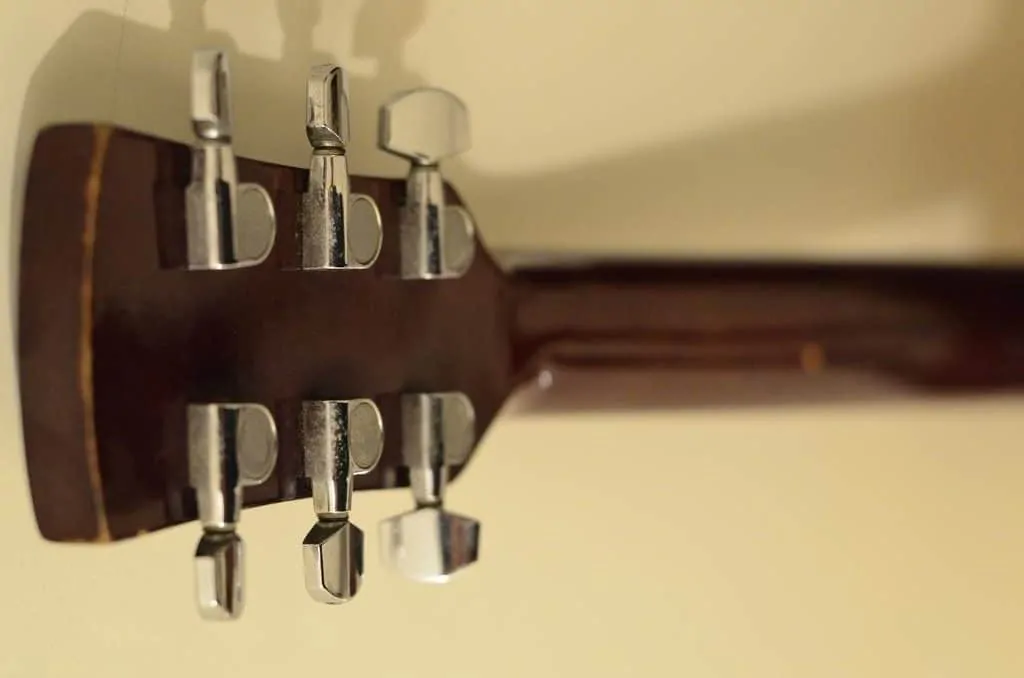
These tuners have a die-cast housing enclosing the mechanical parts of the tuners. They are permanently lubricated and sealed, which is good as it makes sure the moving parts inside are properly lubricated with no fear of the lubricant drying up soon.
They generally look-alike for different brands but can have different mounting screw positions even for sealed tuners of the same brand.
A Guitar with Sealed Tuning Pegs
Tips for Installing Tuning Pegs
Here are some tips that will help you while in the market for a tuning machine as well as during installation after purchase
- Choose tuners of same specification when buying spare tuners as this will reduce the time you spent installing them and remove any need for modifying your guitar to receive the new tuner
- Always note the size of mounting screw before going out to buy new tuning machines
- Also note the position of the mounting screw so you don’t have to drill for the new tuners’ mounting screws
- Be sure that your tuners are secured with screws before going out to get new tuners as some brands are known to use pins to secure the tuning pegs to the headstock
Knowing the intricacies of tuners gives you a well-rounded understanding of its workings. Here are the details of different types of tuners along with a head start if you like to get your hands just a little dirty with some Tuning Machine DIYs
Final Take
The list of best guitar parts and spares that are most likely to be changed with relative frequency have been highlighted so far.
However, with good guitar maintenance practice and care, changing of these guitar parts can be avoided and limited to times when you simply want to upgrade these parts for the best sound quality.
Don’t forget to keep small tools like string cutters, Allen keys, and peg winders in your bag, they’ll help you remove and install parts easily.


