That riff you just wrote sounds awesome! Oh, man, those melodies! So tasteful. But, honestly, how is the world going to know how talented you are if you don’t have the ability to show as many people as possible?
Luckily for all of us, there’s a super easy way to show off your skills by recording in GarageBand.
GarageBand is a beginner recording software that comes with every MacBook and Mac Desktop computer and is user friendly enough for even your grandmother to become your studio engineer if you so desire.
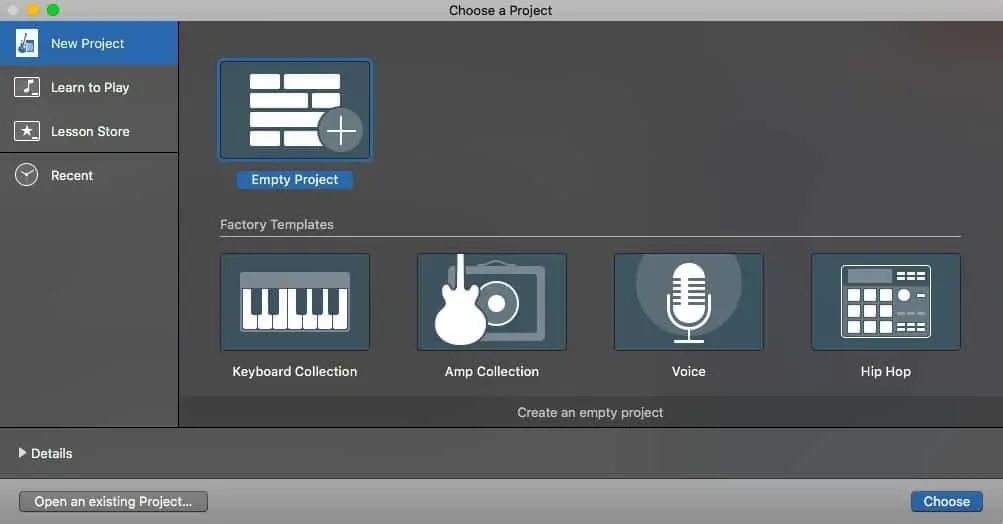
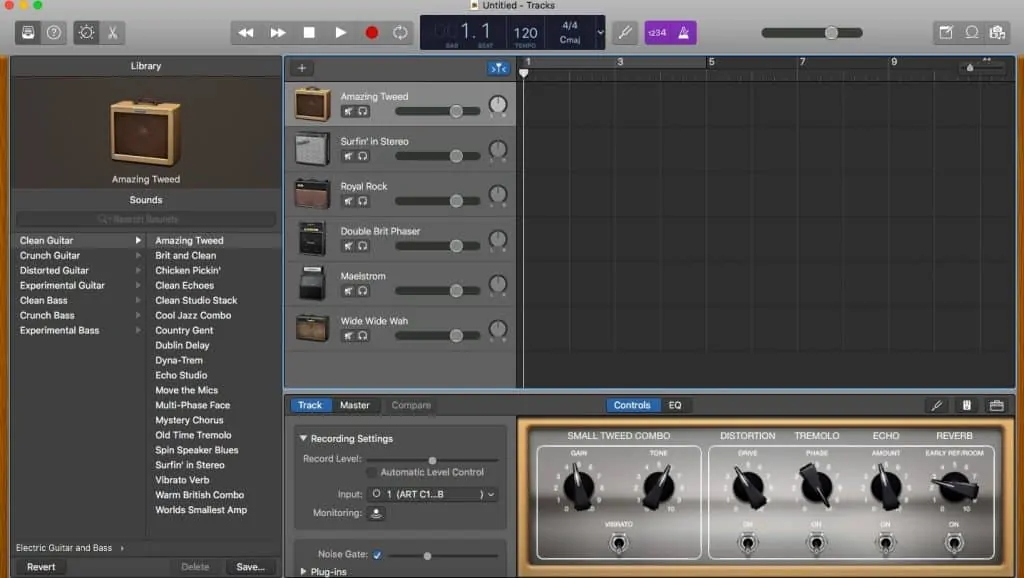
Look at the bottom of your screen for the application sporting a Sunburst Gibson ES345, that’s GarageBand. When you open it up, it will ask you what you want to record. If you would like to start with one of the many guitar amp simulators that Apple has included, click on Amp Collection! It will open a number of tracks with different tones for you to play around with.
Before you get to jam, you’ll need a couple things: do you have an interface? An interface is something that plugs into your computer via USB and allows you to plug in your guitar with a standard quarter-inch jack. Just like anything else, interfaces vary in quality depending on how much cash you’re willing to part with.
The Apollo by Universal Audio can run you up between $800 and $2000 depending on specs, but The Scarlett Solo by Focusrite will do everything you ask of it for $110.
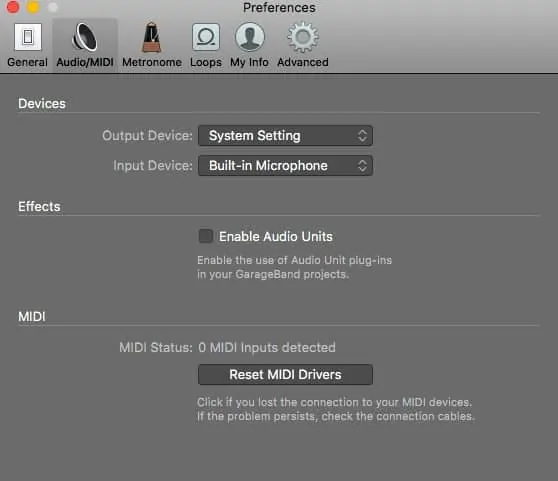
If this is your first time using GarageBand, you need to make sure the program knows what you want to record through. In your top left corner of the Menu Bar, click GarageBand, click Preferences, and then click the Audio/Midi button. This lets you choose your input/output. For input, select the interface you’re using so the sound doesn’t go in through the built-in microphone. Then, for output, choose which speakers you want your sound to come from.
Once you’re plugged in, GarageBand gives you multiple preset amp simulators that are optimized for the genre you play or the tone you’re going for. If none of the tracks open are giving you your ideal tone, click on the filing cabinet icon to open the tone library and experiment with all of the 65+ amps GarageBand has to offer. Each amp gives you the ability to mess with the volume, gain, drive, presence, and any effects that are built in. Hover your cursor over the knob you want to manipulate, and “scroll” up or down to dial it in to your liking.
If you don’t want to go direct into the interface, you can also use a microphone to pick up the tone from your own amp. I understand; you’ve spent thousands of dollars on an amp and pedals to get that perfect tone, and maybe you’d like to use that tone for your project on GarageBand. No problem at all! A great mic to use for your amp is the Shure SM57. It’s a directional mic that is used by both beginners and pros. Locate the speaker on your amp (if there are two speakers, just choose one) and direct your mic near the middle of the speaker.
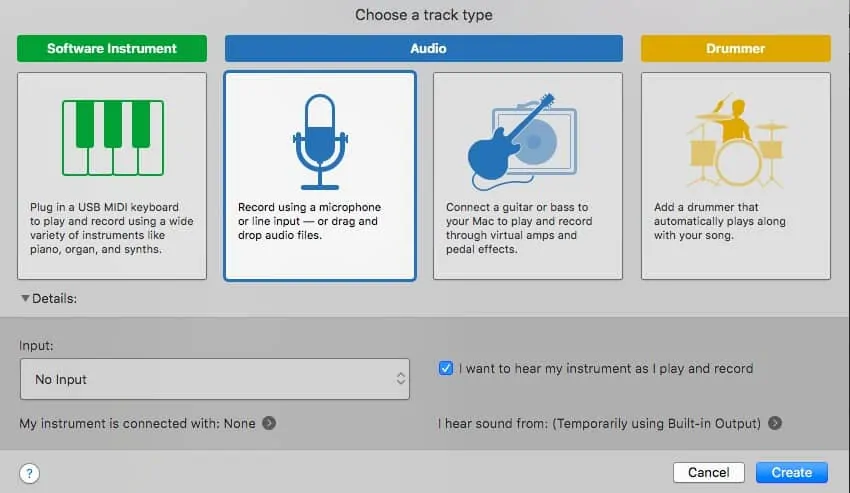
To record through a microphone, click the + in the top left corner of your track list to create a new track. Even though you’re recording guitar, click the microphone icon to open an empty audio track, and check the box that says, “I want to hear my instrument as I play and record”.
This turns the “monitor” on. By doing this, you can move the mic around in front of your speaker to find a sound you prefer, and you can test the sound by listening to the difference in mic position through a pair of headphones in your project. Some artists prefer to have the mic really close for a tight sound—if you’re a metal player, you’ll utilize this method for chugging or djenting. An example of the mic sounding like it’s very distant from the amp is in John Mayer’s solo for his song Something Like Olivia. It creates the sound of a genuine room reverb and can add a more human aspect to your playing. Find what works for you and get creative!
When recording with a mic, be sure to turn your amp volume down low enough where the signal (the sound going into the project) doesn’t clip. Clipping is the term for when your instrument is too loud and the bar on your track goes from green to yellow to orange/red. If your instrument makes the bar turn red, back off the volume on either your amp or the track. Don’t get carried away!
This photo shows where you can enter the tempo and the key you’re playing in. This step is optional, and can often just take up time if you only plan to get the basics of an idea down. If you really want to commit to this project, you can enter this information to make your project easier to work within. If you don’t know the tempo, there are websites where you can “tap out” your tempo. Tap the spacebar in the groove of your idea and the website will identify your tempo for you. To the right, you can turn the “count-in” feature on or off, which gives you a one bar count-in so you can get in the groove. You can also click the metronome icon to turn your click on or off.
Now that you’re ready to record, you can either click the Record button at the top of the page or hit the “r” key. To stop recording, you can hit the spacebar. GarageBand allows you to create as many new tracks as your computer can handle, and once you hit a certain point your computer will become frustrated with you and try to give up. Don’t overload your CPU, and don’t forget to save everything.
Although GarageBand is user friendly, there’s still a lot to know! The possibilities are virtually endless for a beginner, but once you know the basics, it becomes easier and easier to learn as you go. GarageBand has the reputation of being too basic, meaning that professionals don’t respect the program for what it is. Well, of course it’s basic, but nowhere in the rules does it say that music production has to be difficult for it to be high quality! Ultimately, the artist determines the quality of the music, not the program.
Now that you can navigate through GarageBand, go make some quality music!
Is there anything we missed in this walkthrough of GarageBand? Engage with us and let us know.


