Relicing guitars is a popular trend that’s only growing more common. Of course, the “natural” — and best — way to relic a guitar is to buy your axe new and simply play it for decades! Over time, it will pick up dents, dings, and scars that come together to create a stunning vintage look.
However, not all players want to wait for so long to get the look they love. If you want your guitar to look like a beautiful road-worn artifact but don’t have the patience, you’ll need to do the job yourself. And despite the widespread myth, dragging your guitar behind your car won’t relic it, it will just destroy it.
This article walks you through a few of the steps to “artificially” relic your guitar with tools. It’s important to know that this process is more of an art than a science — there’s no guarantee of success! But to age your guitar without putting in the years or miles, this is what you’ll need to do.
Before you Relic
You should never jump into a relicing job without any prior planning. Pay attention to these steps before you relic to make your project as successful as possible.
Before you get out your sandpaper, files, and saws, consider whether or not you really want to relic your instrument; there’s no way to guarantee that it will look the way you want it afterwards and there’s certainly no way to undo any damage once you’ve started!
You should also know that relicing is controversial in parts of the guitar community. Certain players, especially older ones who have naturally reliced guitars over years of use, may look down on newer guitarists who try to recreate the look artificially. Whether fairly or not, you may be judged for relicing your own guitar, particularly if your playing isn’t up to standards.
Of course, many other players absolutely love a beat-up, old-looking guitar — and a good relic job will always win much more support than a crappy one. As long as you’re confident in your choice and happy with the look, there’s no reason to pay attention to the minority of players that disagrees.
If you love the reliced look, start out with a cheap guitar that you don’t care too much about. Even if you have to buy a beater model to practice on, it’s worth the extra expense. The practice will be valuable if and when you choose to relic your favorite instrument.
Plan Where to Relic
Once you’ve chosen a guitar to work on (hopefully a guitar you don’t care about if this is your first relic job!), it’s time to plan out where you want to do the relic work. Skipping this step will make your finished product look sloppy and obviously fake; plan carefully to end up with a more convincing result!
Basic Locations
Certain areas of the body are obvious targets for relicing. The places that your hands rest when playing — usually the neck and bridge — should be your first locations. The goal is to duplicate natural wear, so you’ll also want to simulate chips, dings, and dents that an old guitar might have picked up throughout its life.
Areas like the input jack and bottom edges of a guitar often receive a lot of damage from drops or pokes. Over time, many players rub away at the finish towards the back of the guitar where their forearm makes contact with the body. You could even relic the fretboard itself to simulate years of exposure to strings and oil from your fingers.
Personalized Ideas
Beyond the obvious targets, you should also think about your own playing mechanics. Adding in a couple of personal touches can make your relic job seem more authentic and true to you rather than the haphazard work of a random player.
Playing your axe is the best way to find unique locations for potential relic marks. Examine your motions carefully and find some personal touches — do you rest your pinky next to the bridge? Do you pull your thumb up around the edge of the neck as you fret chords? Do you strum across the highest frets of the neck, like Keith Richards?
Once you’ve identified your quirks, think of creative ways to show those traits in your relicing. For example, you might wear away the finish where your pinky rests, as though it’s been moving there for years. If you fret chords with your thumb, you could sand off the fretboard binding or file down the edge of the neck on that side. You could also cut or chip at the last couple of frets on the neck to make it look as though you’ve done damage with your heavy strumming.
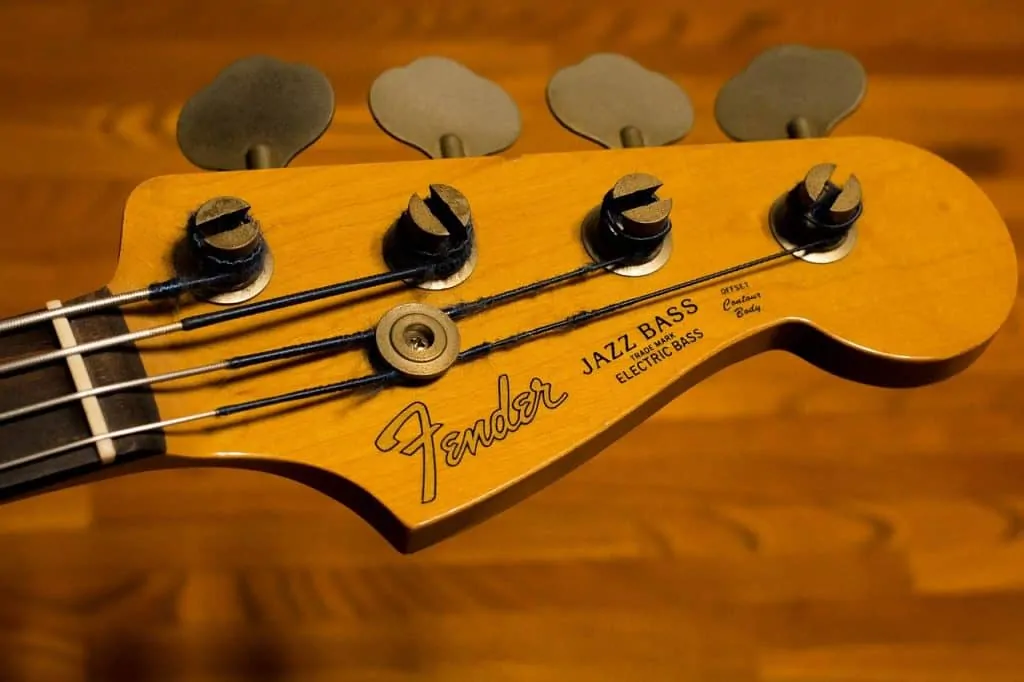
Extra touches, like the tarnished gears on this Jazz Bass, can often make the difference between a mediocre relic job and a fantastic one.
Extra Touches
While large parts of a successful relic job require you intentionally damage your guitar, certain elements demand much more care and attention to detail. These “extra touches” aren’t physical in the same sense as sanding off the finish or chipping the paint around an input jack, but they’ll make a major impact on the perceived authenticity of your final product.
Finish
Finish checking is the most important extra touch you’ll need to take care of. It’s the signature sign of a well-aged nitrocellulose lacquer finish. Besides, many players love it for the look alone. Unfortunately, the checking will only develop on guitars with a nitro lacquer finish — no matter how hard you try to artificially age the paint, a urethane finish will look shiny and new.
Most new guitars, particularly inexpensive ones, use a urethane finish. Before you try to create any checking or lines, go to the manufacturer’s website to see whether or not the guitar is finished with lacquer. If your guitar does use urethane, there’s need to panic! You can still use a couple unique methods to create a reliced look and feel for guitars finished with urethane.
Hardware and Electronics
Brand new hardware can ruin any relic job — bright and shiny metal sticks out awkwardly against a beat-up body. Don’t overlook the pickups, bridge, tailpiece, and pickguard on your guitar when you begin to relic it.
Thankfully, the metal parts on your guitar are some of the easiest things to age. As we’ll discuss later, you can get the job done with some techniques that are almost totally hands-off. As long as you have a bit of wiring or soldering experience, relicing these metal parts is a cinch.
If you’ve never worked with guitar electronics before (or done any wiring or soldering work), it might be a good idea to practice a bit before popping out your guitar’s pots and pickups. While in a perfect world you could successfully relic your electronics in one piece, in practice you’ll need a bit of knowledge to fix anything that goes wrong.
If you don’t feel comfortable messing around with your instrument’s electronics, it’s best to leave them undamaged and to only relic the non-electronic pieces of hardware. In most cases, the pickups alone won’t be shiny or new-looking enough to derail the look of your relic job. If you can’t get over the contrast, you can always try to find a professional guitar tech to do the work for you after you finish the rest of your relic process.
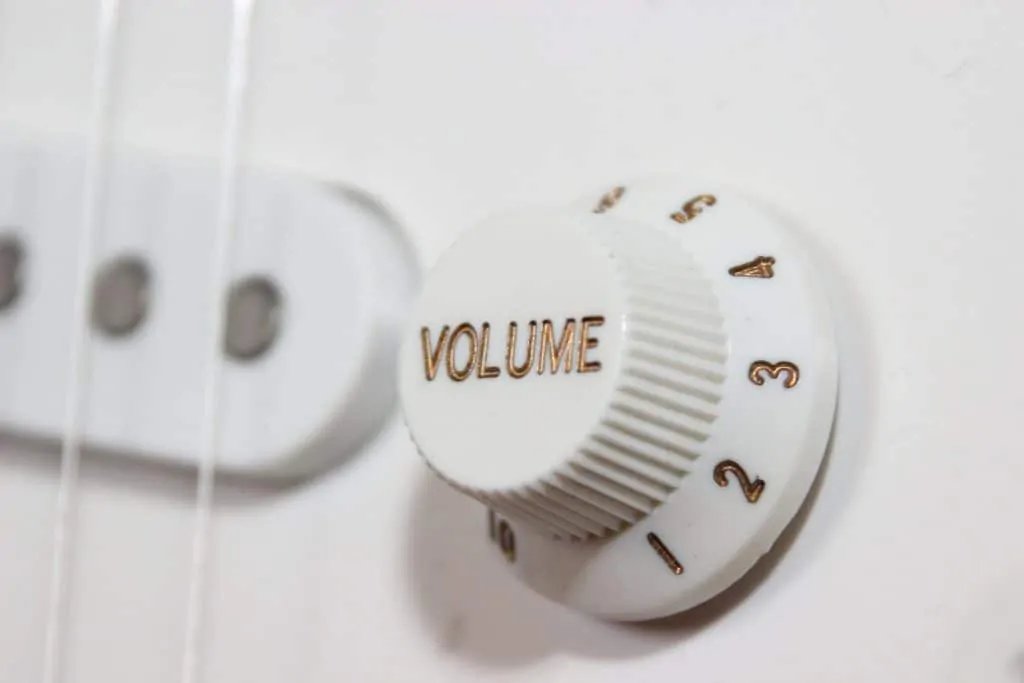
A good-looking set of vintage knobs can transform a modern instrument into a classic one without much effort.
Knobs
Knobs are an important part of any reliced guitar for their feel as much as their appearance. It’s common for relicers to sand down the finish around their knobs to simulate years of twisting and adjusting the dials during performance.
If you want the knobs themselves to look vintage, though, you can use multiple different strategies. Some players prefer to age their knobs along with the rest of the hardware for a more uniform look.
However, certain guitars have evolved and changed throughout the years and the knobs used on vintage models are different today. In those cases, players often buy sets of vintage-style caps from other dealers and fit them on their axe. These knobs will look and feel the part and don’t require any extra work on your part. If you need the perfect reliced look down to the smallest details, you shouldn’t ignore the knobs.
Headstock and Tuners
Though it’s difficult to change aspects about your guitar’s headstock like the shape or logo to match vintage specs, there are other adjustments you can make to give it some more character. First, you should focus your efforts on the hardware that goes through the headstock: tuners.
Like knobs, tuners are a seemingly minor detail that make a reliced guitar look so much more authentic. A shiny modern-style set of tuners on a guitar that looks beat to hell is a surefire example of an artificial relic job.
If you want to fix the problem, you can either age the set along with the other hardware components or swap them out for a package of vintage-style tuners. While aging modern tuners might not copy earlier styles exactly, it will have a bit more character and will blend in well with the color and feel of all of the other metal parts on your guitar.
Vintage-style tuners, meanwhile, are better if you’re chasing the exact specifications of a past model year. Like the vintage knobs we mentioned above, these tuners also save you time — just be aware that you might need to age these tuners anyways!
Finally, you can use the surface of the headstock itself to add a bit of flair to your relic job. Many famous players, most notably Eric Clapton, have stuck cigarettes vertically behind the nut on Fender-style headstocks while they play. Over the years, this can create a series of cigarette burns on the top of the headstock between the nut and the first tuning peg.
It’s up to you whether or not to try and recreate this look — some people love it, others hate it. However, it’s certainly a more personal and unique touch than some other relic strategies — and it doesn’t take much effort to give it a try.
If you play the bass, you can copy many of these tips. Just be careful not to go too hard on the strings and tuners, which are under a lot more tension than the strings on a guitar! This will also depend on which type of bass you play: a budget bass, for example, won’t be as scary to knock around as a five-string bass.
Likewise, if you play 12-string guitar you’ll also need to adjust your process a bit. The basic tenets still apply, but you’ll need to be particularly careful so as not to damage the strings or carefully ordered tuning pegs.
How to Relic Your Guitar
Once you’ve finally figured out everything you want to do, it’s time to sit down with your guitar and get down to work. These pieces of advice are designed to guide you through a completely independent relic job. Remember, though, that there’s no shame in getting someone to help you!
Like we mentioned at the beginning, relicing is an art rather than a science. It’s still impossible to predict exactly how the wood of your guitar will react to chips and scratches, blowtorches, or other rapid changes in temperature!
If you get in over your head when relicing your guitar or just want someone to check your work, it’s always a good idea to find a guitar tech and ask him for advice with your more advanced projects. It could save you a lot of heartache (and money) down the line.
Prep Work
When you sit down to relic your guitar, your first priority should be keeping the instrument safe. Certain relic techniques have the potential to damage your axe, particularly if the neck and body are under high tension from the strings.
To alleviate the tension, you should detune and cut the strings off of your guitar before you start. While you’re at it, it’s also a good idea to remove every piece of metal hardware you can. While you should remove the pickguard and electronics if you know how to deal with the electronics, you can also cover them with masking tape if you don’t feel equipped to remove and replace the wiring.
Place the metal parts in an organized pile and set them aside to relic on their own. You can separate the neck from the body at this stage if you’d like, though this step is only possible for guitars with bolt-on necks.
You should keep your guitar on a workbench or another flat, stable surface whenever you relic it. You can sit in your practice chair while you work to give yourself a comfortable platform. Like we mentioned above, make sure to keep all of the parts organized at all times! While it may seem simple to re-arrange everything with the memory fresh in your mind, struggling to reconstruct the look of your guitar after relicing it can suck the fun out of the relicing job and delay you from seeing your final result.
It goes without saying that you should also have any and all the tools that you plan on using ready before beginning. Keeping everything at your fingertips makes it easier to complete your work as quickly and efficiently as possible. The less time you spend searching for tools, the less time your axe spends without strings on. This includes basic maintenance tools like a good peg winder. Just in case, you’ll also need to learn how to change strings before you start relicing your instrument.
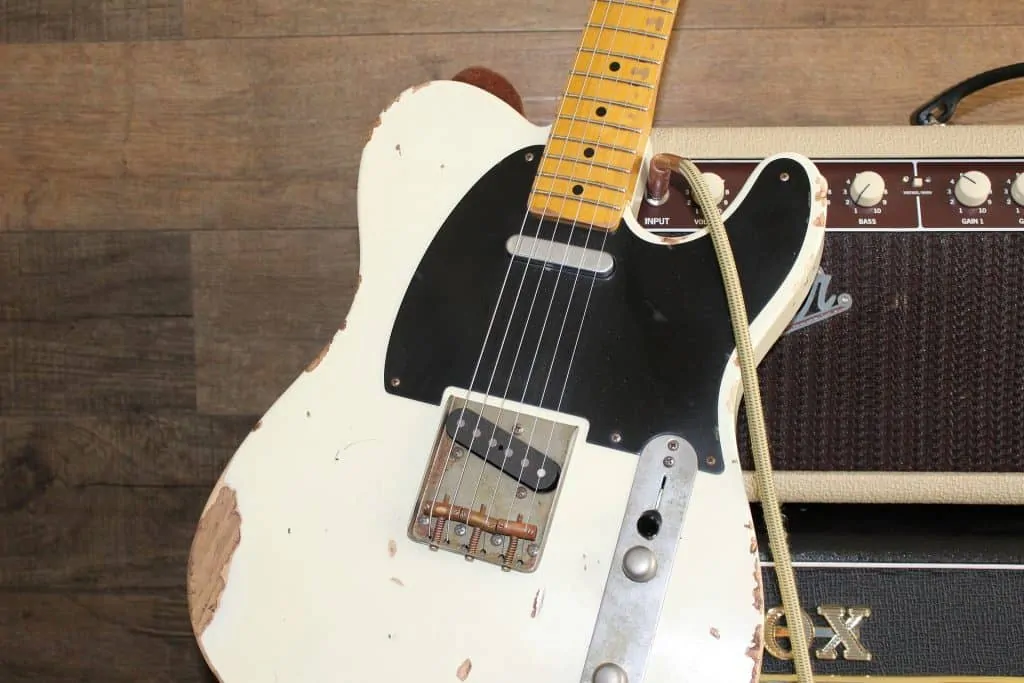
When done properly (like on this Telecaster), heavy relic jobs with sanding and buffing can transform your guitar into a completely unique piece of art.
Relic Work
After you’ve gotten your axe ready to relic, you can begin with the big jobs: dents, scratches, and finish wear. How far you take this step depends on how heavy of a relic you want — some players go crazy, while others are more conservative and prefer to add lighter touches later in the process.
To create finish wear, you should grab some sandpaper or other abrasive tools. The particular grit level depends on how much of the finish you want to cut through. Sandpaper is designated by numbers; lower numbers feature a coarser grit and work better for heavy relicing. You can use higher numbers, on the other hand, for fine touch-up work or on minor patches that coarse grit may damage.
Remember that you can only use sandpaper to wear down your guitar if your instrument has a nitrocellulose finish! Polyurethane finishes are highly resistant to sandpaper and similar materials — rather than ending up with a beautiful relic guitar, you’ll just end up with a mess.
If you’re not sure which finish your guitar uses and you can’t find any information to answer your question, try sanding an inconspicuous area of the body to see whether or not it wears down at all. A urethane finish will resist the sandpaper, while a nitro finish will rub away with some elbow grease.
Even if your test comes back inconclusive, you may be able to discern your guitar’s finish just from your prior experience with your axe: nitro finishes are more delicate than urethane ones and often wear a bit in the course of normal playing.
Sanding, Buffing, and Polishing
If your guitar has a nitrocellulose finish and you’re still confident that you want to relic it, you can go ahead and get to work! Your first step should be to mark the areas you want to sand on your guitar’s body. Freehanding your relic without evaluating the look of it beforehand is a recipe for disaster.
Once you’ve established the areas you want to sand down, use different grit levels of sandpaper and wet sand the body to rub down the finish in a reliced pattern. You should keep the grit levels rough at this initial stage; numbers in the 800-2000 range will work well. Of course, this will vary depending on how heavy of a relic job you’re after. Adjust the numbers according to your preferences.
There are few things more ugly than large patches of wear with abrupt transitions into a perfect factory-new finish. Relicing your guitar like this is a dead giveaway of a homespun relic job, and will take all of the mojo out of your axe. As you wet sand the finish, make sure to “blend” the grits together for a more natural wear pattern. Your goal should be to make the transition from exposed wood to untouched finish as smooth and natural as possible.
After you’ve sanded the finish down how you want it, you may find sanding lines on your guitar. To eliminate these and make your relic look much smoother overall, you should buff and polish your axe. You can use high-grit sandpaper for this (between 3000-5000 grit or higher).
Chips, Nicks, and Dents
Beyond the standard “play wear” relicing, many players also add in some strategically placed dents to emulate years of drops, falls, and accidents. These are optional, and you can always lighten up your touch if you’re worried about harming your instrument. However, a couple of added marks will go a long way towards making your relic job seem more realistic.
Blunt objects are best to scratch and dent your finish. If you can, use items that might actually cause chips in real life — say, an input jack or belt buckle. Then, knock them into your guitar at locations where they would hit you instrument if you played it normally.
The exact amount of dents you create is up to you, but remember that you want to keep your relic looking natural! Three dents give your guitar character and flair, but 30 just make you look careless as an owner. Seriously, who smashes an input jack into the body of their guitar 30 times on accident?
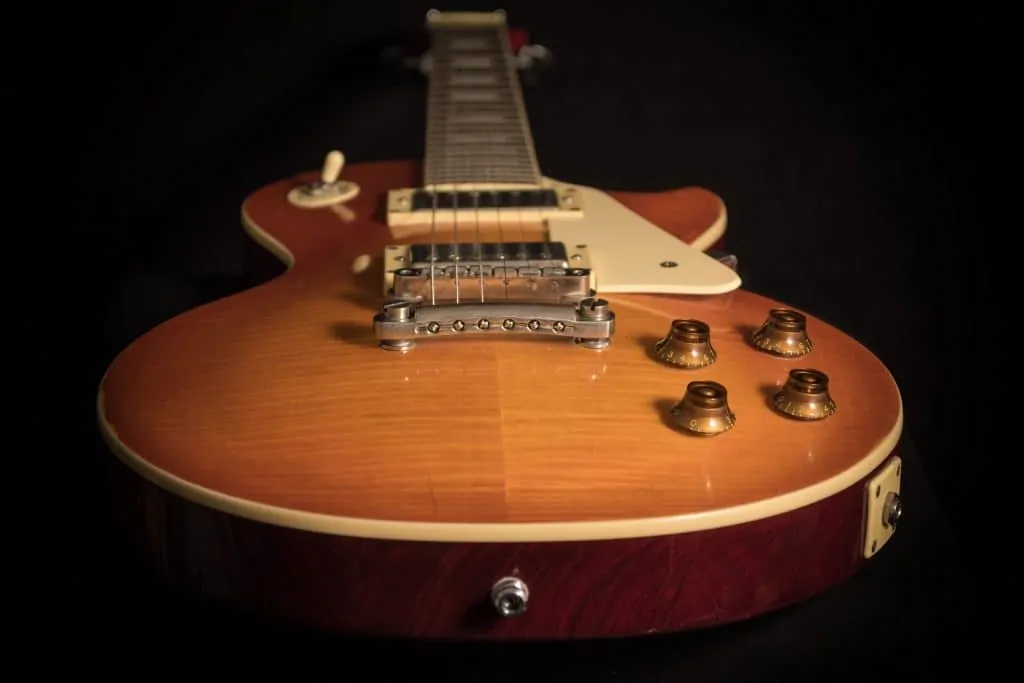
Les Paul guitars are particularly well-known for their brilliant finish patina. This can be difficult to acquire in a short time, but the results are worth it!
Finish Patina
Even after you’ve sanded down parts of your guitar, you may still be unhappy with how the rest of the instrument looks. If you don’t put the proper effort into your relic job, some parts of the instrument will look beat up while other parts may still retain their factory sheen.
Unfortunately, it can be difficult to get rid of this gloss and give your guitar a worn-in, dull look. A quick and easy way to get the process going is to leave your guitar exposed in the sun for a couple of days. Over time, all lacquer finishes will yellow and age, which will create that vintage patina so many players crave — leaving it in the sun can help speed up that process.
Before you throw your guitar outside in the heat to let it wither, make sure it’s in stable condition and that you haven’t left any delicate parts on it. While the sun can age the finish of your guitar, it may also cause the instrument to expand slightly, throwing your tuning and action out of whack.
Certain guitars are far more delicate than others, but you should be prepared to change the strings and adjust the truss rod when you bring your axe back inside. If you’re worried about cracking or splitting other parts, remove them before you place the guitar in the sun.
Checking
Ageing the finish in the sun can go a long way towards creating a true vintage relic. However, many other historic instruments possess a key feature you may forget: checking. These spiderweb patterns are a hallmark of prized old-time models; they give your axe tons of character. Unfortunately, they’re difficult to replicate the artificial way.
Lacquer finishes tend to check because of quick variations in temperature. These are difficult to recreate in a short timeframe, but with a bit of extra effort you can bring checks out of your relic as well.
If you have a week or more to get your project done (and enough space in your freezer!), try freezing your guitar overnight and setting it back out each day. As it thaws, the temperature fluctuation can cause the lacquer to check. This is more of an art than a science; you may see results instantly or it may take multiple tries before cracks begin to show.
For quicker results, you can also use more extreme methods to alter the temperature. As this article in Guitar Magazine discusses, you can heat up the surface of your guitar with a blow dryer or paint stripper gun, then cool it off by spraying compressed air out of an upside-down aerosol can.
Use the coolest setting on your heat gun for this technique, and don’t cover the entire body at once! Work in smaller chunks to ensure the best results.
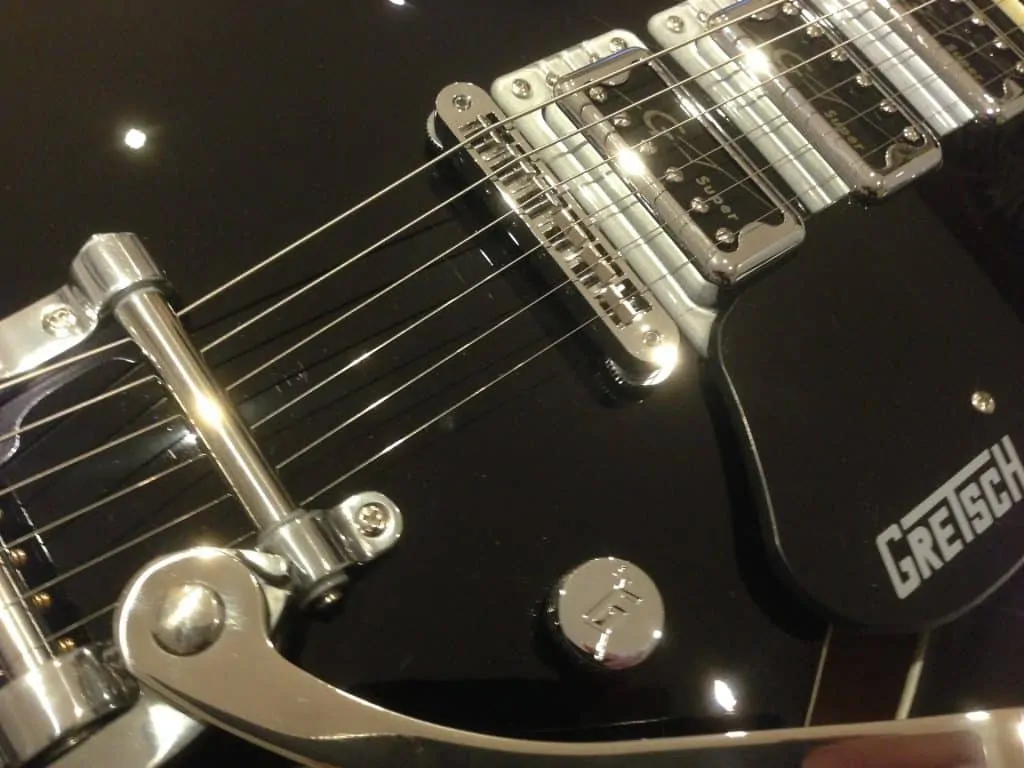
While these pieces may be small parts of your guitar, they’re absolutely essential to the look and feel of any relic job!
Hardware & Pickups
In the same way that a shiny gloss finish will stick out against sanded-down relicing on your guitar, gleaming pickups and hardware will look awkward and out of place against a beat-up body. Thankfully, the metal components on your guitar are easy to relic — you just need a bit of technical knowledge to get them on and off of your instrument.
Taking the hardware and pickups off of your guitar isn’t essential to relic them, but it will help you get a more detailed finish; if you don’t need to worry about damaging your guitar’s body you can use more precise techniques on the hardware. Many players feel squeamish about pulling different items off of their instrument. Most hardware can be removed and put back on without any trouble, so there’s no reason to worry! Just be careful and you should be alright.
The major exceptions to this axiom are the pickups. Messing with the wiring may be a daunting task for players without any soldering or wiring experience. Because plenty of things can go wrong here if you’re not careful, it’s best just to leave your pickups in your guitar and not mess with them too much.
If you do feel comfortable doing some soldering work or know a friend who has experience, removing the pickups will help you create a more accurate vintage look. Just make sure to take off the casing to relic and avoid damaging the pickups themselves!
Once you have all of your metal hardware and pickup casings, you can relic them a couple of different ways. If you want to add some scratches, use a file or some steel wool to add a couple of nicks. To rust the hardware, you can leave them exposed outdoors for a few days.
For similar results in a shorter time, you can also break out the chemicals. A diluted solution of bleach and water will do the trick to prematurely age all your metal hardware. The exact strength can vary, but many players recommend a solution of three parts water to one part bleach.
You can also use vinegar to achieve similar tarnished results. Place all of your metal components in a small container without a lid. Then, place the small container in a larger container with a lid. Pour some vinegar into the big container and close the lid, then let it sit for a few hours. If all goes well, you should get the look down!
Neck
The neck is a sore subject for many guitar relic fanatics. While reliced necks can look amazing, feel and playability are far more important to consider. Before you break out the sandpaper, practice on some cheap guitar necks to make sure that you like the effect and can replicate it consistently.
The back of the neck is a relatively safe place to do some relicing work. Replicating years of hand wear just takes some sandpaper, buffing, and polishing. You can follow a similar process to what you’d use on your guitar body. Relicing this part will be more difficult if the neck has a urethane gloss finish, but it’s not impossible — urethane finishes are thinner on necks than on bodies.
If you want the true reliced look found on guitars like Eric Clapton’s “Blackie,” you can relic the fretboard as well. You should only attempt this on guitars with maple fretboards — ebony, rosewood, and other materials are much more difficult to work with and don’t give the same visual contrast. To create fretboard wear, sand with lighter-grit sandpaper to replicate wear from the strings.
Don’t overlook the knobs and jacks when you relic your instrument!
Summary
Relicing your guitar is an outstanding way to personalize your instrument. Players prize reliced guitars for their character and visual flair. However, few things in the guitar world look uglier than a bad relic job!
Follow our guide to relic your guitar correctly and avoid creating a horror story. Remember to be cautious and plan out every mark you make before you sand away at your instrument. With just a couple of tools and some basic knowledge, you can turn a stock guitar into a completely unique and eye-catching axe.

