Power chords are the key to unlocking many iconic guitar songs across genres and decades –– from Buddy Holly to Black Sabbath to Blink-182.
The best part is, they’re not even that hard to play. They’re nowhere near as finger-cramping as barre chords. They’re even easier to fret than some open chords (looking at you, G7)…
With the right chord shapes and some handy practice songs to guide you, you’ll be playing power chords like a pro in no time! So tune up, give your fingers a quick stretch and let’s get started.
Contents
First Things First
Before we dive into the fun stuff, let’s talk about what makes power chords different from other types. Once you know how they work, the different voicings (shapes and fretboard positions of a specific chord) we’ll look at will make a lot more sense.
What are they?
Most basic guitar chords are triads. They consist of three different notes stacked in thirds. In major chords, these notes are the root, the 3rd scale degree and the 5th scale degree.
Take the G major scale, for example –– G A B C D E F# G. To make a G chord, you would need to play a G note (the root), B note (the 3rd) and D note (the 5th).
For an open G in standard tuning, you would get these notes by playing
- The 3rd fret of your 6th (low E) string
- The 2nd fret of your 5th (A) string
- The open 4th (D) string
You can stack additional notes on top of these by playing your open 3rd (G) string, the 3rd fret of your 1st (high E) string and either the 3rd fret or an open 2nd (B) string.
Even though the root and 3rd are repeated in different octaves, this G is still considered a triad. After all, it still contains only 3 notes from the G major scale.
Power chords, on the other hand, are dyads. They ditch the 3rd scale degree, playing only the root and 5th. For this reason, they’re sometimes called 5 chords.
For example, a G5 is just a fancy name for a power chord made from a G root note and a D 5th. Depending on the shape, you might also play another root note (or more rarely, a 5th) at a higher octave.
This G power chord contains the root on the 3rd fret of the low E string and the 5th scale degree on the 5th fret of the A string.
At this point, you might be wondering why we play the root and 5th together instead of the root and 3rd. Technically, you could play just the root and 3rd. But it would sound incomplete as a chord on its own.
In diatonic scales like the major and natural minor, the perfect fifth (the interval between the root and 5th) is the most consonant (harmonious) interval, after the unison and octave. This is why power chords sound so kick•ss –– even without the 3rd scale degree.
If you know music theory, you’ll know that the 3rd gives chords a major or minor quality. If it’s a natural 3rd (ex: B in the G major scale), it creates a major. If it’s a flattened 3rd (ex: Bb in the G major scale), it creates a minor.
Power chords don’t have 3rds, so they aren’t major or minor. Instead, they’re called indeterminate. This flexible sound makes them a favorite in quick-fire chord progressions.
Why use them?
Some experts trace the origins of the modern power chord to Sun Studio in Memphis, where it was used by blues guitarists like Willie Johnson. Today, you can find them in almost any genre (“Sun Studio on Union Avenue” by JeremyA / CC BY-SA 2.5).
They may not sound as full as triads. But don’t be fooled by their simplicity! Power chords still pack a punch, for four main reasons:
- They’re versatile. You can substitute them for any major or minor voicing.
- They’re moveable. You can change between chords just by sliding the same shape up and down the fretboard.
- They sound great with distortion. While open chords sound messy and chaotic, power chords tap into that rich, high-gain sound. This makes them a favorite in rock, punk, metal, blues and other genres.
- They sound great on acoustic guitars. Although power chords are more commonly played on electrics, they do make an appearance in acoustic songs too. If you don’t believe me, listen to an MTV Unplugged album!
Basic Shapes
Now that you’re (hopefully) convinced that power chords are indeed worth learning, let’s look at the two most common types. They’re based on a moveable shape that you can slide to any fret, using either the 6th or 5th string for your root note.
First things first, you’ll need to memorize the notes on these two strings. Otherwise, it will be a struggle to find your root.
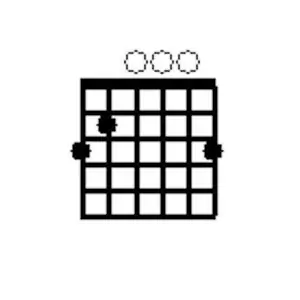
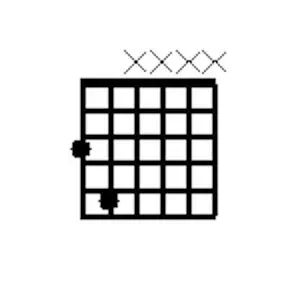
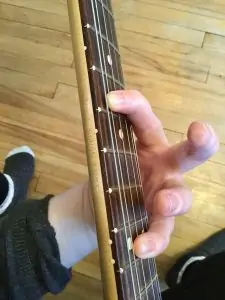
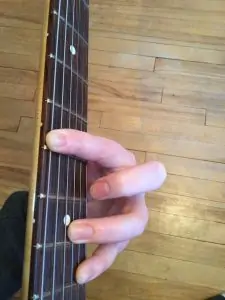
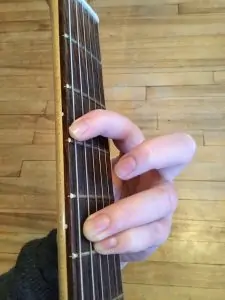
Once you have the root, fret it with your index finger. Then, add the 5th by placing your ring finger two frets higher on the next highest string. For example, on root 6 power chords, you would add the 5th note on your 5th string. On root 5s, you would add the 5th on your 4th string.
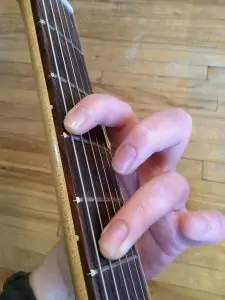
You can find this moveable shape, seen on the root 6 G5 (left) and root 5 C5 (right), in thousands of guitar songs.
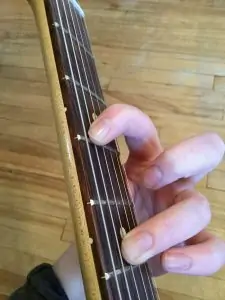
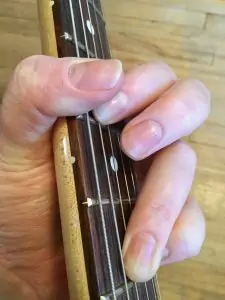
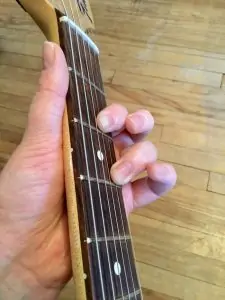
One common variation on this basic shape is to add the octave with your little finger. Simply place it beside your ring finger, on the next highest string. Or, you can barre both strings with your ring finger.
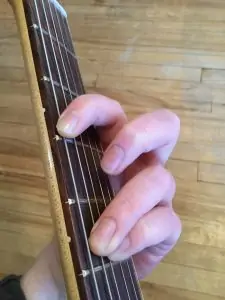
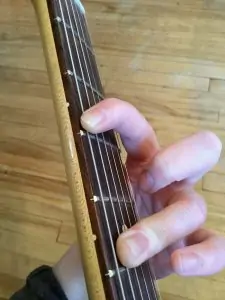
Personally, this three-finger variation (left) is my favorite shape. It gives you a fuller tone, thanks to the added octave. Plus, you don’t have the hassle of barring (right). But it does require some extra training for your little finger.
Another way to look at these moveable shapes is to think of them as “incomplete barre chords.” After all, if you barred your index and added your middle finger one fret lower on the 3rd string (root 6s) or barred the 4th-2nd strings with your ring finger (root 5s), you would get a major voicing.
These shapes may seem like a stretch at the start –– especially if you’re a small-handed guitar player like me. The key is to practice fretting them a few minutes every day. Even by the end of the week, you’ll notice a big difference in your dexterity.
Another good idea is to start higher up the fretboard, closer to the bridge. The spaces between the frets are smaller here, meaning you won’t have to stretch as much. Then, you can slowly work your way down toward the nut.
If you’re still struggling, you might want to switch to light gauge strings. The lighter your gauge, the less pressure you need to apply to fret your notes. However, I would recommend staying away from extra and super lights. They tend to add too much twang to your lower strings.
Finger stretching aside, the biggest struggle when you start playing power chords is learning to mute your unwanted strings.
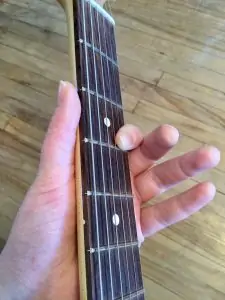
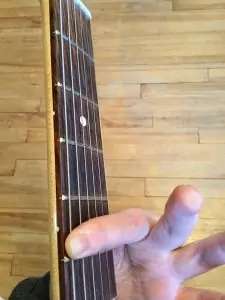
I find that the best way to do this is to fret on a slight angle. I flatten the tips of my fingers until they graze the next highest string. Then, I can strum more freely, without worrying about hitting the higher strings by accident.
On root 5 power chords, I also like to bring my thumb over the side of the neck to mute the 6th string.
Don’t forget to palm mute or add a string dampener (also called a fret wrap) if you crank up the gain! Otherwise, your power chords will sound too chaotic.
Variations
The root 6 and root 5 moveable shapes we just looked at are only the tip of the iceberg. There’s loads of other power chord variations you can use to spice up your riffs, including…
Rock and roll 6s
Once you’ve mastered the two-finger moveable shape, you can adapt it to a 5 chord-6 chord shuffle pattern. You’ve probably heard this rhythm in some rock and roll and blues rock songs…
Start by strumming your regular shape. Then, place your pinky two frets above the ring finger on the same string. This raises your 5th scale degree to a 6th scale degree.
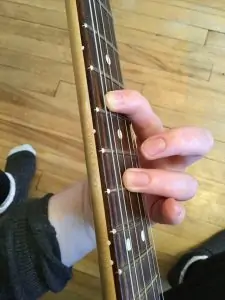
Try playing two counts of F5 (left) and two counts of F6 (right) in a shuffle groove.
It won’t be comfortable at first. But this extra note opens up some cool rhythmic possibilities for your 12-bar blues progressions.
Open position shapes
Another common variation is to play power chords in the same position as your open E, A and D chords. This is especially helpful when you want to switch between different chord types in the same song.
The full-octave open E5 consists of the open 6th string, plus a mini barre (or two fingers) on the 2nd fret of the 5th and 4th strings. The A5 has the same shape, but on the 5th-3rd strings instead. The D5 combines the open 4th string with the 2nd fret of the 3rd string and 3rd fret of the 2nd string.
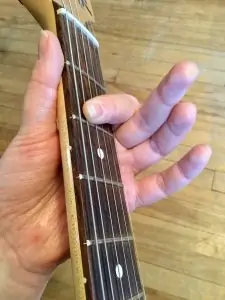
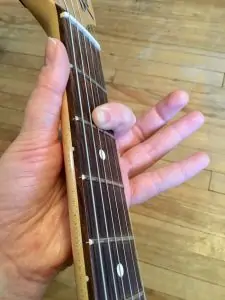
You can also play these chords without the octaves by removing your finger from the highest string.
If these three are the only power chords you’re using, it’s fine to fret them with your index (and middle) finger. But if you need to slide up the fretboard to play other shapes, it’s better to use your ring (and little) finger. This way, your index will be ready to fret the new root note.
Higher string shapes
Let’s say you want to move your root to the 4th string. If you leave the octave out, you can fret it the exact same way as the root 6 and root 5 shapes. But if you want to add the octave, you’ll need to raise your little finger by one fret on the 2nd string.
Root 3s are more like your basic shapes. Only, you’ll need to raise both your ring (and little) finger up one fret.
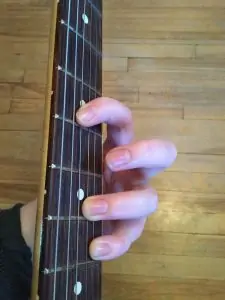
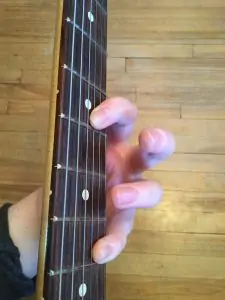
Full-octave shapes with roots on the 4th (left) and 3rd (right) strings. For the root 3s, you might want to barre the 2nd and 1st strings with your little finger.
Root 4s and 3s don’t pack a punch quite like the root 5s and 6s. But they’re a great way to liven up a basic progression.
You can also play 5 chords with roots on the 2nd and 1st strings. Because they’re treble-heavy, they’re not usually considered power chords. Instead, they’re just called dyads.
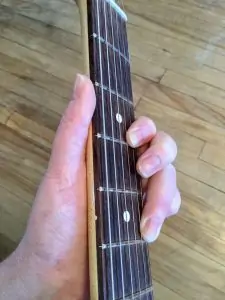
For a root 2 (left), you can play the 5 note on the 1st string by lowering your finger by one fret. For a root 1 (right), you can play the same fret on the 2nd string to put the 5 note in the base.
Drop D shapes
Still struggling with these shapes? One easy fix is to switch to Drop D tuning.
This means downtuning your 6th string one whole step to a D. The rest of your strings stay the same. So, from the 6th to the 1st string, your notes would be D A D G B E.
Because your 6th string is now one full tone lower, you’ll need to place your finger two frets higher than you normally would in standard tuning. This would put the root on the same fret as your 5th and octave. So, you can just barre across the three lowest strings with your index finger and voilà! You have a power chord.
A root 6 G5 in standard tuning (left) vs. Drop D tuning (right).
Of course, you’ll still need to fret your root 5s in the classic two- or three-finger shape. But Drop D is a great way to give your hands a break on root 6s. Better yet, it allows you to play a low Db5 and D5 that wouldn’t be possible in standard tuning.
Another cool thing about Drop D tuning is that you can stack additional root and 5th notes for a fuller sound. For example, you can add your ring finger two frets higher than the barre on the 3rd string and/or your little finger three frets higher than the barre on your 2nd string.
A G5 with two octaves and an extra 5th note.
Practice Songs
Now that you know how to play different power chord shapes, the next step is to incorporate them into your regular practice sessions. The best (and most fun) way to do this is by playing songs.
To start off, I would recommend substituting power chords for majors and minors in songs that you already know.
For example, you might know Bob Dylan’s “Knockin’ On Heavens Door,” which has a simple open chord progression of G D Am G D C. You could substitute these chords for a G5, D5, A5 and C5. For an extra challenge, try moving beyond the basic shapes, incorporating root 4s, root 3s and treble dyads.
Then, once you’re comfortable with the different shapes, you can start learning songs that really place them front and centre.
When I was a student, once upon a time, the first power chord song I learned was “Hitchin’ A Ride” by Green Day. The main riff is a root 6 B5 – A5 – Ab5 – G5 progression that repeats for (almost) the entire song.
Billie Joe Armstrong (Green Day’s guitarist) usually down tunes his guitar half a step to Eb Ab Db Gb Bb Eb. But this riff sounds just as good in standard or Drop D tuning.
Some other great beginner riffs to try out are “You Really Got Me” by The Kinks (F5 – G5) and “Smells Like Teen Spirit” by Nirvana (F5 – Bb5 – Ab5 – Db5).
To practice your rock and roll 6s, I’d recommend “Takin’ Care of Business” by Bachman-Turner Overdrive (root 6 C5/C6 – root 6 Bb5/Bb6 – root 5 F5/F6). And for open position shapes, you can try “Louie Louie” by the Kingsmen (A5 – D5 – E5 – D5).
<iframe width=”560″ height=”315″ src=”https://www.youtube.com/embed/VuRnofFtta8″ frameborder=”0″ allow=”accelerometer; autoplay; clipboard-write; encrypted-media; gyroscope; picture-in-picture” allowfullscreen></iframe>
Check out this video for more beginner-friendly power chord songs.
Final Thoughts
With their major/minor blending role, moveable shapes and distortion-loving feel, power chords are one of my favorite chord types to play on guitar. They’re the perfect example of how some of the simplest arrangements of notes can produce some of the most memorable songs.
The power chord shapes I’ve discussed in this guide are the most common ones you’ll come across. But the combinations of roots and 5s are endless! So don’t be afraid to experiment. You never know where you’ll find a cool new G5 voicing…

