Whether you’re dreaming of being the big EDM producer, or just want to know a few basics on producing electronic music on the weekend, there’s a pretty steep learning curve involved.
Don’t let that scare you off, though.
All we’re saying is that you need a capable guide to take you by the hand and teach you the basics of producing electronic music.
And that guide is, well, this guide!
We’re going to teach you everything you need to know about making electronic music, in 12 easy steps.
Let’s dive right in.
Contents
Step 1: Pick your DAW
The DAW (digital audio workstation) is the centerpiece of the modern production studio.
You can think of it as a tape machine, mixing desk, and collection of outboard gear, all in one.
Most DAWs even offer a bunch of software instruments and synths (like the ones we’ll be using to create electronic music very shortly), as well as loops and vocal hooks to use in your productions.
As with most things in the music world, you’ve got a lot of options when it comes to picking a DAW.
Some common production software include:
- ProTools
- Logic Pro
- Ableton
- Cubase
- Reaper
- FL Studio
I’m using Logic Pro X because I’m an Apple nerd, but you can follow along using any DAW of your choice, they mostly do the same things.
If you’re on a Mac as well, but don’t want to invest in Logic Pro X just yet, then I’d recommend checking out GarageBand.
It’s free and offers much of the same basic functionality.
Let’s start with a quick rundown of the main features you’ll find in DAWs.
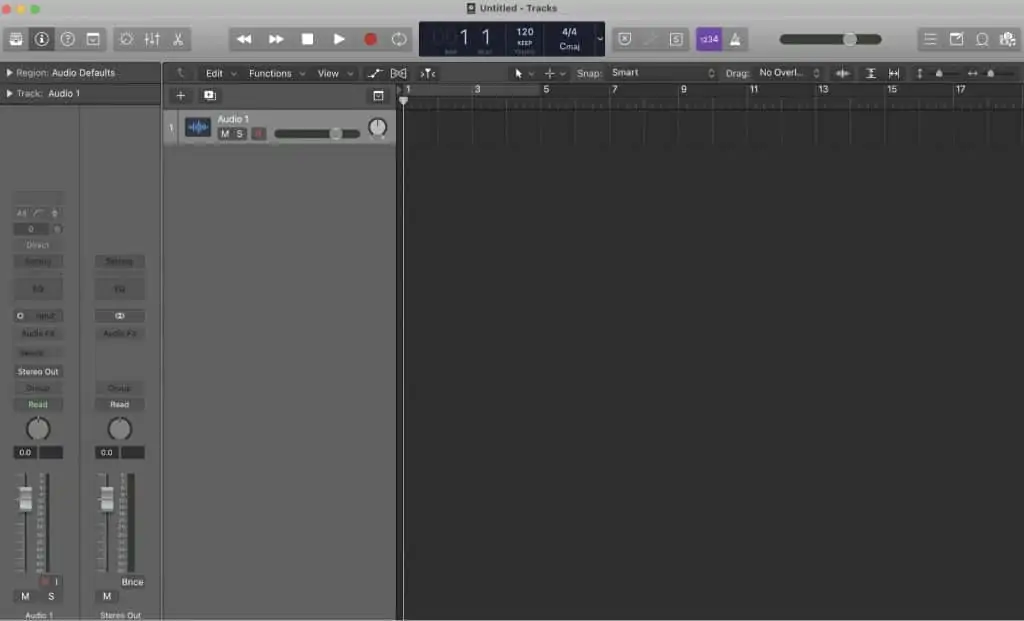
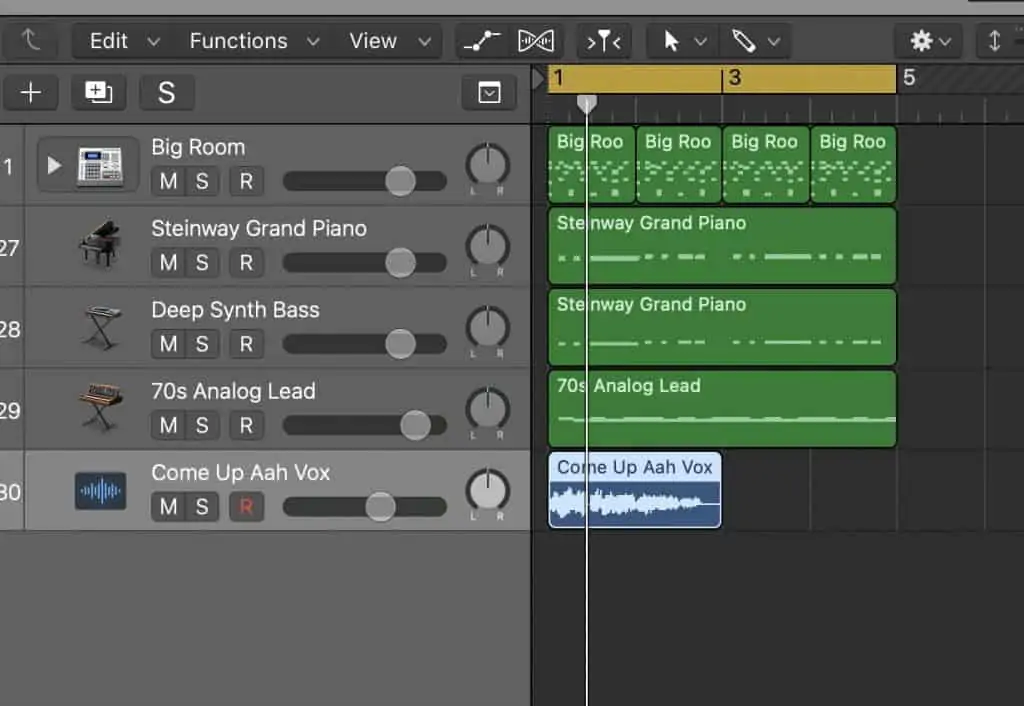
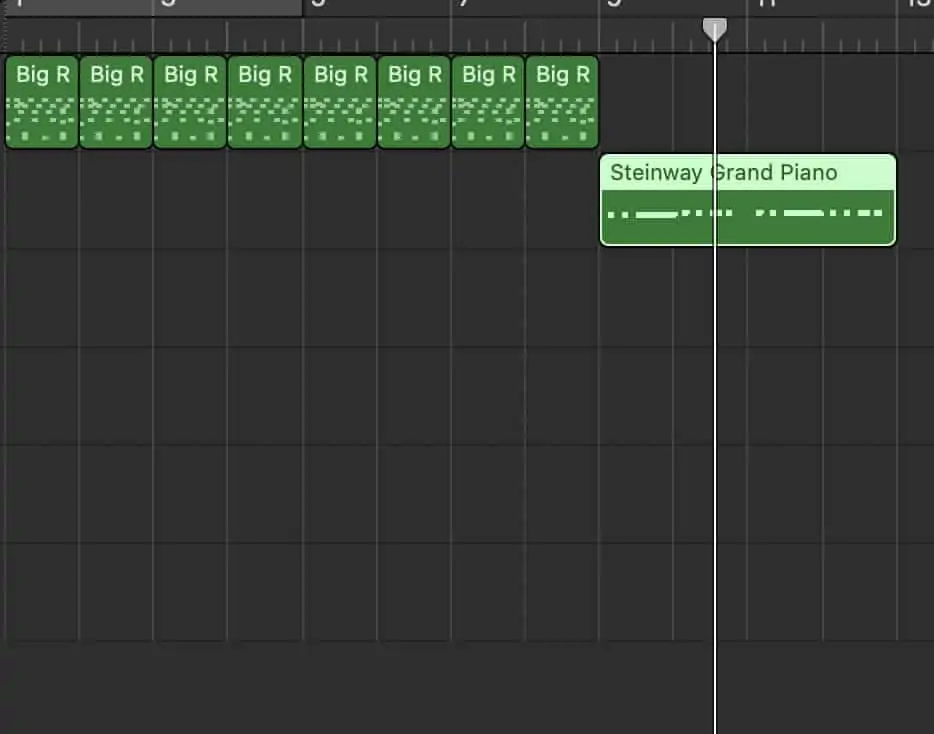
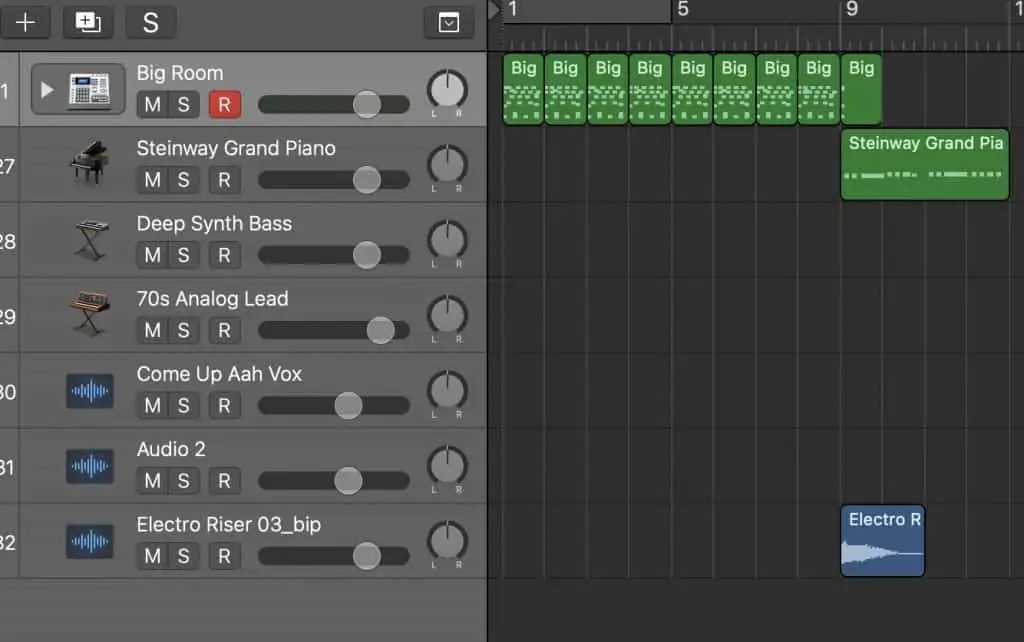
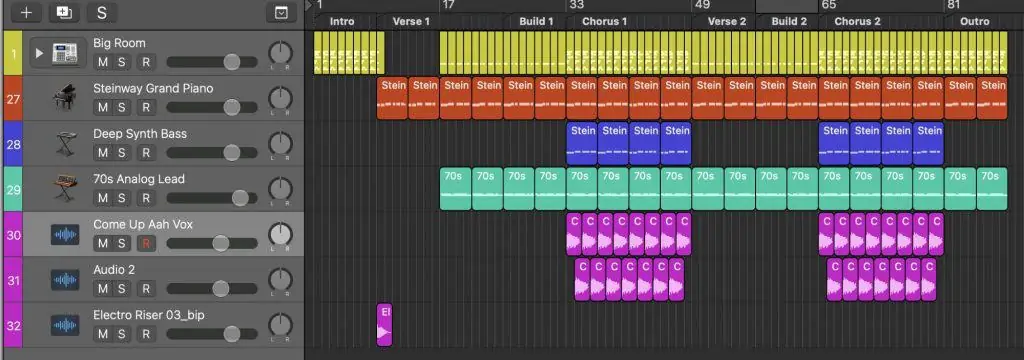
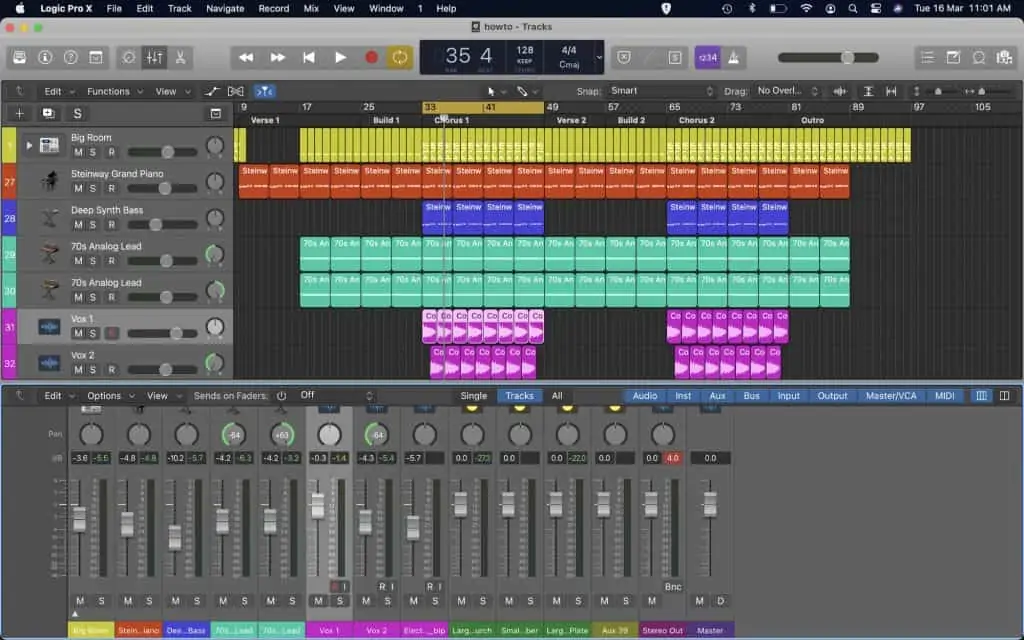
The arrange window is where your clips, recordings, and samples live:
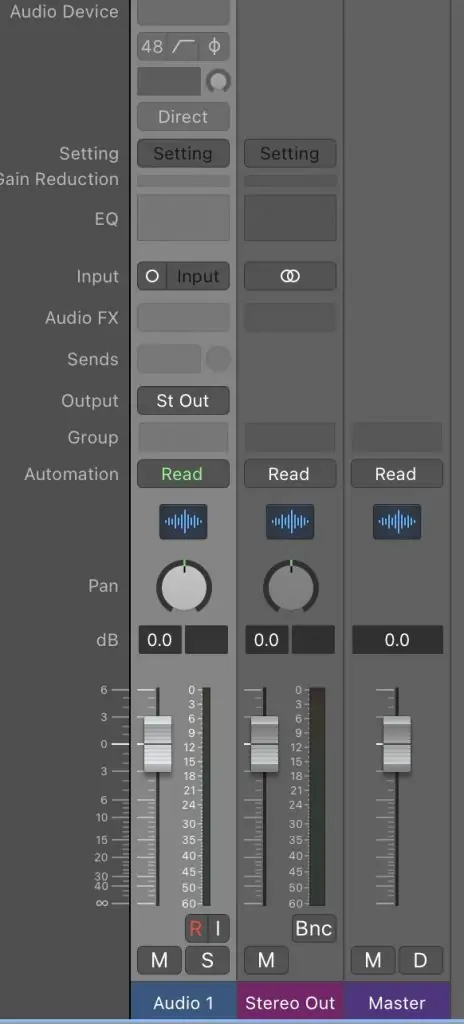
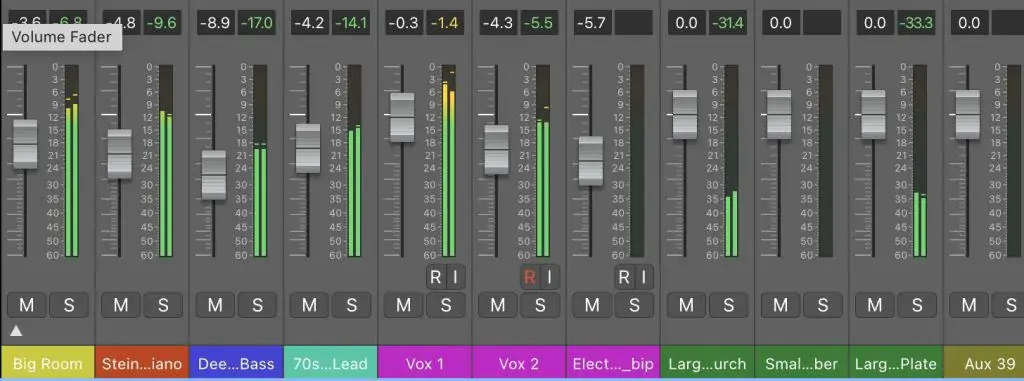
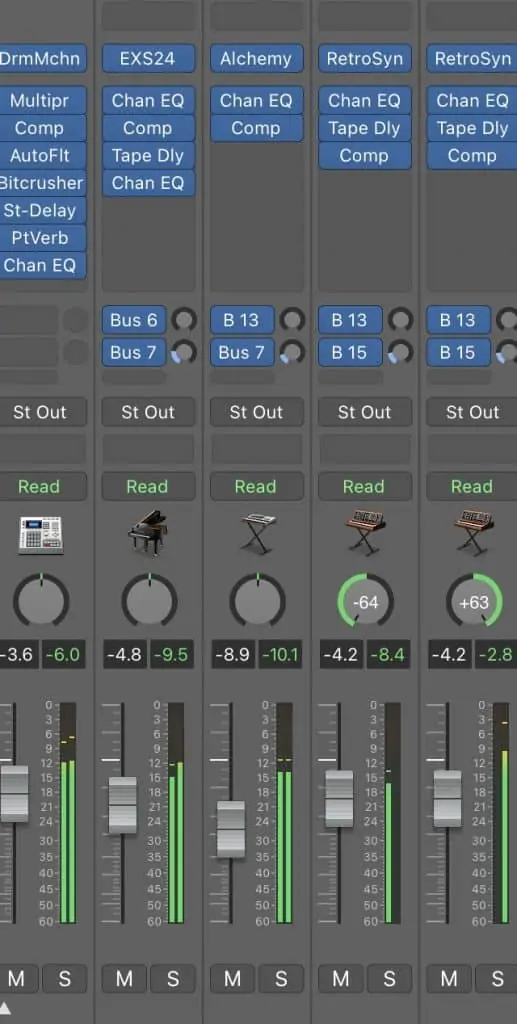
The mixer section allows you to adjust the level and pan of each track, and add plugins (more on all of this a bit later):
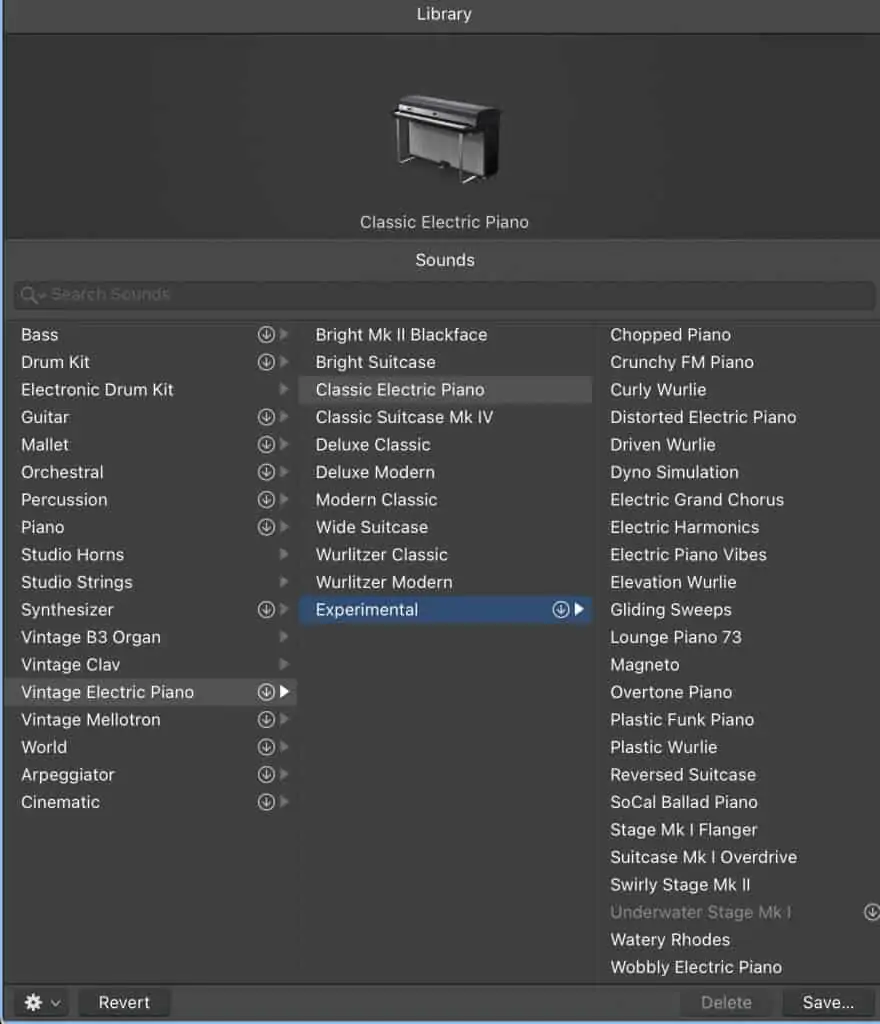
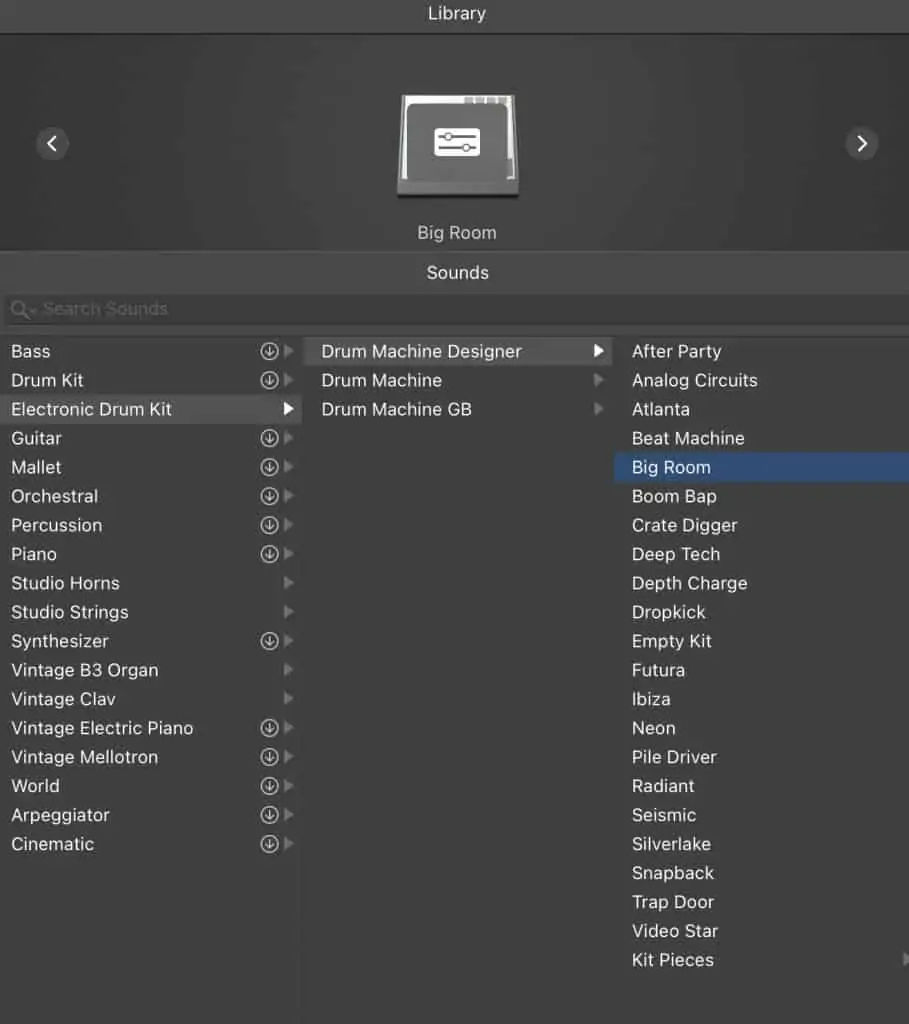
The instrument browser is where you choose your drum kits, synths, and bass instruments:
As long as you’ve got those three things, you’ve got a DAW that can help you in producing electronic music.
Step 2: Choose your genre
Electronic music isn’t a genre in itself. Rather, it’s a term used to describe a variety of genres that are produced electronically.
Before you begin, it’s a good idea to consider the type of music you’re aiming to create.
Common electronic music genres include:
- House
- Drum & bass
- Dubstep
- Lo-fi
- EDM
- Hip-hop/glitch-hop
- Future bass
- Trance
I’m going to go with a good old house feel on this track since that’s kind of the basis of a lot of electronic music, but you can do whatever you want.
Hell, create a new crossover genre if you feel so inspired.
Step 3: Grab your gear
Though electronic music is produced largely in the box (inside your computer), you’re still going to need some equipment to get the job done.
First and foremost, you’ll need a laptop or computer, which you’ve probably already got if you’ve gotten as far as finding a DAW!
There are a few other bits of musical equipment that are important, though.
Studio Monitors
Studio monitors are speakers that connect to your computer (usually via an audio interface) and allow you to listen to the music you’re creating.
They differ for consumer or hi-fi speakers in that they aren’t designed to sound good, necessarily. Rather, their aim is to sound true and natural. That means they reproduce what you’re creating without coloring it at all.
If you create electronic music on speakers that make your tunes sound good, then there’s a fair chance your mix won’t translate nicely, which means it might sound weird when you go to listen to it on other sound systems.
I’d recommend getting a set of 5” monitors like the JBL LSR305.
Bigger speakers will give you more low-end response, but they require a well-treated room to really take advantage of, so I’d be sticking in the 5” range.
Headphones
If you don’t have space for studio monitors, or need to produce music without making too much noise, then you can opt for a set of professional audio headphones.
Even if you do get some studio monitors, I’d recommend investing in a quality set of cans. It’s always great to have a second option for monitoring, and they let you understand the stereo field of your production in a different way.
I’d be going with the Audio-Technica ATH-M50x for the best middle-ground between price, comfort, and listening experience.
Audio Interface
An audio interface is a helpful little device that takes analog signals (like from a microphone) and translates them into digital ones that your computer can recognize.
It also does the opposite, taking the output from your laptop and connecting to your studio monitors.
You’ll need an interface if you plan on recording with a mic, or plugging in a guitar or bass direct, or of course, if you wish to hook up to some studio monitors.
If that sounds like you, I’d recommend going with the EVO 4 by Audient. This is the unit I’ve got, and it’s bloody awesome, not to mention compact and pretty damn affordable.
If you plan on doing absolutely everything in the box, and you’re just going to produce and mix on headphones, then you can probably get away without an audio interface for now.
Microphone
If you plan on singing or rapping over the electronic music you create, then you’re going to need a microphone to record it.
Even if you aren’t a singer, having a mic on hand can be a cool way to record random samples to modify and include in your productions.
If you’re aiming to keep things low cost, then you can’t go wrong with the Shure SM58.
If you’ve got a little more cash to spend, then I’d ball out on the SM7B. I love that damn mic.
Ready?
Now you’ve got all that shiny new gear, let’s plug it all in, power it up, and get to making some dope electronic music.
Step 4: Load up some instruments
Usually, when I’m producing electronic music, I’ll simply add instruments as they are required.
For the sake of this lesson, though, let’s load up a few software instruments that form the basis of an electronic track.
You’re going to need:
- A drum kit
- Some keys
- A synth lead
- A bass instrument
- A vocal hook
Drums
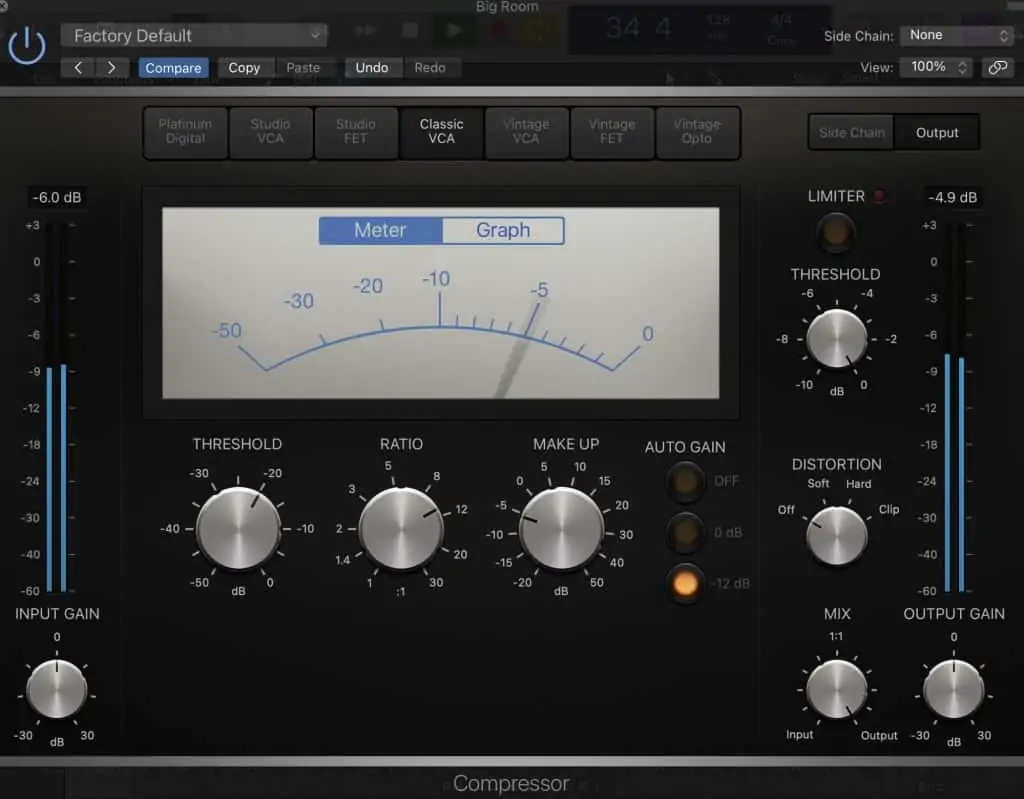
I’m going to go with the Big Room preset in Logic Pro X, for that, well, big room house sound.
Keys
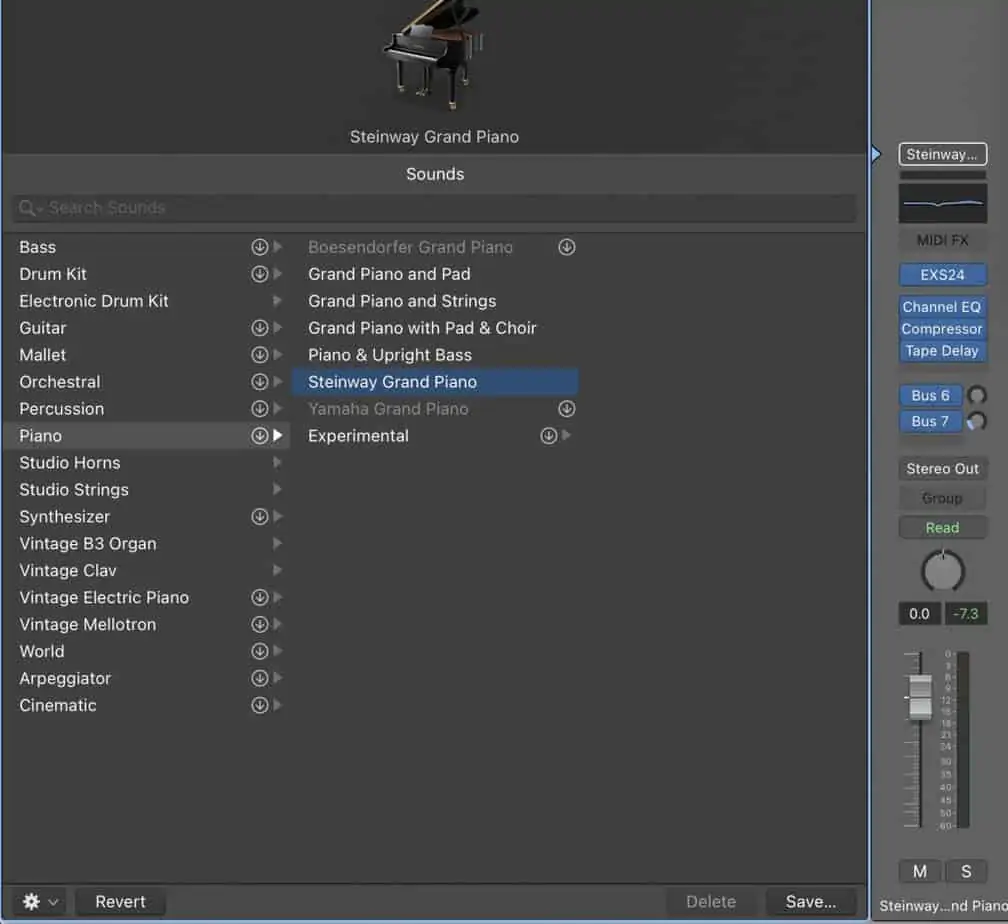
Logic Pro X has a tonne of different keyboard sounds. I’m going to load up just a plain Piano sound, which I’ll use shortly to plug in a few chords.
Synth Lead
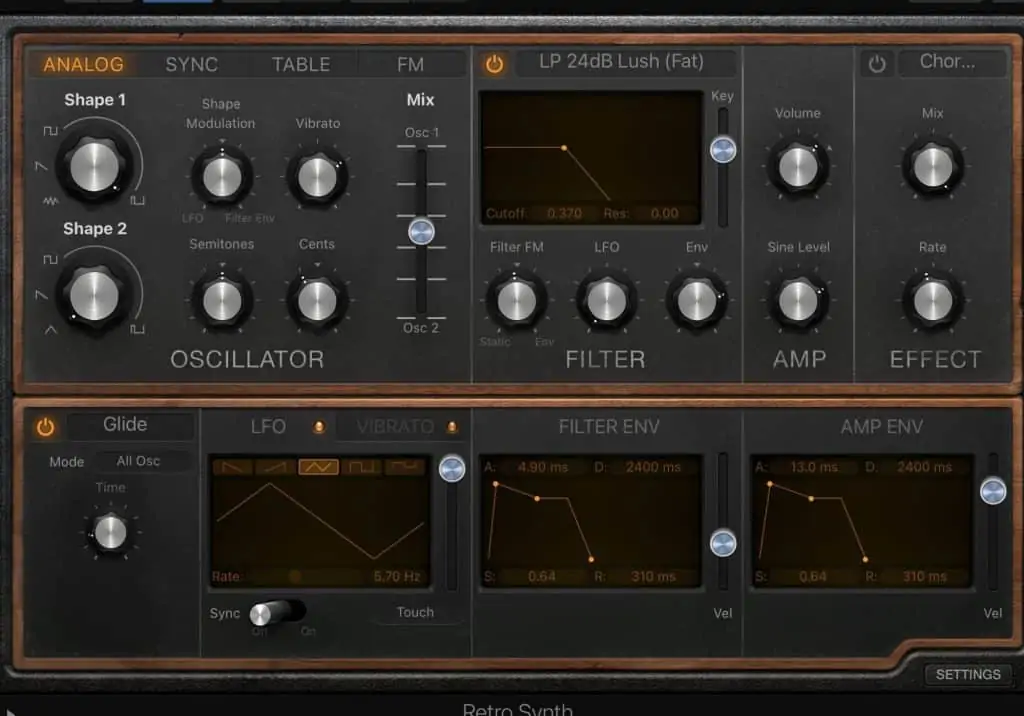
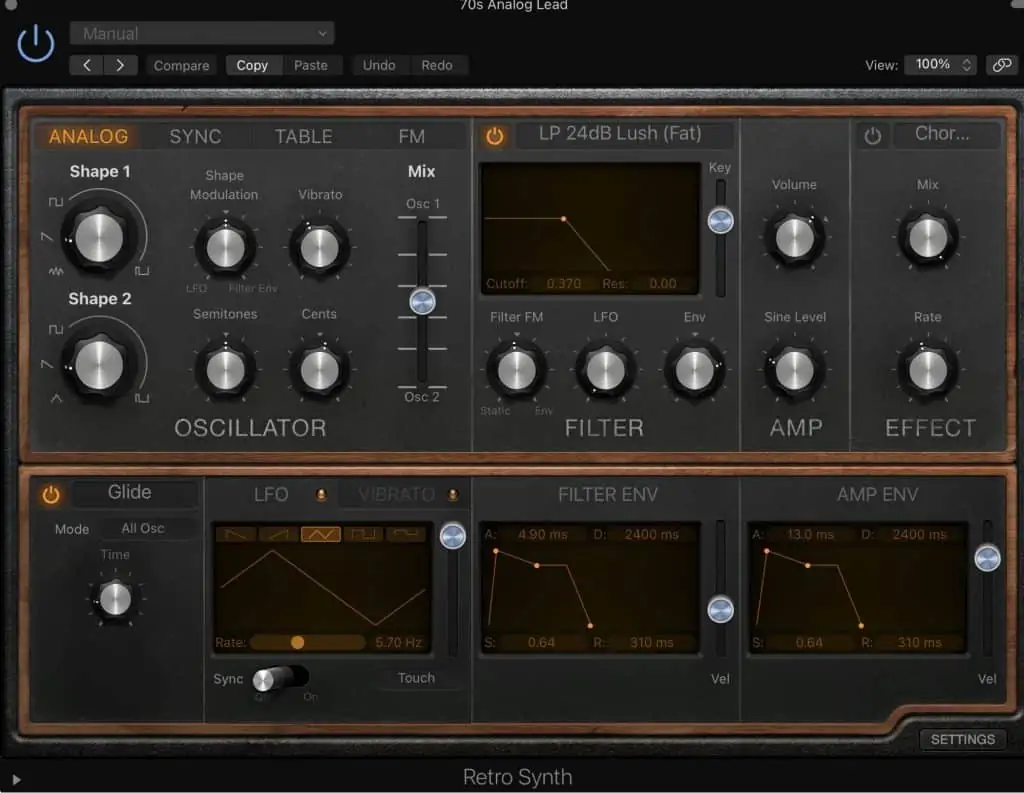
Logic’s Retro Synth plugin is pretty awesome for those classic synth sounds. I’m just going to use the 70s Analog Lead patch for now.
Bass
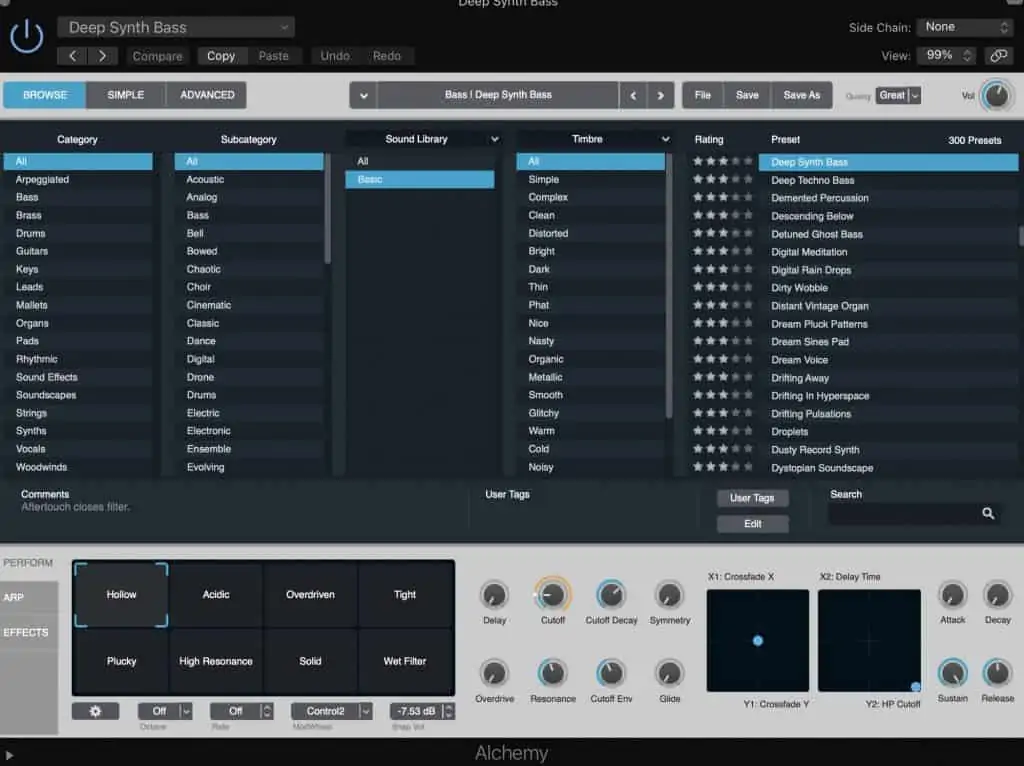
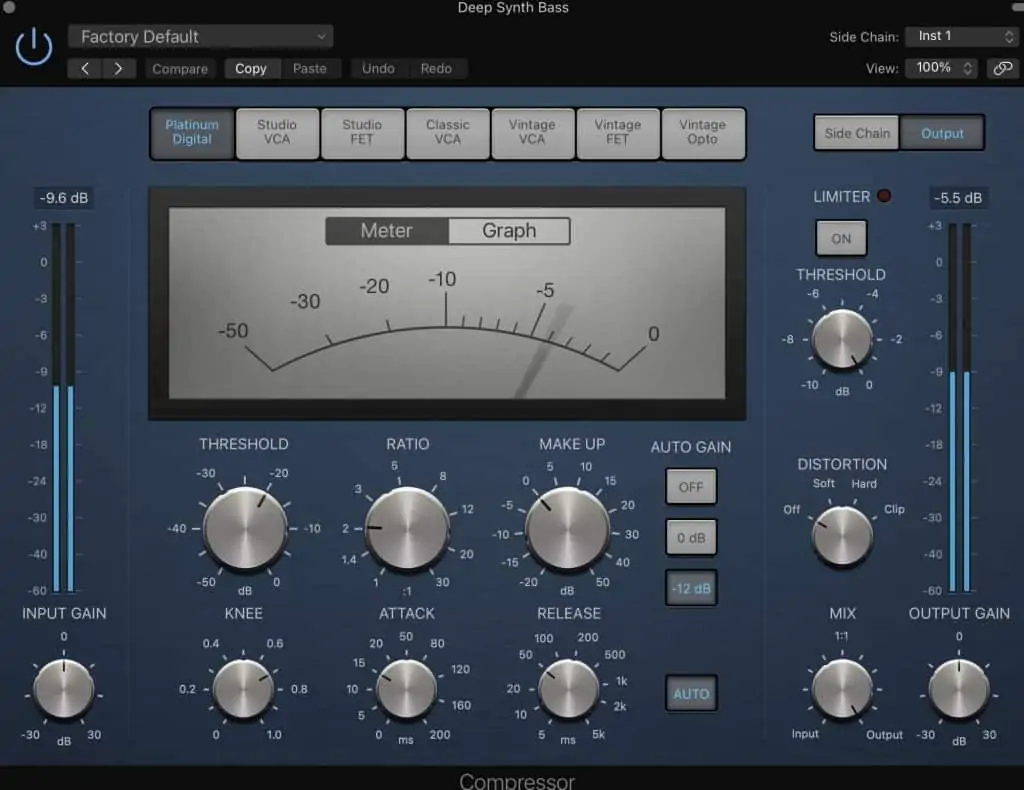
I love a good dirty bassline, so I’m going to chuck in the Deep Synth Bass patch from Alchemy.
Vocals
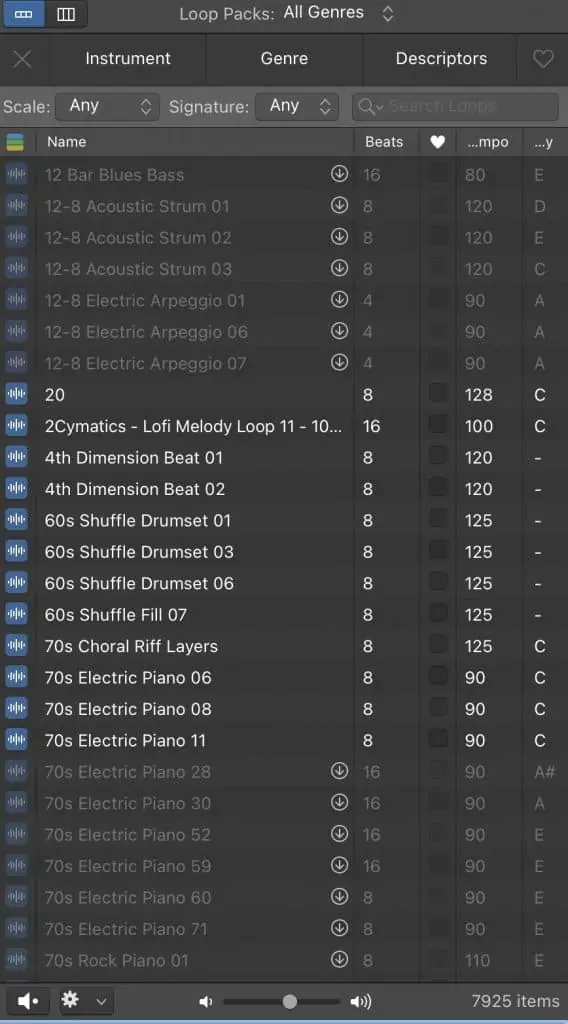
For the vocal hook, I’m going to leave the singing to the singers, and browse for an appropriate Apple Loop once I’ve laid the basis of my track down.
Cool, now I’ve got a few instruments loaded up, it’s time to start creating.
Step 5: The drum beat
The beauty of house beats is that they are dead simple.
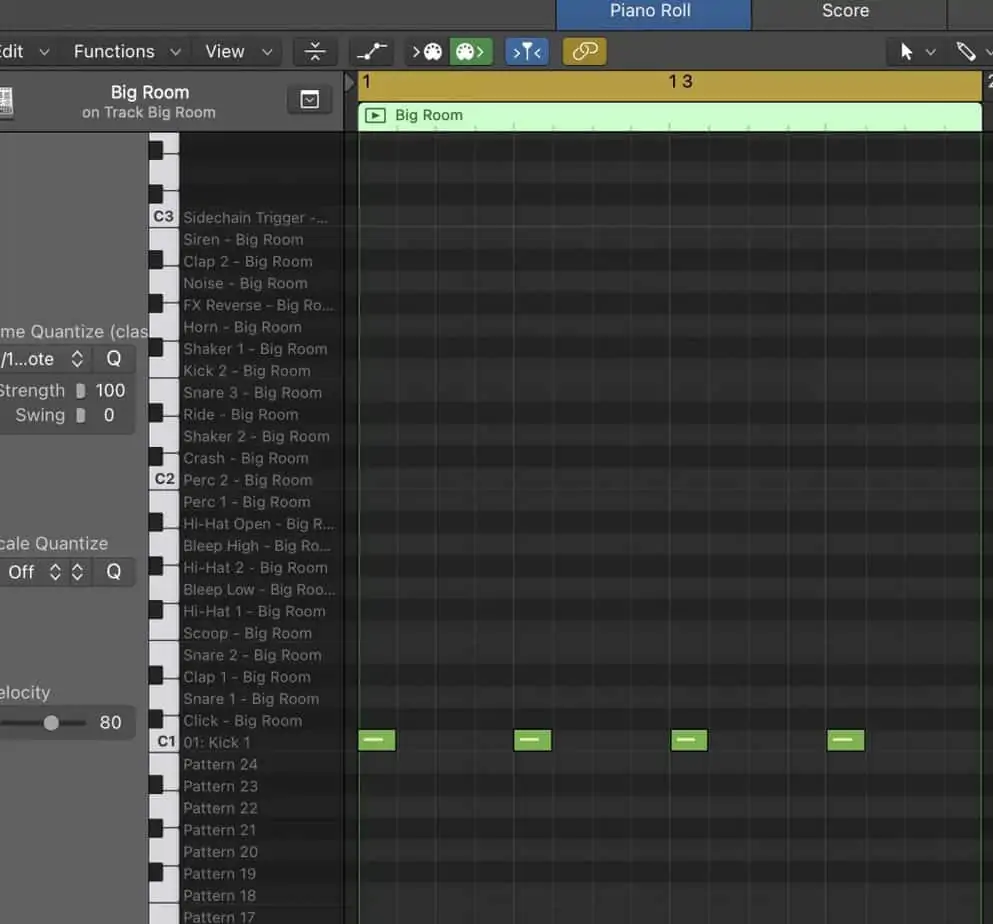
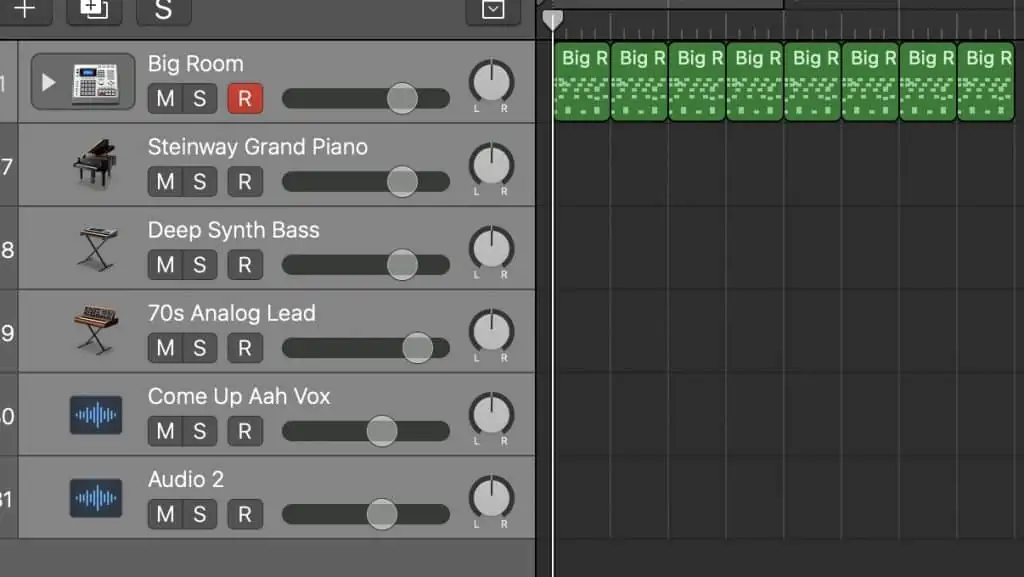
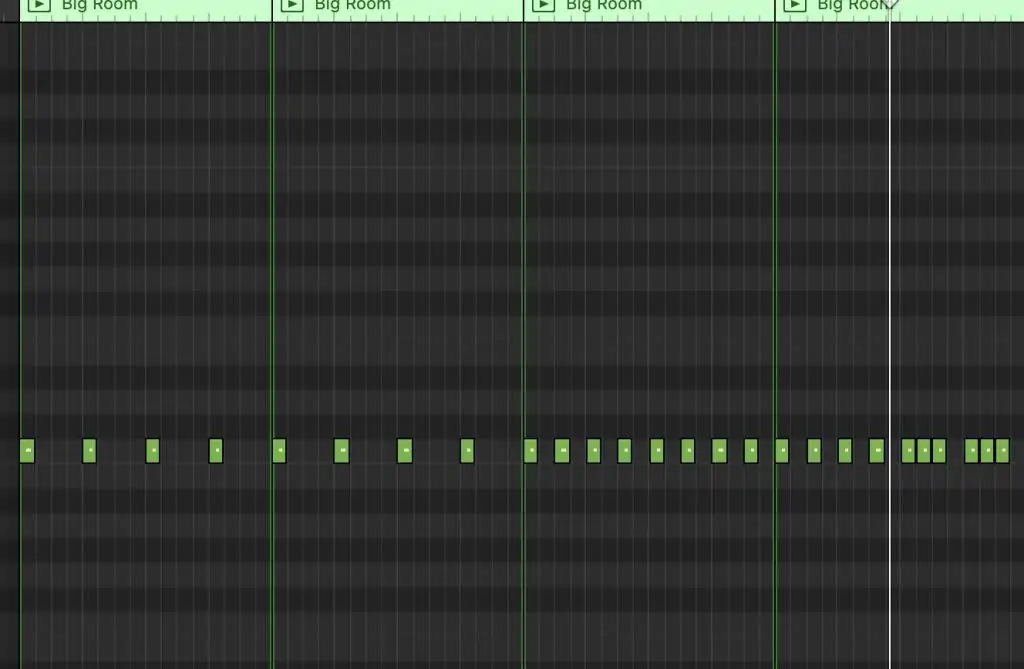
Let’s start by adding a four on the floor kick pattern.
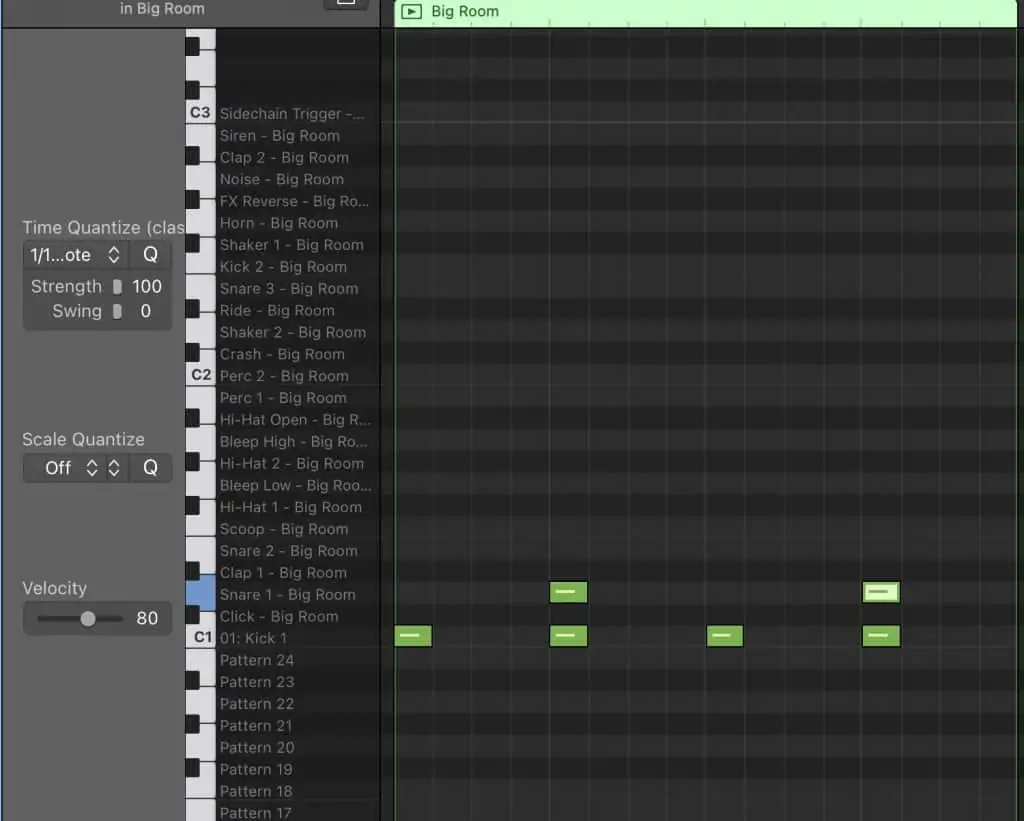
Now, let’s add a snare on the 2 and 4.
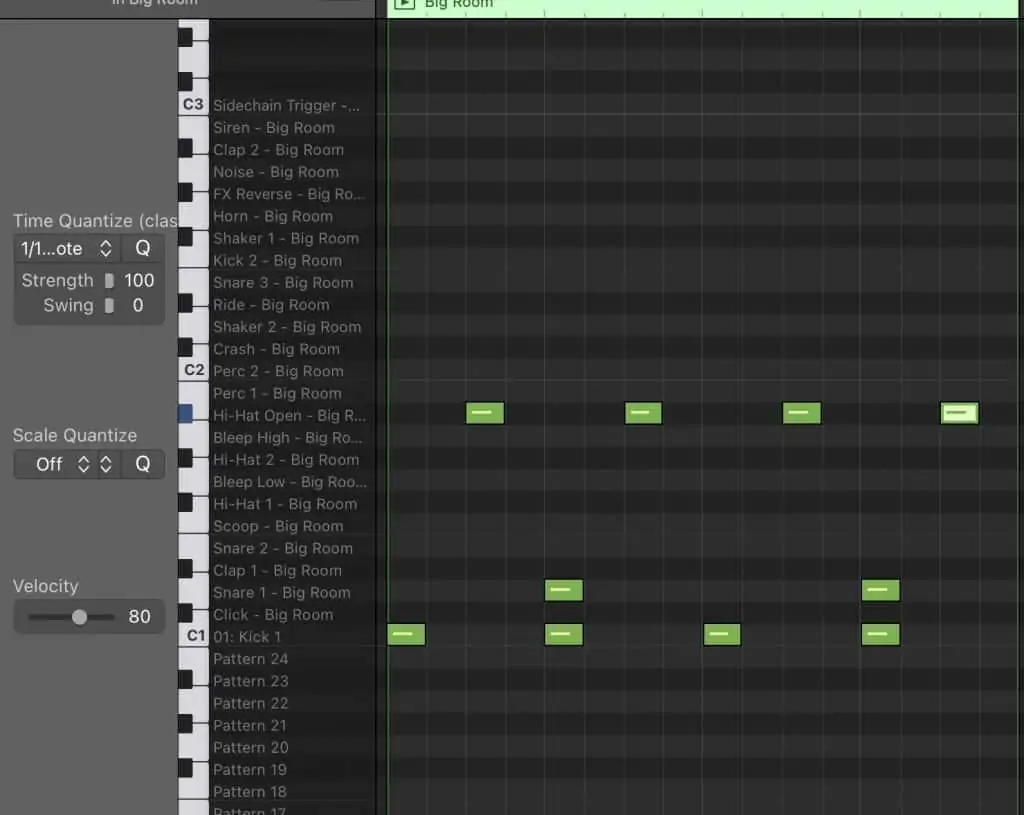
Let’s add a bit of sizzle by chucking in an open hi-hat on the off beats.
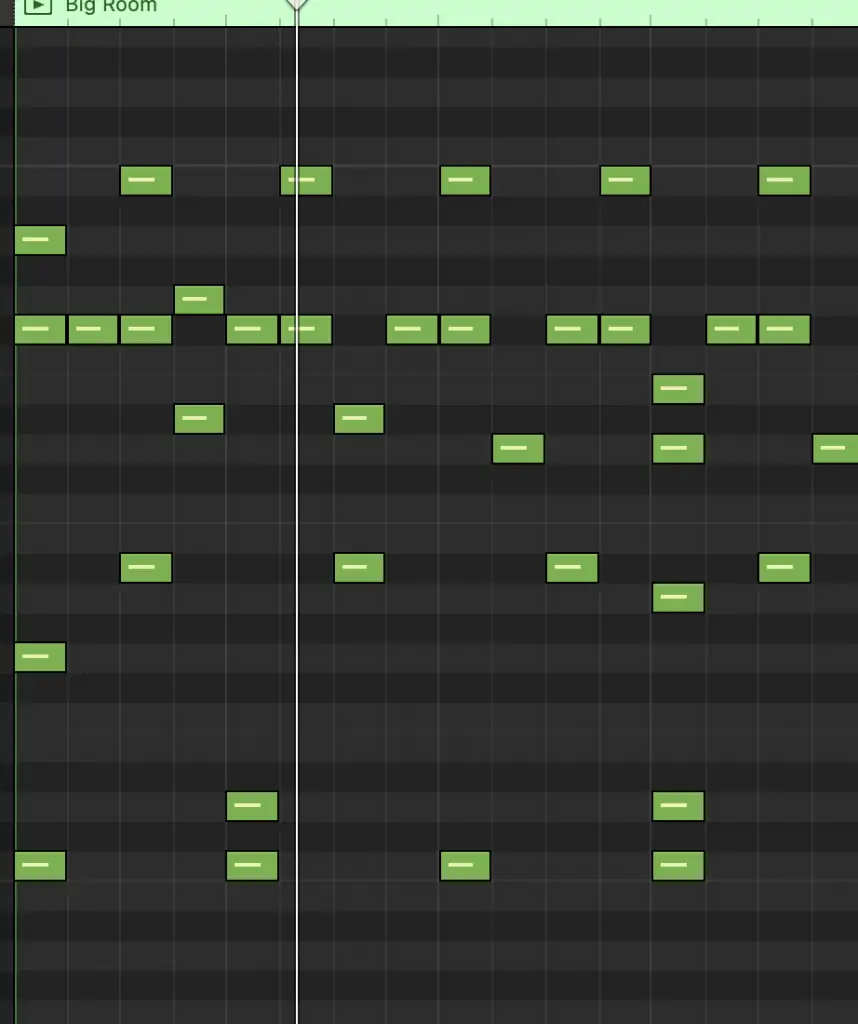
To top things off, let’s get a crash happening on the start of the loop, and maybe add a couple of other percussion instruments to spice things up a little.
Alright, sounding pretty damn good.
This will do for now, let’s move on to our keys and chuck in a few chords.
Step 6: The chords
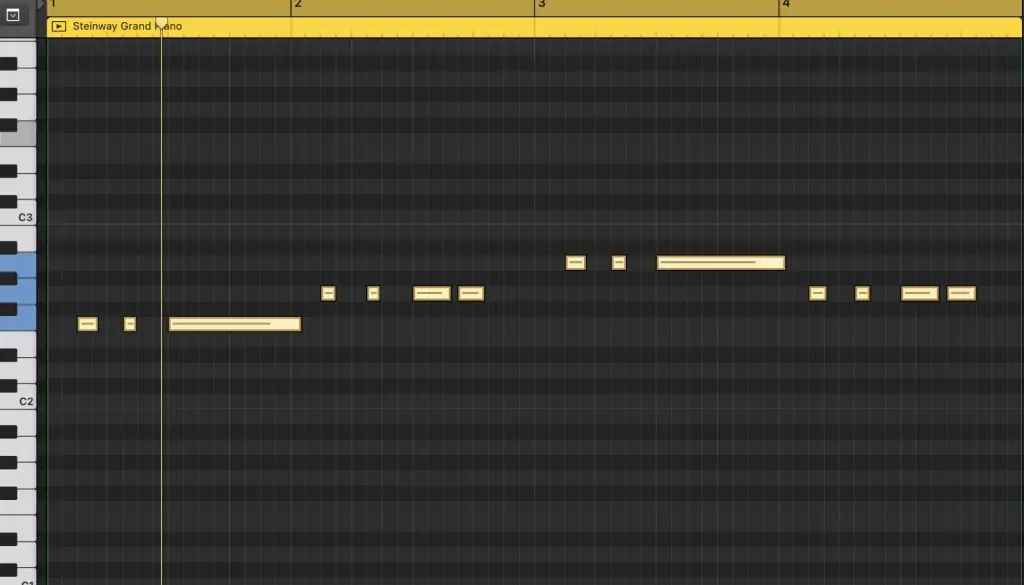
I’ve decided to use a simple piano patch for my chords part, and I’m hoping to find a piano house sort of sound, in the vein of MK.
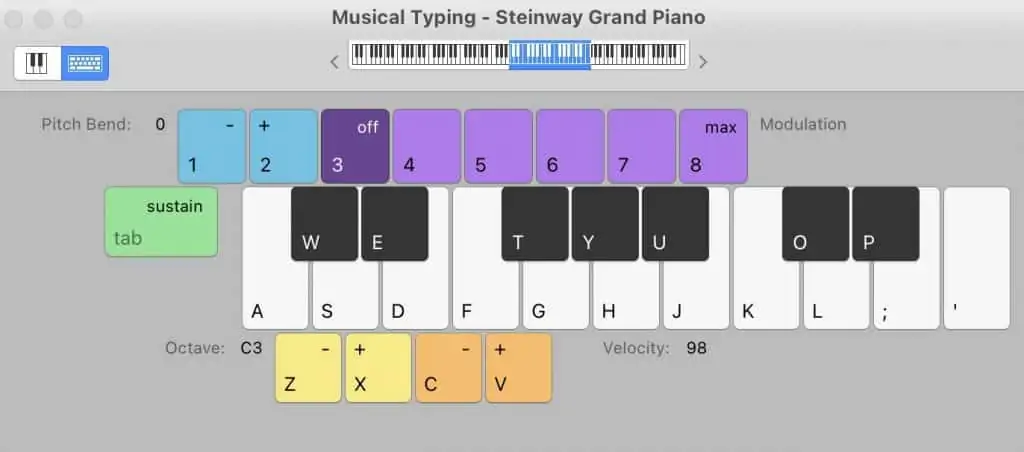
Because I don’t have a MIDI keyboard, I’m going to hit Command K, and open up the musical typing keyboard to use the keys on my laptop.
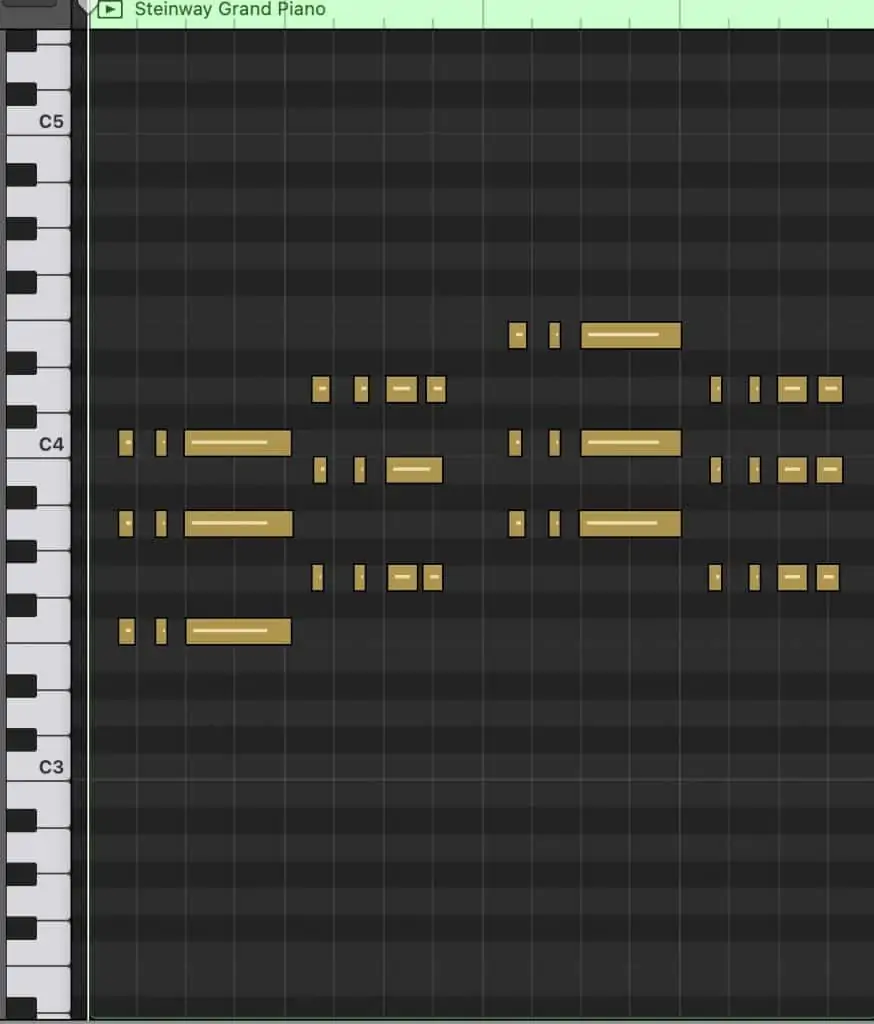
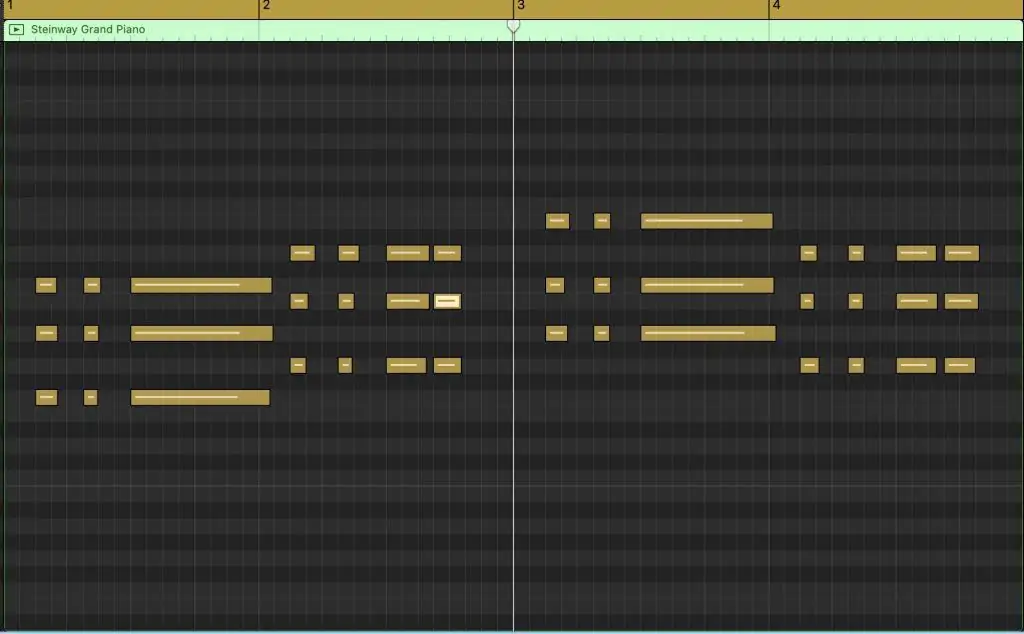
I’ve kept it simple, going for a VI, VII, I, VII chord progression in the key of A minor.
Some of my playing was a little sloppy, though, so I’m going to select all of the MIDI notes, and hit the Q key to quantize them, then go through and adjust any note lengths manually.
That looks good for now.
Step 7: The bassline
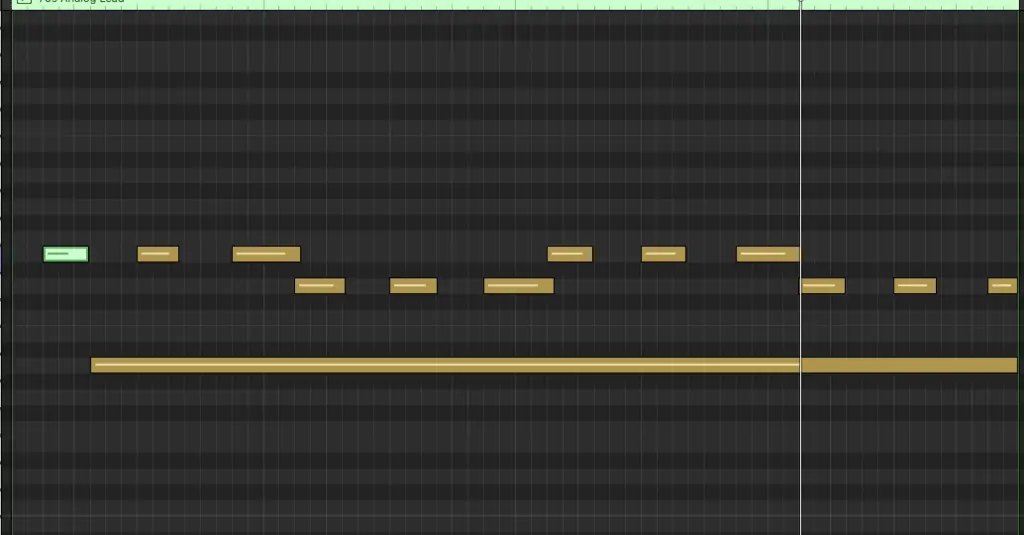
Before I add in the topline, that is, the main melody, I’m going to add in a simple bass part to give my loop a bit of low end.
I want my bassline to more or less follow what the chords are doing, so I’m going to start by copying the same region from the keys track into my bass track.
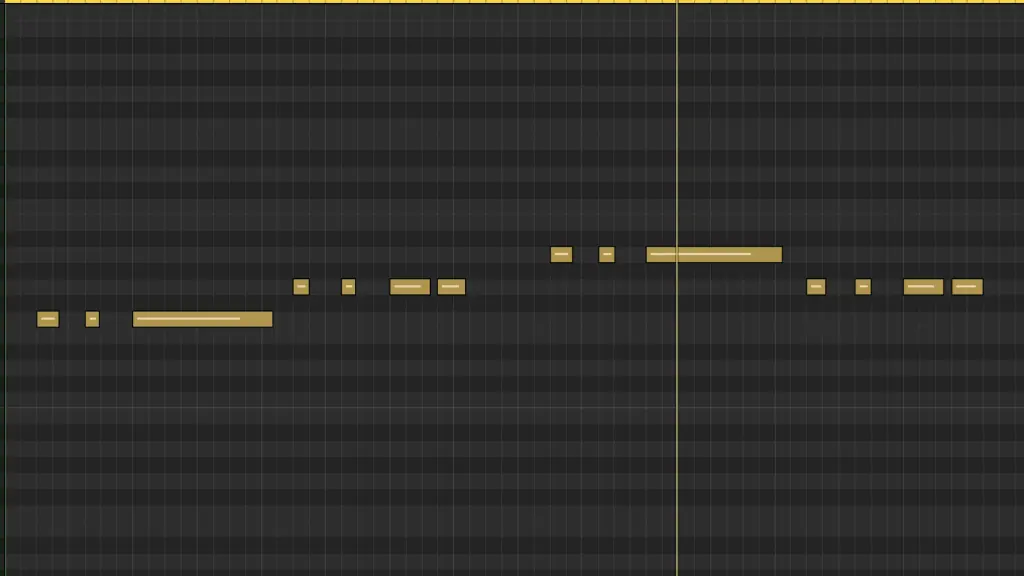
Now, I’ll remove the third and fifth notes from the chord shapes so I’m left with just the root note.
One last edit. The notes are too high up. I need to bring them down an octave to give me a proper bassline.
Great. Now things are shaping up. Let’s add a melody.
Step 8: The melody
In this particular track, I’ve already got a fair bit going on in terms of harmonic content, largely because of my instrument choice (this bass instrument is pretty forward-sounding).
So, I’m going to create quite a simple melody to make sure I still have some space for a vocal hook.
I’ll write in the melody using the musical typing keyboard just like I did before.
Now, for my final act…
Step 9: The vocal hook
I pride myself in my ability to recognize where my limitations are, and one of those limitations is my vocal ability.
I’m no American Idol.
So, rather than record something subpar and autotune the crap out of it, I’m going to dive into Logic’s gigantic bank of Apple Loops, and find something that works for my track.
Apple Loops is basically a huge bank of pre-recorded samples, drum loops, melodies, basically anything you need.
To be honest, you could construct an entire song out of Apple Loops if you wanted to. And it’s been done! Just check this out:
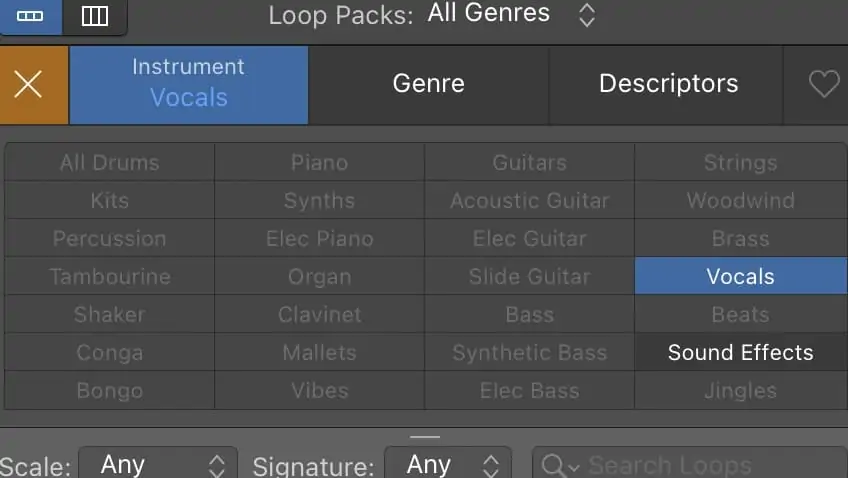
I’ve selected Vocals from the Instruments descriptor in the loop browser.
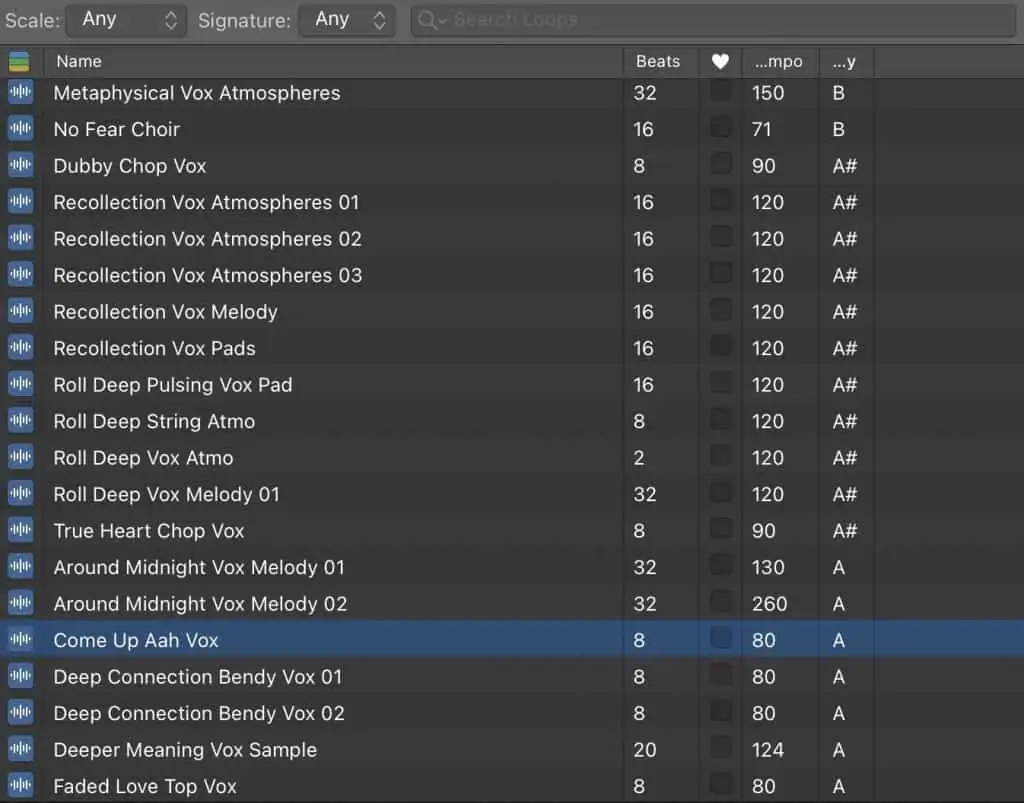
Ideally, I want to find something in the same key as the tune I’ve already created. So, I’ll sort the loops by key, and find something in A.
This one works. To bring it into the mix, you just click and drag it over into your timeline.
The beauty in Apple Loops is that they can flex to the tempo of your track, so you don’t have to do any awkward editing.
The second half of the loops has an interesting down-tuned effect happening in the background, and it’s given me an idea.
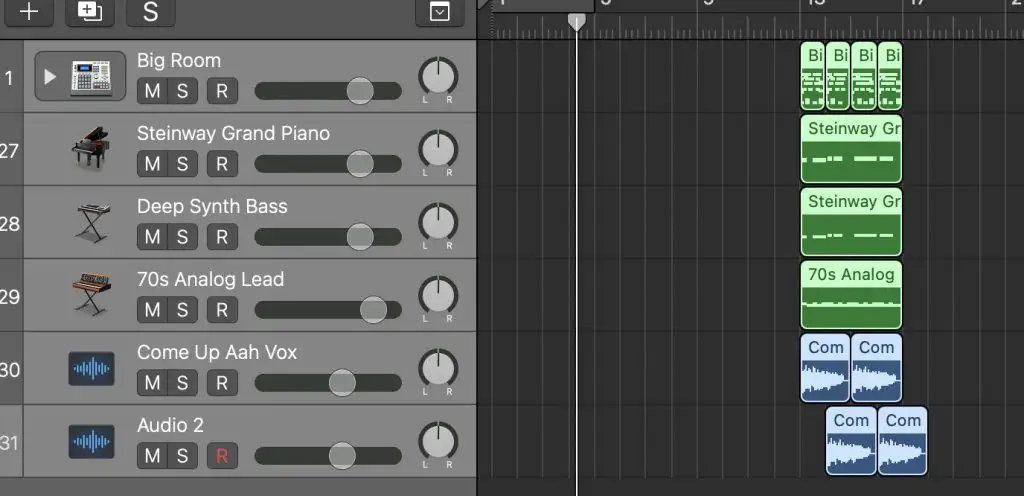
I’m going to duplicate the track, and drag the regions on the second track out by a bar, to create an echo effect.
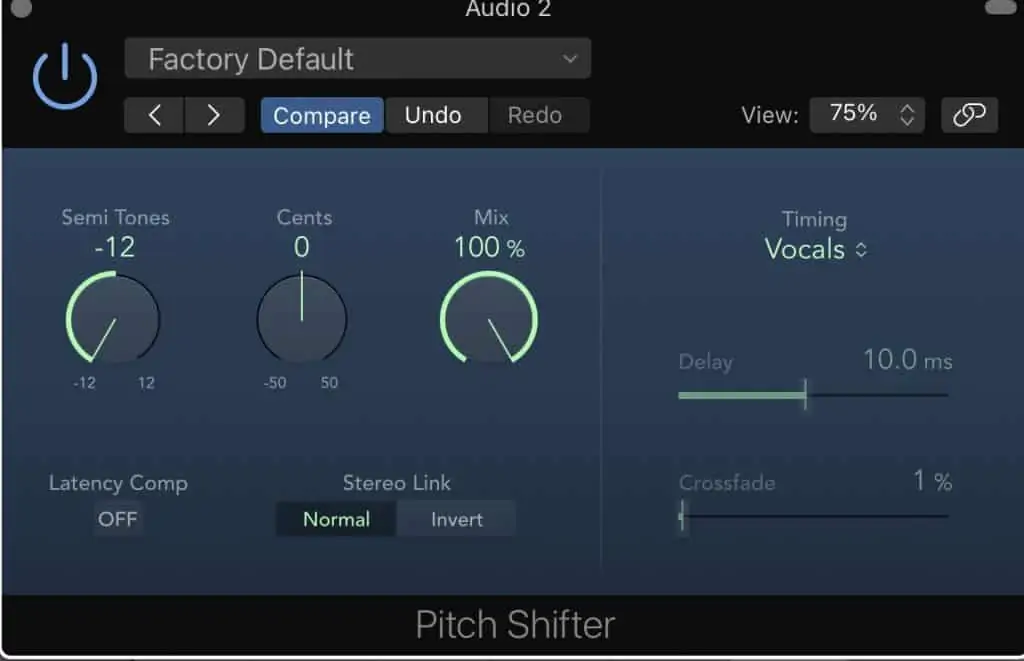
On the second track, I’m going to add a Pitch Shifter plugin and pitch it down an octave.
Cool, this is sounding pretty fun. Now, it’s time to give some structure to my song.
Step 10: Arrangement
What we have so far sounds more or less like the chorus, the hook, the drop.
But that’s all it is, just one loop. I want to get a bit more structure.
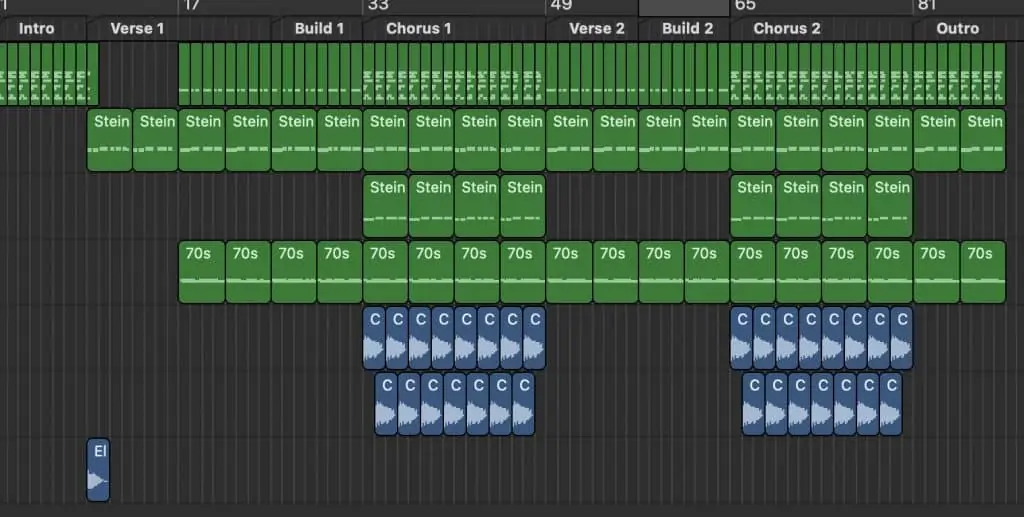
A common structure for house tracks looks like this:
Intro>Verse>Build>Chorus>Verse>Build>Chorus>Outro
So, I’m going to aim for something similar to this.
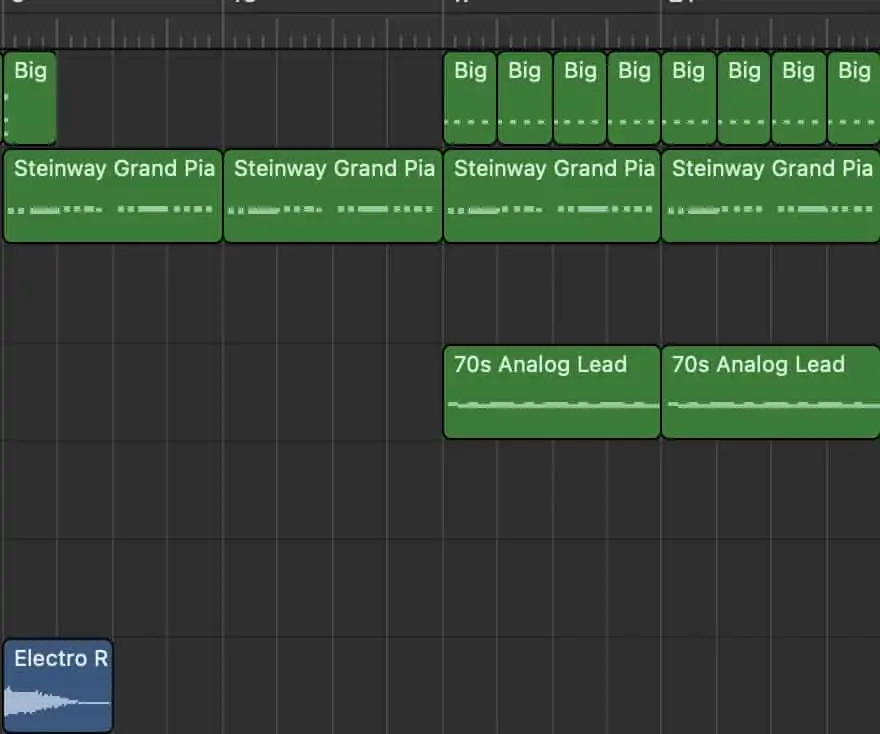
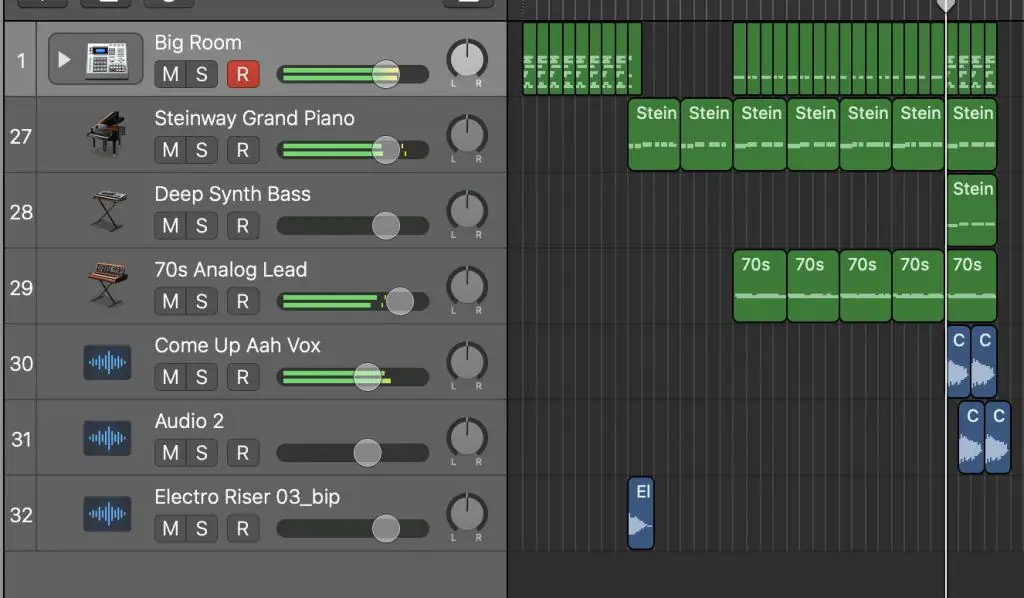
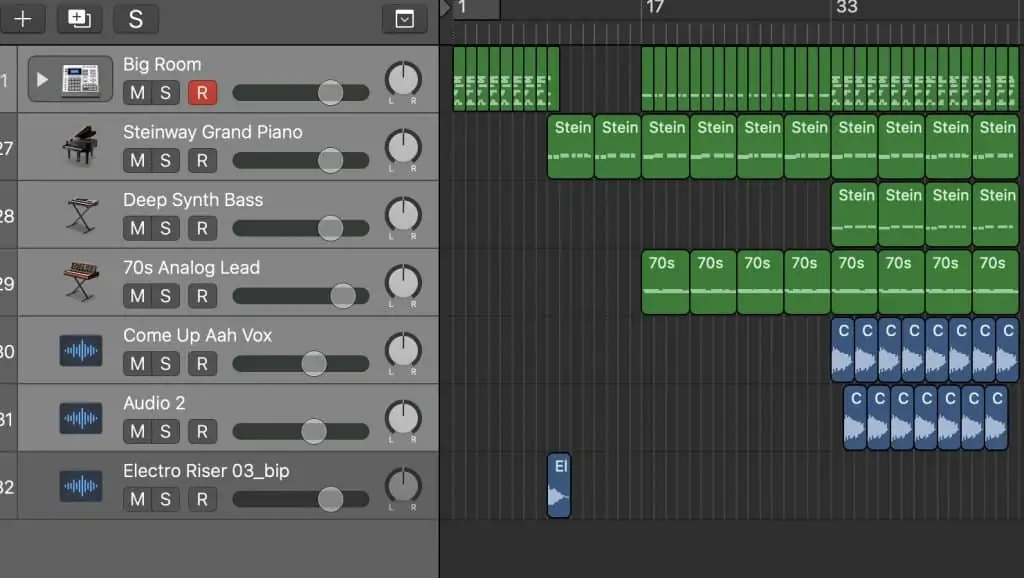
To start, I’m going to drag what I’ve already got right out to the right, to make space for an intro section.
The kind of intro you go for really depends on your intention. I’m going to go with an intro that works well in DJ sets, rather than as a radio edit.
This kind of intro starts with a few bars of the drum loop, to allow the DJ to mix the tune in.
Then, we drop right down to just the chords.
We need something to tie the two together, though, so I’ll find a riser effect in Apple Loops, reverse it, and supplement this with a kick and cymbal on the downbeat of the new bar to tie it all together.
After eight bars of just the keys, I’m going to add in the melody from the chorus to add a little progression, and then just a kick on every downbeat.
That’s pretty much my verse. Now, I’m going to create an eight bar build by simply adding more and more kicks before the drop.
Then, I’ll shift the chorus regions over, so we have a logical flow.
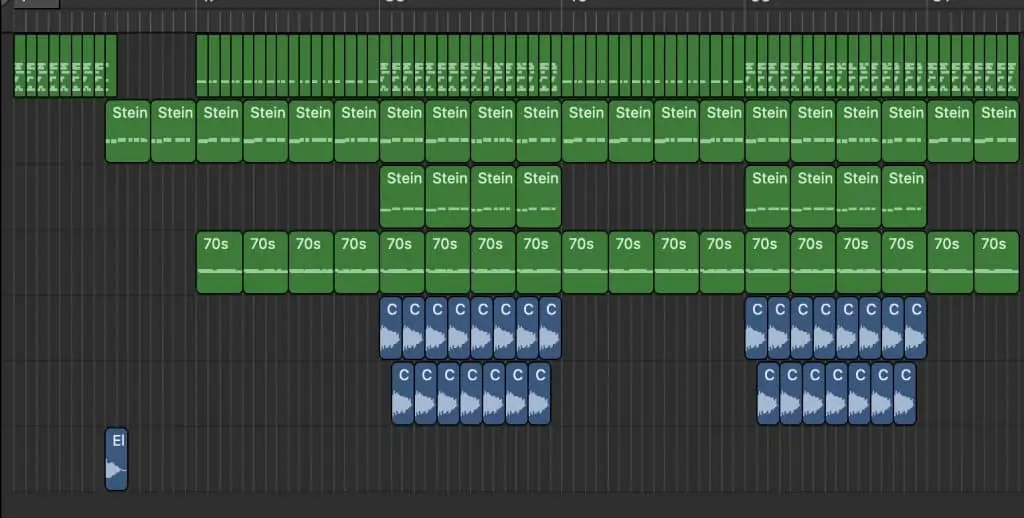
Of course, we want our chorus to last a little bit longer, so I’m going to duplicate the regions over a few times.
Cool. Now we’ve got an intro, a verse, a build, and a chorus. From here, it’s pretty much copy and paste to get the final structure happening.
I’ll just use the verse section as my outro but with the chorus drum beat, allowing the DJ to mix out into another track.
Before I move onto mixing my track, though, I want to do a little bit of admin.
First, I’m going to create markers (Option ‘) to make it easier to navigate around the structure of my track.
I’m also going to color coordinate my tracks and regions so I can see at a glance what kind of instruments they all are.
Fantastic. Let’s get mixing.
Step 11: Mixing
When we mix a track, what we’re doing is taking each individual element and crafting the available sonic elements to make them fit with each other.
It’s kind of like taking a kitset bookshelf, and then adding the screws and glue to turn it into a final product.
I’m going to introduce you to the four key elements of mixing electronic music:
- Levels
- Pan
- Effects
- Automation
Levels
The first and most simple element of mixing is setting the relative levels of each track.
By default, all of our tracks are set to 0dB, like this:
It’s very rare that your track will sound like a cohesive unit without a bit of level adjustment.
More than likely you’ll have some instruments that sound too loud, whereas others are being buried in the mix.
The goal of setting our levels in mixing electronic music is to allow each track or instrument to be clearly heard, but without overpowering the rest.
That’s basically all there is to it!
Pan
Where our level controls allow us to play in the dynamic field (how loud or soft something is), the pan control gives us the freedom to choose where an instrument sits in the stereo field.
That is to say, whether it appears in the left speaker, or the right, or the middle. Or anywhere in between!
Some instruments typically need to be in the centre, such as kick, snare, bass, and vocals.
Others we can pan to one side or another to give our mix a little more depth of field.
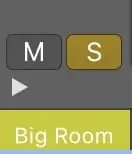
For example, I’m going to expand my drum track by hitting this little arrow.
This gives me access to mix each drum instrument separately. Here, I’m going to pan some of the less crucial elements (i.e. not the kick or snare) to various places in the stereo field to give myself a nice wide drum loop.
Now I’m going to turn my attention to the other instruments.
The bassline is going to stay in the centre, and I want to keep my vocal loop there as well, but it’s kind of getting buried by the keys and lead.
I don’t want to have either of them sitting on just one side of the stereo field, so I’m going to play a little trick.
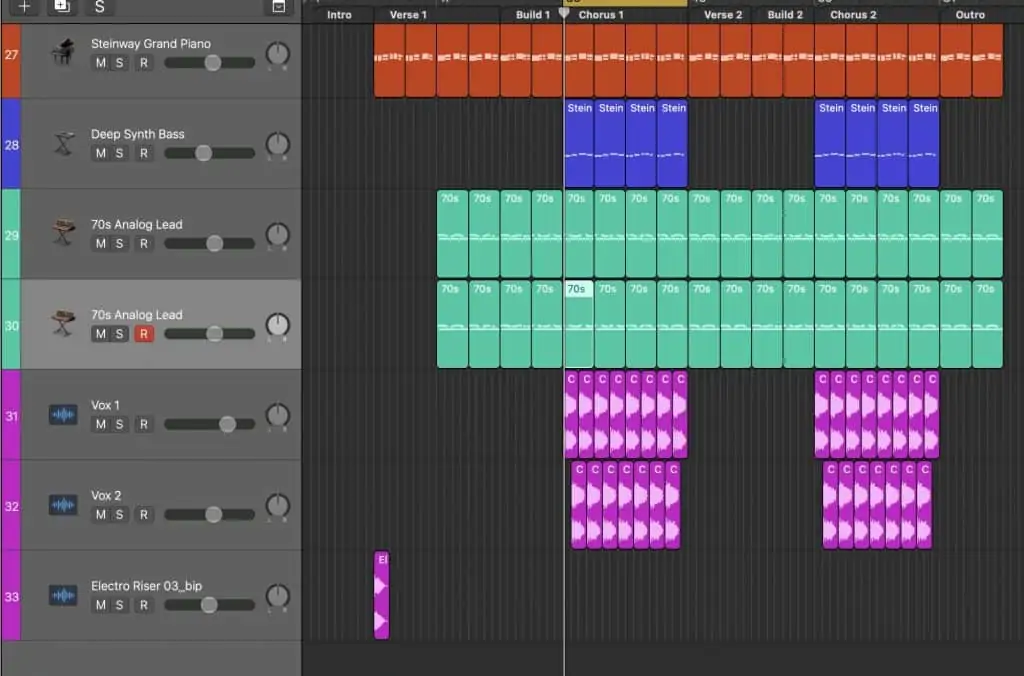
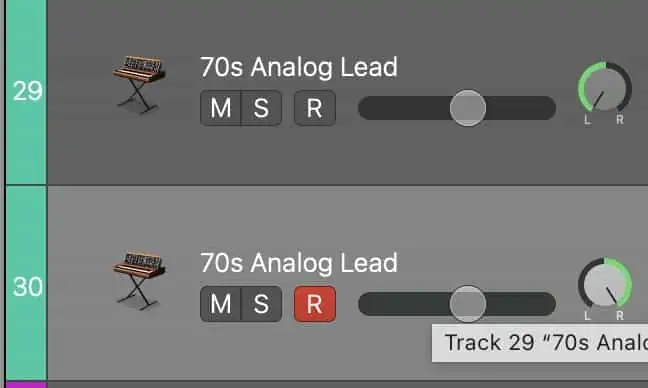
I’ll start by duplicating the synth lead track.
Then, I’m going to adjust some of the parameters in my synth module to achieve a sound that is slightly different, but not by too much.
Finally, I’ll pan them hard left and right.
This gets the tracks out of the way of the vocal hook in the centre, and gives a whole new level of width to my production.
I’m still not loving the piano in the middle, but I’ve got a trick to deal with that next.
Effects
Effects in mixing are fairly similar to in the guitar world, like when you set up a pedalboard with a bunch of cool guitar pedals.
However, when mixing electronic music, we are generally looking to be a bit more practical, as opposed to creative.
What I mean by that is that we’re going to rely more heavily on things like EQ (equalization) and compression as opposed to flangers and phasers.
Yes, there’s room for creativity, and we are still going to take advantage of stuff like reverb and delay, but the point here is that we are using effects to make everything blend together nicely rather than to come up with some interesting stuff.
Equalization
EQ in mixing is the same as on electric guitar amps, except taken to the next level.
We are going to use EQ to shape our sounds, remove any ugly frequencies, and boost any desirable ones.
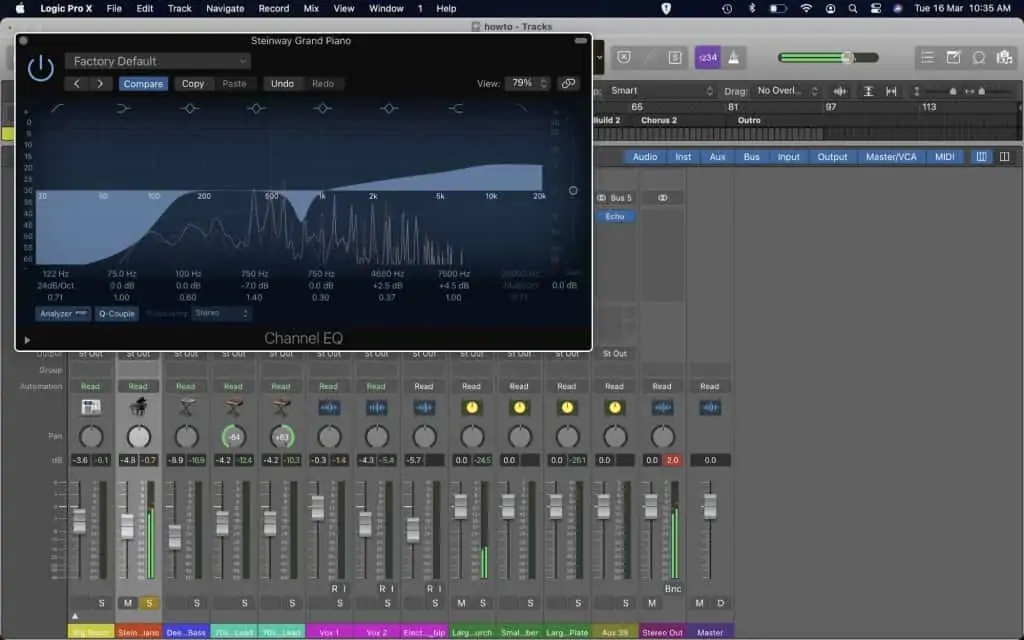
The idea is to cut more than you boost. Let’s start with the piano.
I want to get rid of anything below 100Hz or so, so I’m not overcrowding the low end, and I’m going to lift the upper-mid and high frequencies to give my keys a bit more air.
I’m also going to remove some of the boxiness I’m hearing around 750Hz.
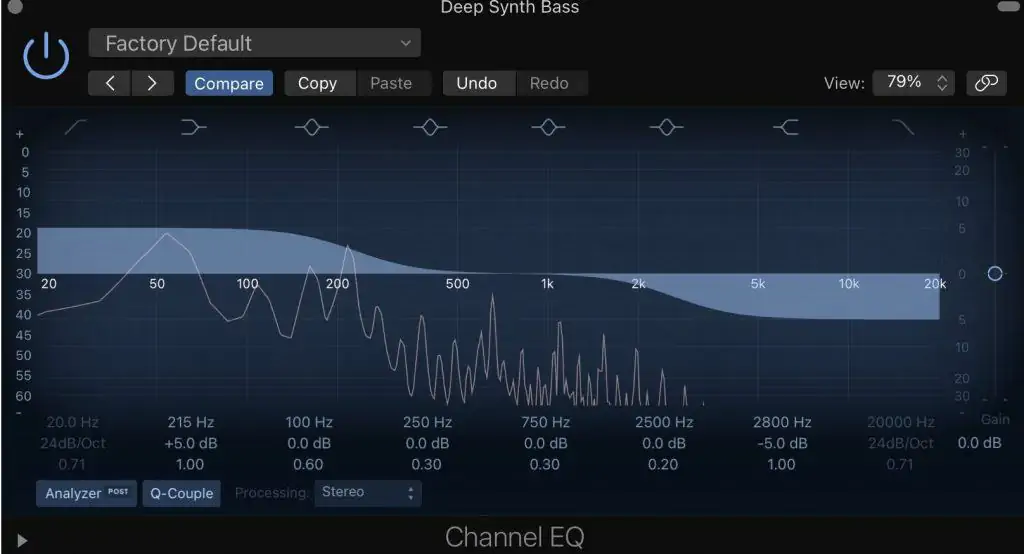
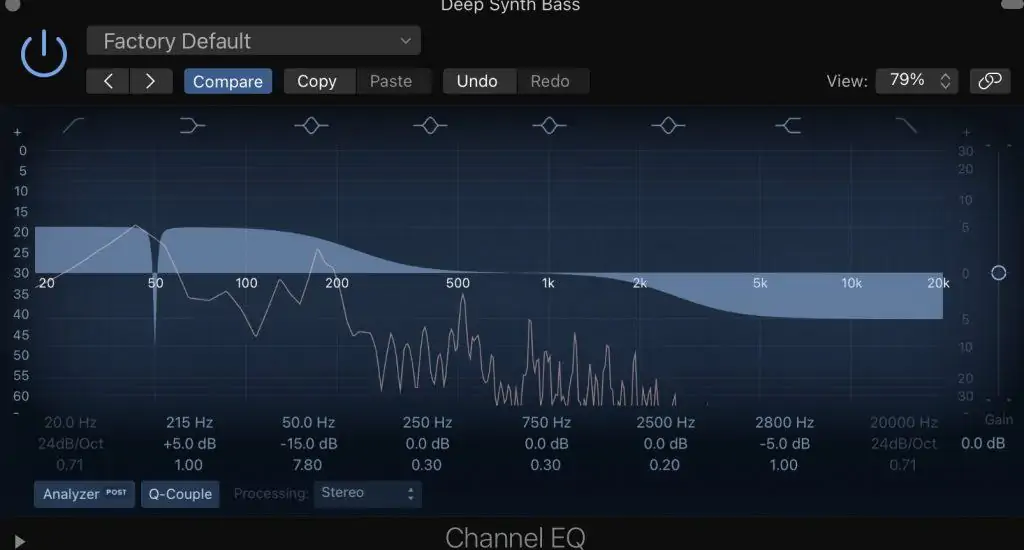
I’m hearing too much character in the bass, and not enough of the low-end bassyness. So, I’m going to apply some broad boosts and dips to subtly move the sound of the bassline to a more desirable place.
I also want to make sure that my kick and bass are working together in harmony.
This is a problem area for a lot of electronic music, as the instruments are competing for the same sonic space.
I’ve got two tricks to deal with this.
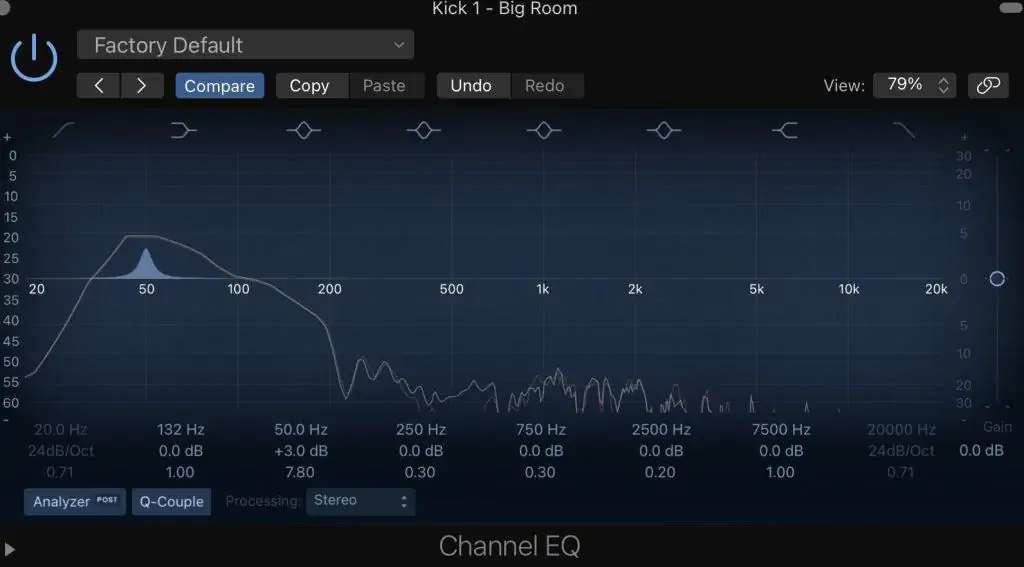
The first is a tongue and groove EQ technique.
Looking at the analyzer on my EQ plugin, I can clearly see that the fundamental of the kick rests at around 50Hz.
So, what I’m going to do is give it a sharp boost right here.
Then, I’m going to head over to my bass EQ plugin, and apply the same thing, but in reverse.
I’ve made it a little more extreme, because I want to cut through the broad base I applied earlier.
Cool, now by kick and bass are working together nicely in the frequency domain, but I still need my track to breathe a little more and allow the kick to come through.
Compression
If you’re a guitar player like myself, you might have come across compression pedals before.
These basically limit the dynamic range of your playing, making loud parts quieter and softer parts louder.
Compression works the same way when mixing electronic music.
I’m not noticing a huge need for any compression on any of the individual tracks, but there is another technique I want to use called side-chain compression.
Side-chain compression is an absolute must use in electronic music.
Imagine a compressor that only reacts when it’s directed to by an external sound source. In this case, the kick drum,
This means that the compressor will clamp down on the volume of our instrument (whatever we have the compressor plugin loaded up on) whenever the kick comes in.
That’s where a lot of electronic music gets it’s breathing, pumping sound from.
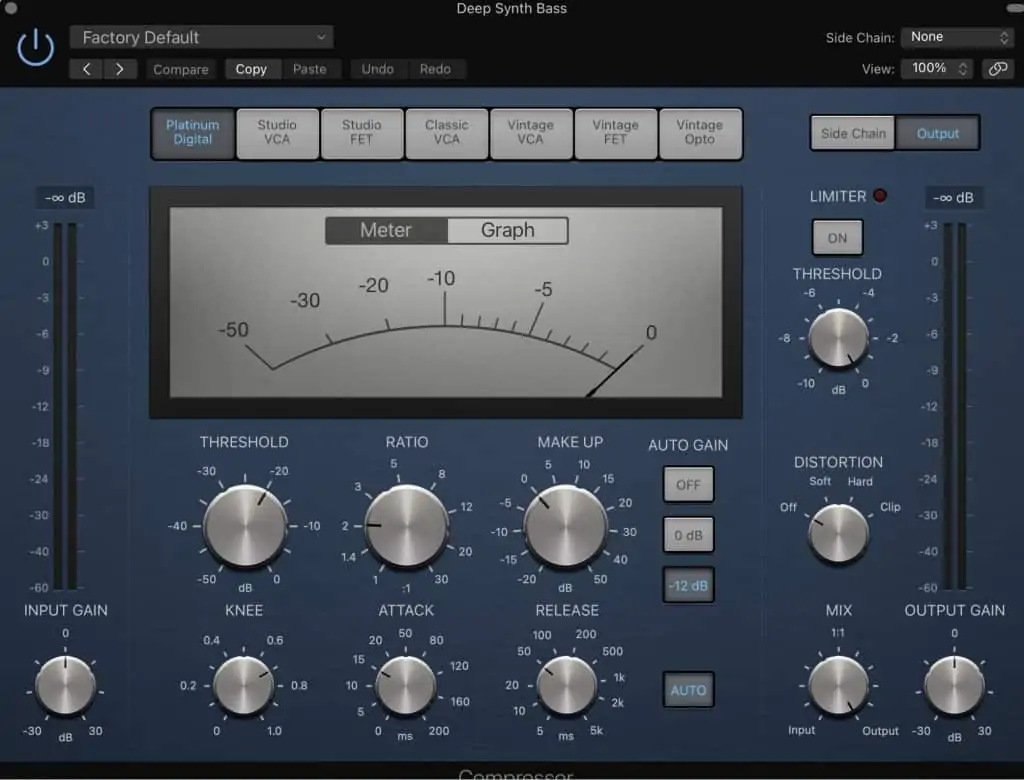
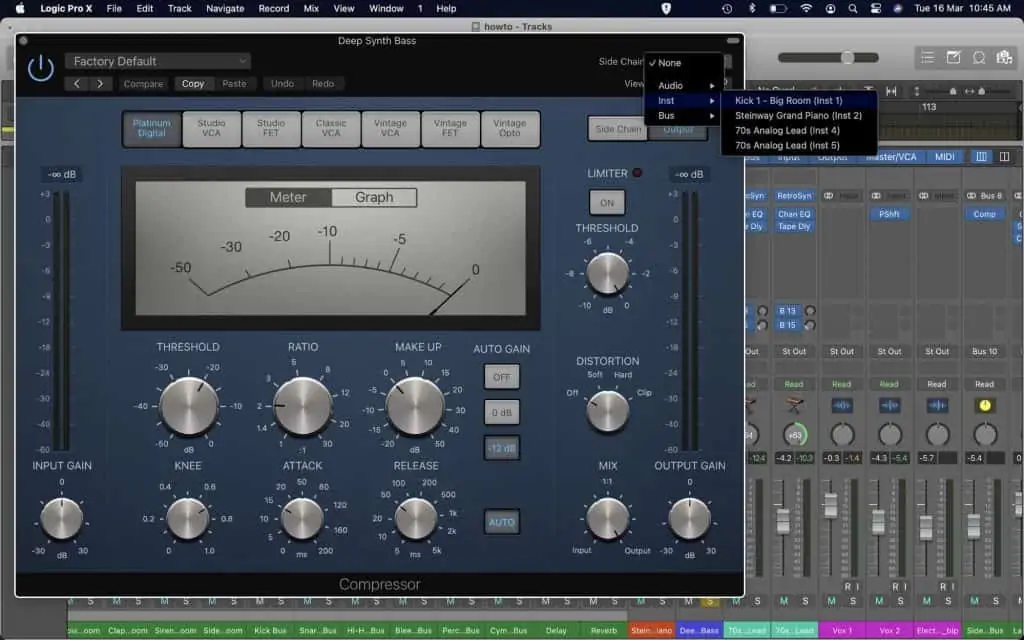
We’ll start by loading up a compressor plugin on the bass track.
Now, head to the top right-hand corner where it says Side Chain, and select Kick.
You’ll see the compressor acting on the bass every time the kick is triggered.
From there, it’s all about tweaking the compressor controls (often just the threshold and ratio knobs) to find the desired effect.
I’ve also copied the compressor plugin over to my lead tracks and to the keys, though I’ve adjusted the settings on each for a less drastic sound.
I’ve also added a little compression (regular, not side-chain) to my drum bus to give it a little more edge, and to glue the whole loop together a little more.
Stereo Wideners
I mentioned before that I had another trick for getting a bit more stereo width on the keys.
That trick is called the stereo widener.
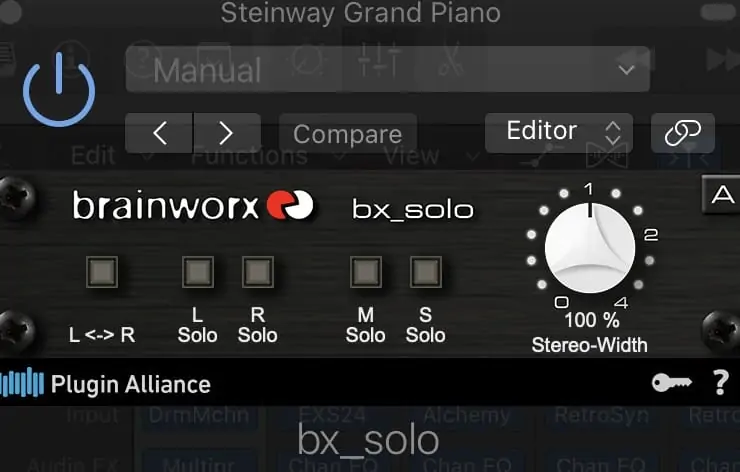
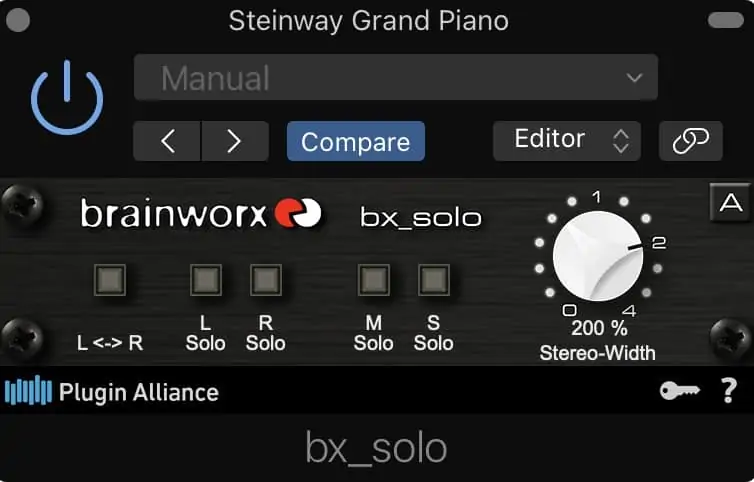
I love the free plugin from brainworx called the bx_solo for this.
Just load it up, and crank up that stereo-width knob a touch.
I’ve gone for a fairly extreme setting, 200% width, because I really want those keys out of the way of my vocal hook.
Automation
The last part of mixing electronic music is applying a bit of automation.
Automation is like telling your DAW to make changes to your tracks (like turn them up or down) at certain points along the timeline.
Here, I’m going to use automation on my second vocal track (the octave-down one I created earlier) to pan it left and right sequentially.
Here’s what I mean:
Now, half of these will come up in the left ear, and half in the right, giving my chorus hook a bit more of a dynamic feel and a bit of movement.
Step 12: Mastering
Mixing and mastering are processes that tend to spark a lot of confusion.
That’s because they are quite similar, and though they used to be very distinct processes, they are now often done in tandem.
Generally speaking, mastering applies to the song as a whole, whereas mixing is done on each of the tracks individually.
I’m not going to go into too much detail on mastering here, but I’ll touch on a couple of basics.
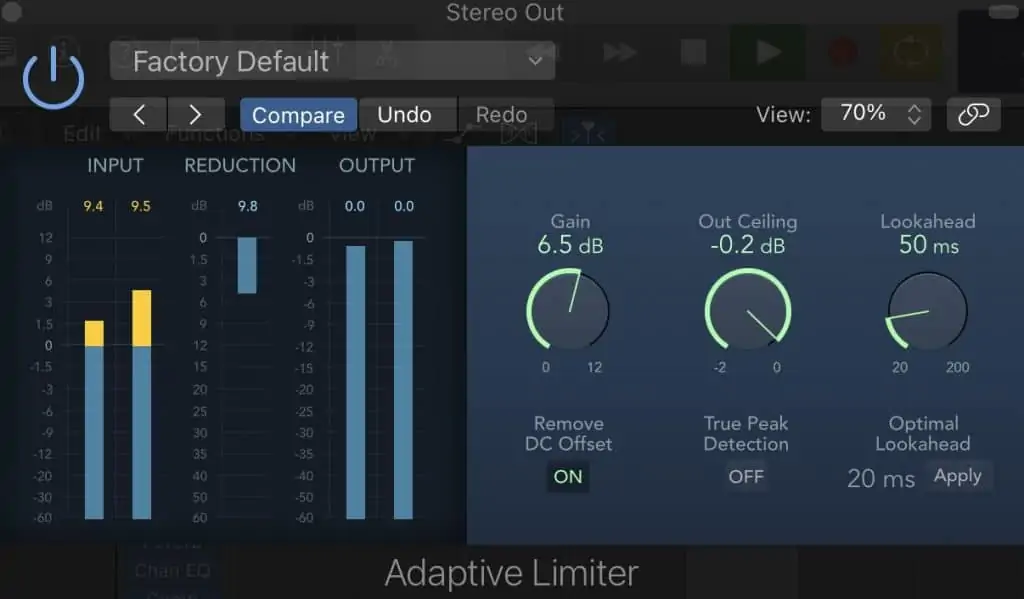
The first is to apply a limiter across the master bus, like this.
Doing this ensures we don’t get any ugly digital overages, and also makes the track sound suitability loud.
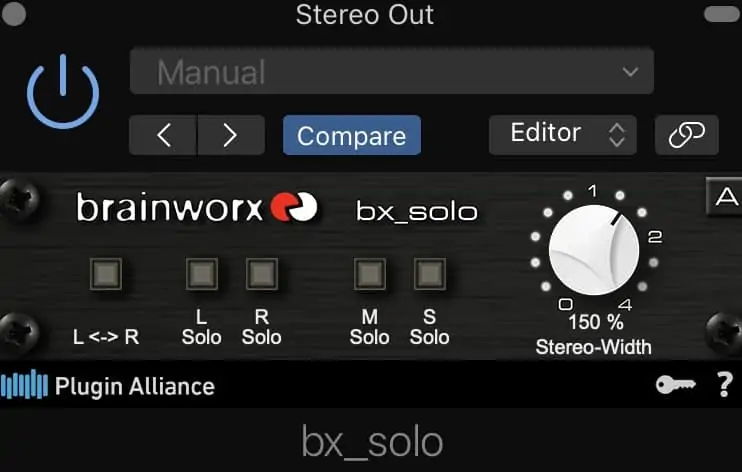
I’m also going to add another stereo widener tool here, but only tweak it just a touch.
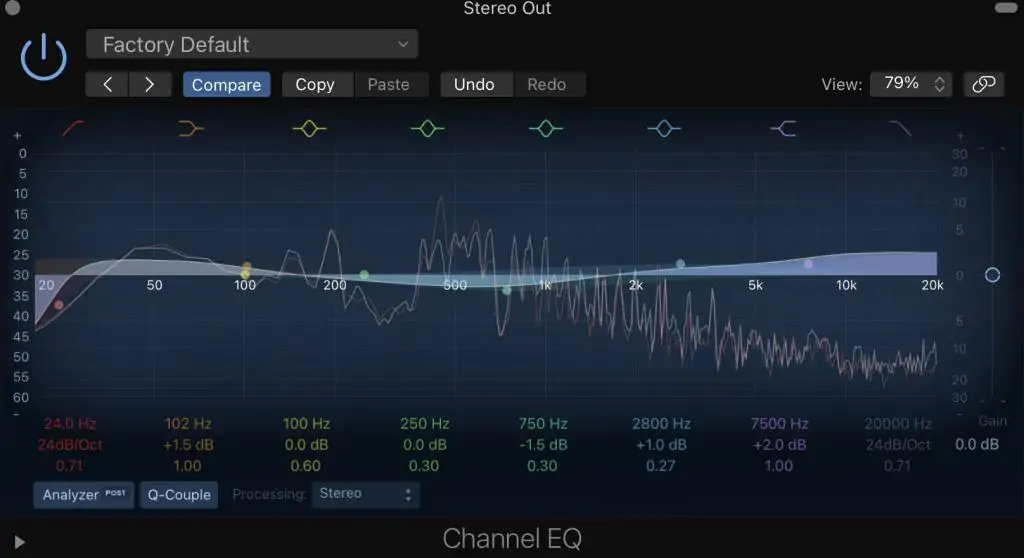
Lastly, I’ll round things off with some subtle, tasteful EQ.
And there it is, my finished track in all its glory!
Conclusion
Electronic music gets a bit of slack, even now, for ‘not being real music’, because it all happens in a computer rather than on ‘actual instruments’
The way I see it though, is that you’re just using a different set of instruments, ones that you don’t hit or pluck, but rather tap away at a few keys on your MacBook and carefully tweak into the early hours.
Plus, it’s more accessible than ever, with free DAWs like GarageBand opening up a world of opportunity for would-be electronic music producers to take their creativity to the world stage.
So, what are you waiting for?
Get creating!

